EasyManua.ls Logo

Fluke 199C - User Manual

Fluke 199C
7 pages
Print Icon
To Next Page IconTo Next Page
Loading...
1
Operation of Fluke 199C Oscilloscope:
Automatic Operation: This is the simplest and quickest way to capture a
signal, knowing little about what you are measuring.
A. Turn scope on – circular button in lower left hand corner.
B. Push the yellow button labeled “Scope”.
C. Press the lime green Auto/Manual button.
D. Connect to where you wish to measure.
1. The oscilloscope will auto-range to the correct voltage range, time
scale, etc. The trigger will go to “Auto Level”, and the trigger mode
will go to “Automatic”.
2. Adjustments may be made from that point, such as changing the time
scale, voltage scale, readings, using cursors and using screen capture.
Use of “Screen Replay”
A. The scope meter will (automatically) capture up to 100 of the most recent
scope screens. (This is the case whether triggering for the scope is set to
automatic trigger, one shot, or “on trigger”. Each refresh will result in a
screen stored in the memory.)
B. To look at what has been saved, press the “Replay” button.
1. A control panel will appear at the bottom of the screen, allowing you
to scroll through each screen one at a time for a close look, scroll back
one at a time, or hit play and rapidly go through all of the replay
screens.
2. On any recalled screens you may use the cursors and zoom functions
to get a better look at the waveform.
3. Individual Screens may be saved to one of the 15 memory positions.
C. If any scope adjustments are made (time scale, voltage scale, trigger
level, etc), everything previously captured by the replay memory will be
lost.
Use of the Scope Memory
A. Press the light blue “hold/run” button to freeze the scope screen. The
word “Hold” will appear in a box in the upper right hand side of the
scope screen.
Question and Answer IconNeed help?

Do you have a question about the Fluke 199C and is the answer not in the manual?

Overview

This document outlines the operation, screen replay, memory usage, and data transfer capabilities of the Fluke 199C Oscilloscope, along with detailed instructions for capturing fencer and trainer transients.

Function Description

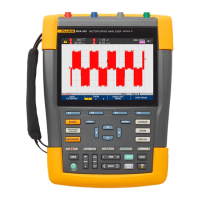
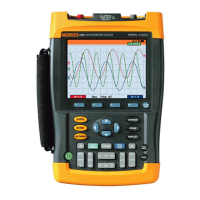
The Fluke 199C Oscilloscope is a versatile instrument designed for capturing and analyzing electrical signals. It offers both automatic and manual operation modes, making it suitable for users with varying levels of expertise. The device can automatically range voltage and time scales, set trigger levels, and store screen captures. It also features a "Screen Replay" function to review past captures and a "Scope Memory" for saving specific screens or setups. The oscilloscope can be connected to a computer for downloading saved screens and waveforms, facilitating report generation and further analysis.

Important Technical Specifications

While specific numerical specifications like bandwidth, sampling rate, or input impedance are not explicitly detailed in this document, several operational parameters are mentioned:

  • Time Scale: The oscilloscope can adjust its time scale down to 5 nanoseconds per division (ns/division), allowing for detailed analysis of fast transients.
  • Voltage Scale: The voltage scale can be adjusted from 1 Volt per division upwards, with the ability to change input scales to accommodate signals appearing off-screen or to get a better look at waveforms.
  • Trigger Modes: Supports "Auto Level" and "Automatic" trigger modes for general use, and "single shot" capture for transients. It also includes "Glitch detect ON" for capturing short-duration events.
  • Memory:
    • Screen Replay: Automatically captures up to 100 of the most recent scope screens.
    • Scope Memory: Allows saving individual screens or setups into 15 designated memory positions.
  • Connectivity: Features an optical coupler for connecting to a computer, enabling data transfer and software integration with FlukeView.

Usage Features

Automatic Operation: This is the simplest method for capturing signals, ideal when the user has limited knowledge of the signal characteristics.

  1. Turn on the scope using the circular button.
  2. Press the yellow "Scope" button.
  3. Press the lime green "Auto/Manual" button.
  4. Connect probes to the measurement point.
    • The oscilloscope will automatically set voltage range, time scale, and trigger settings ("Auto Level," "Automatic" mode).
    • Users can then manually adjust time scale, voltage scale, readings, and use cursors or screen capture as needed.

Screen Replay: This feature allows review of recently captured screens.

  1. The scope automatically stores up to 100 recent screens, regardless of trigger settings.
  2. Press the "Replay" button to access saved screens.
  3. A control panel appears, allowing users to scroll through screens one by one, or play them rapidly.
  4. Cursors and zoom functions can be used on recalled screens for detailed waveform inspection.
  5. Individual screens from replay can be saved to one of the 15 memory positions.
    • Note: Any scope adjustments (time scale, voltage scale, trigger level) will clear the replay memory.

Scope Memory (Saving and Recalling Screens/Setups): This allows users to freeze, save, and recall specific screen captures or instrument setups.

  1. Freezing Screen: Press the light blue "hold/run" button. "Hold" will appear on the screen.
  2. Saving a Screen/Setup:
    • Press the "Save/Print" button.
    • Press F1 for "Save".
    • Use arrow buttons to select one of 15 memory positions.
    • Press F4 to save.
    • The system will prompt if overwriting existing data.
  3. Recalling a Screen/Setup:
    • Press the "Save/Print" button.
    • Press F2 for "Recall" or F4 for "View".
    • Use arrow buttons to select the desired memory position.
    • Press F2 ("Recall Setup") to load the saved setup and screen.

Capturing Fencer and Trainer Transients (Detailed Setup): This section provides specific instructions for configuring the oscilloscope for transient capture.

  1. Basic Setup (Scope Mode):
    • Turn on scope, press "Scope" button.
    • Access waveform options (F4), turn "Glitch detect ON", turn "Average OFF", set "Waveform" to "Normal".
    • Clear menu with "Clear Menu" button.
  2. Input to Channel A:
    • Press square "A" button. Turn input A on (F1).
    • Set coupling to DC (F2).
    • Open probe menu (F3), select "Voltage" probe type (F4), then set attenuation to "1:1" (F4).
    • Access other Input A Options (F4), set "Normal" polarity (F4).
    • Clear menu with "Clear Menu" button.
  3. Trigger Menu:
    • Press rectangular "Trigger" button.
    • Scroll to "Edge Trig" (F1), highlight "A".
    • Set to "positive" slope (F2).
    • Adjust trigger level using up/down arrows.
    • Open "Trigger Options" (F4), highlight "On Edges" (up/down arrows).
    • Select "single shot" (F4).
    • Set "Noise Rejection Filter" to "OFF" (F4).
    • Clear menu with "Clear Menu" button.
  4. Input to Channel B:
    • Press square "B" button. Turn input B off (F1).
    • Clear menu with "Clear Menu" button.
  5. Saving the Setup: Follow the "Scope Memory" saving procedure.
  6. Capturing Transients:
    • Attach 1:1 probes to Input A.
    • Turn on scope.
    • Connect probe to the measurement point.
    • Adjust trigger level, voltage scale (e.g., 1 Volt/division), and time scale (e.g., 1 second/division for fencer pulses) to capture the signal.
    • If no signal, adjust trigger level or voltage scale (Input A Range button).
    • If overloaded, raise input scale (Range button).
    • Clear menu with "Clear Menu" button.
    • Save the screen using the "Scope Memory" saving procedure.
  7. Viewing Individual Transients:
    • After capturing, adjust the "Time" button to zoom in on the waveform, down to 5 ns/division, to determine phase duration.
    • Save desired screens.

Downloading Saved Screens to a File or Document: This allows transferring data to a computer for reporting and analysis.

  1. Connect the scope to the computer via the optical coupler.
  2. Open FlukeView software. It will prompt to connect to the instrument.
  3. Turn on the Scope Meter.
  4. Click "Connect" in FlukeView.
  5. To download the currently displayed screen, select the camera icon in FlukeView.
  6. To download as a waveform, use the waveform button.
  7. Saved files have a ".fvf" extension, viewable only with FlukeView. Graphics can be copied via "Edit dropdown" and pasted into other documents.

Printing Saved Screens: This outlines methods for incorporating saved screens into reports.

  1. Open FlukeView software.
  2. Using Qreport (for Fluke ScopeMeter Test Report):
    • Connect scopemeter to computer.
    • Recall saved scope shot on scopemeter.
    • Open "Qreport" from computer's Program Menu.
    • Click the camera icon in Qreport to automatically connect and insert the active screen into the report document.
    • Fill out the report and save.
  3. Bringing Saved Screens into FlukeView:
    • Open "FlukeView" software.
    • Connect to scopemeter (if not already connected) via the connection icon.
    • Click the camera icon to bring in the active screen, or the camera with a question mark to bring in screens from memory.
    • Saving Options in FlukeView:
      • Save as bitmap (.bmp) or FlukeView file (.fvf). BMP is recommended for wider compatibility.
      • Transfer to Word Document: Go to "Window Drop Down Menu", highlight "Default Size", click "Copy the Graphics to the Clipboard" (or "Edit" > "Copy Graphics"), then paste into a Word document. Add descriptions as needed.

Maintenance Features

The document does not explicitly detail maintenance features such as calibration, cleaning, or battery replacement. However, the ability to save and recall setups can be considered a form of operational maintenance, ensuring consistent measurement configurations. The process of downloading data to a computer for archiving also contributes to data integrity and long-term record-keeping, which can be part of a broader maintenance strategy for measurement data.

Fluke 199C Specifications

General IconGeneral
BrandFluke
Model199C
CategoryTest Equipment
LanguageEnglish

Related product manuals