Do you have a question about the Fluke ScopeMeter 190 II Series and is the answer not in the manual?
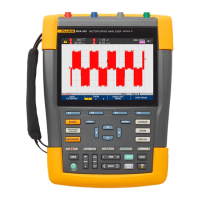
Provides a step-by-step introduction to the scope and meter functions.
Explains the procedure to power on the test tool from a standard AC outlet.
Details the steps to reset the test tool to factory settings.
Illustrates how to use the test tool's menus to select a function.
Describes how to close a menu or hide key labels at any time.
Explains the function of the illumination LED on various keys.
Details the connection of probes to the test tool's BNC signal inputs.
Explains how to set the correct measurement probe types for accurate results.
Guides on how to select the required input channel for measurements.
Explains how the Connect-and-View feature optimizes signal display.
Covers the wide range of automatic scope measurements available.
Describes how to freeze the screen to capture readings and waveforms.
Explains how to use functions for smoothing waveforms and capturing events.
Details using Persistence to observe dynamic signals.
Explains how to display glitches on a waveform.
Describes how to suppress high frequency noise on a waveform.
Covers setting acquisition speed and waveform memory depth.
Explains how to invert a waveform for a more meaningful view.
Guides on how to select AC-coupling to observe small AC signals.
Explains how to adjust input sensitivity continuously.
Details how to suppress noise without loss of bandwidth.
Explains how to add, subtract, or multiply waveforms.
Describes the Spectrum function for amplitude analysis.
Explains how to display a reference waveform for comparison.
Describes using a reference waveform as a test template.
Guides on using analysis functions for detailed waveform analysis.
Covers the wide range of automatic meter measurements.
Details how to choose a measurement in scope or meter mode.
Explains how a relative measurement displays present result.
Guides on how to measure resistance.
Explains how to measure current in both scope and meter mode.
Describes how to activate manual ranging during meter measurement.
Provides warnings and cautions for safe operation and potential hazards.
Lists and explains the international symbols used in the manual.
Details critical precautions to prevent electrical shock or fire.
Outlines general safety rules and best practices for using the instrument.
Provides essential safety information regarding the Li-ion battery pack.
Offers recommendations for safe storage and handling of battery packs.
Provides an introduction to recorder functions and basic operations.
Explains how to open the recorder main menu.
Details using the TrendPlot function to plot measurements over time.
Guides on how to start a TrendPlot recording.
Explains how to display recorded data in normal and view all modes.
Details how to change the time reference for recorded data.
Explains the Scope Record function for logging waveforms.
Guides on how to start recording waveforms in deep memory.
Details using the Single Sweep function to automatically stop recording.
Explains how to use triggering to start or stop scope record.
Guides on analyzing TrendPlot or Scope Record using cursors and zoom.
Covers capabilities of analysis functions: Cursor, Zoom, and Replay.
Explains how to replay the 100 most recent scope screens.
Guides on replaying scope screens step-by-step.
Details how to replay stored screens continuously.
Explains how to obtain a more detailed view by zooming on a waveform.
Guides on using cursors for precise digital measurements on waveforms.
Explains how to use cursors for voltage measurements.
Guides on using cursors for time, RMS, or phase measurements.
Details how to do cursor measurements on a spectrum.
Explains how to measure rise time using cursors.
Provides an introduction to triggering functions for displaying waveforms.
Explains how to set trigger level and slope for display optimization.
Details how to display waveform time before trigger point.
Covers changing trigger settings for automatic triggering.
Explains how to use triggering on rising edges of a waveform.
Describes using a trigger filter to reduce jitter on noisy waveforms.
Enables creating a stable picture of waveform bursts.
Explains using external triggering on inputs A and B.
Guides on triggering to a video signal.
Explains triggering on the first or second half of a frame.
Details triggering on all line synchronization pulses.
Explains using pulse width triggering to isolate specific pulses.
Guides on setting the tool to trigger on narrow positive pulses.
Explains triggering to find missing pulses in a train of positive pulses.
Provides an introduction to general functions for memory and PC use.
Details the two USB ports for connecting external devices.
Covers saving and recalling screens and setups to internal or USB memory.
Explains how to save a screen and setup in scope mode.
Guides on how to delete a screen and its associated setup.
Explains how to recall a screen and its associated setup.
Guides on scrolling through stored screens while looking at them.
Details how to modify the name of stored files.
Explains how to copy or move files between memories.
Covers uploading waveform data and screen bitmaps to PC.
Guides on connecting the test tool to a PC using USB software.
Gives information and tips on making the best use of the test tool.
Illustrates the use of standard accessories like probes and test leads.
Explains how to use independently floating inputs for measurements.
Details how to use the test tool's tilt stand for viewing.
Explains the security slot compatible with a Kensington® lock.
Shows how to attach the hang strap correctly to the test tool.
Guides on resetting the test tool to factory settings without clearing memories.
Describes how to close a menu or hide key labels.
Explains how to change the language displayed on the screen.
Details how to adjust the contrast and backlight brightness.
Guides on changing the date and time clock of the test tool.
Explains how to conserve power by using display AUTO-off.
Details setting the power shutdown timer to 5 minutes.
Explains how to set the display AUTO-timer to 30 seconds or 5 minutes.
Guides on choosing auto set behavior when pressing the auto set key.
Covers basic maintenance procedures like cleaning and storing.
Provides instructions for cleaning the test tool.
Guides on storing the test tool for extended periods.
Details the procedure for charging the Li-ion batteries.
Provides instructions for replacing the battery pack.
Explains how to adjust voltage probes for optimal response.
Guides on displaying model, software, and calibration dates.
Provides information on battery status and serial number.
Lists user-replaceable parts and specific optional accessories.
Offers solutions for common issues like shutdown or screen problems.
General introduction to specifications and accuracy.
Details the guaranteed numerical values with stated tolerances.
Provides environmental data based on manufacturer verification procedures.
Covers safety standards and warnings for operation.
Detailed specifications for oscilloscope inputs, bandwidth, and resolution.
Details the accuracy specifications for the 10:1 Probe VPS410.
Covers compliance with EN61326-1 regarding electromagnetic immunity.
Provides instructions for installing USB drivers for instrument communication.
Contains information regarding the Battery Material Safety Data Sheet.
| Brand | Fluke |
|---|---|
| Model | ScopeMeter 190 II Series |
| Category | Test Equipment |
| Language | English |