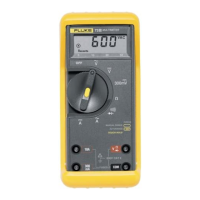
732A
2. Use
#24 AWG or larger^ bare copper^
Teflon
insulated connecting
wires.
It is
preferable to use
shielded,
twisted
pair
cable.
Avoid
splices.
3. Avoid the use of ordinary, nickeUpiated,
banana plugs for equipment interconnections. Use
of iow' thermal
emf
spade
lugs is
recommended.
Crimp the lug onto the wire before soldering.
Loosen the
top
of
the
binding
post,
insert
the
lug
and tighten
the binding post
on the
lug.
2-40.
OTHER ERROR
SOURCES
2-41.
The effects of
the
finite
(though
very
low) output
impedance
of
the
732A, the
lead
wire
resistance
and the
loading
caused
by
the reference divider can not
be
ignored. Use the following
procedure to
minimize
the
effects of
test lead
resistance and
output loading:
1 . Connect the equipment as
shown
in
Figure
2-4.
2. Calibrate the 732A/
Reference
Divider
combination at the divider input terminals.
3.
When
calibration is complete, treat the 732A
and
the
Reference
Divider
as
a
system.
4. Do not disconnect the Reference Divider at any
time, even if it is not required in a
given
procedure.
Since the 732A/ Reference
Divider
system was
calibrated
at the
divider input terminals,
disconnecting it will change the loading on the
732A, and affect the calibration.
2-42.
LONG TERM
STABILITY
2-43.
The user can determine the long term
stability
of
the 732A by tracking
(recording)
the output voltage
before and after each calibration.
Over
a period of time,
the tracked data should
allow
the user
to compensate for
systematic errors in accuracy and
precision.
(Accuracy is
defined as the error
between the 732A output and a
known standard. Precision is
defined
as
the
measure of
repeatability
of
the
732A
output
voltage
in
a statistical
sample).
2-44.
When
the user has compensated for all
systematic
errors, only random errors should
remain.
The
uncertainty of measurements
will
then be a function of the
random
errors
and user errors.
2-45.
OPERATION
2-46.
Use
the
following
procedure to
prepare the 732A
for initial
operation.
1
.
Check the
rear
panel for ac power requirements
and connect
the
732A power
cord
to
an appropriate
power
source.
2. Set
the BATTERY
OPR
switch
to
ON.
3.
Verify
that the
AC
PWR
indicator
is
illuminated.
The
BTRY
CHG
indicator
is also
illuminated
if the
batteries
are not
fully charged.
4.
Allow
the
unit
to stabilize
for a period
of 24
hours
if
either
of the
following
apply:
a.
The IN
CAL
indicator
is not
illuminated.
b. If the
instrument
has been stored in or
exposed to ambient
temperatures
in excess of
the
normal
operating range
(23
±
5^C).
Allow the
unit to stabilize for
24 hours.
5. Insure that the
732A
is
calibrated according to
the
procedures
described in
Section
4.
6.
The
instrument
is
now ready
for use.
7.
If
the
IN
CAL
indicator
goes out,
the output
of
the 732A is not standardized. Notify the Calibration
department
or person(s)
responsible for
maintaining the 732A. Refer to Section 4.
2-7