8
Setting up the lambda.7 haptic device
This section describes the different steps to follow to safely setup your lambda.7 device before
use.
IMPORTANT
PLEASE KEEP THE ORIGINAL PACKAGING
ONLY USE THE ORIGINAL PACKAGING DURING STORAGE OR SHIPMENT
3.1 Haptic device installation
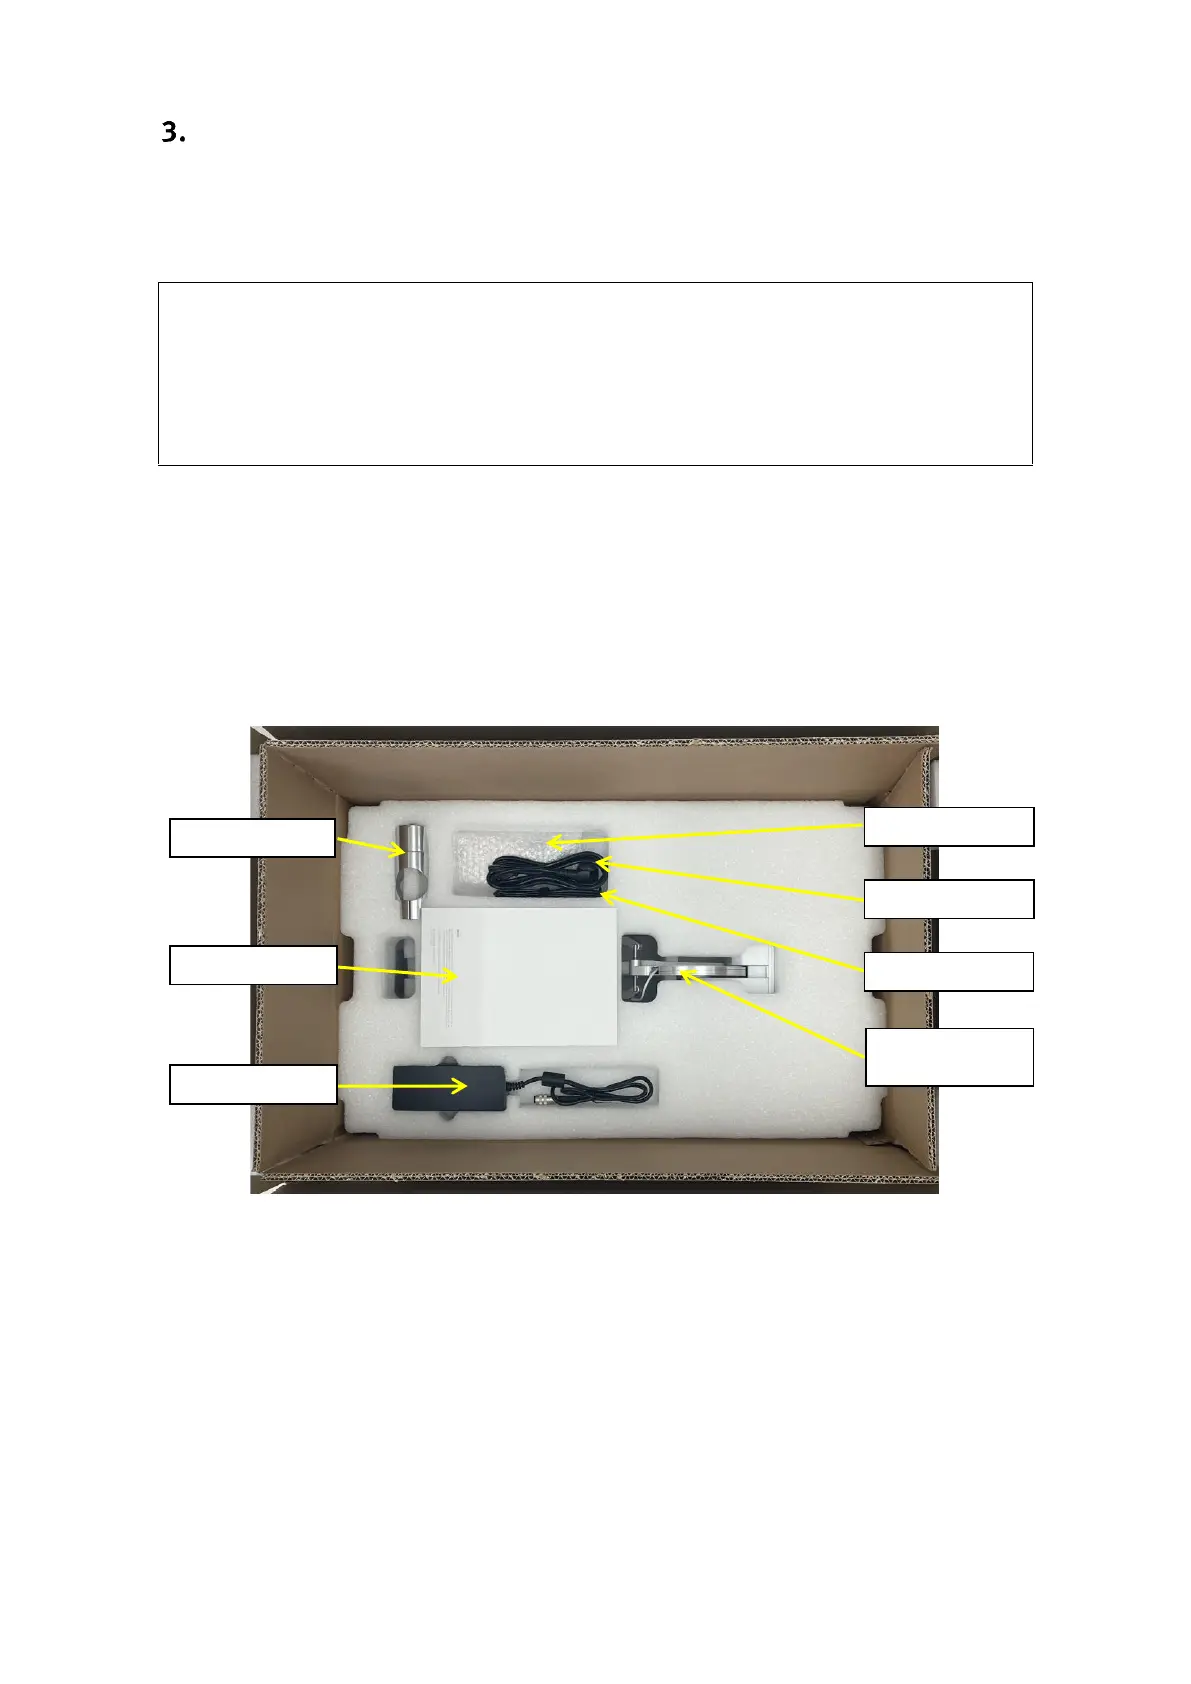
The lambda.7 haptic device is shipped in three cardboard boxes. Please start by opening the
larger of the three boxes which contains the lambda.7 haptic device controller and accessories,
as illustrated in figure 2.
Figure 2 – Transportation box which contains the lambda.7 device controller and accessories.
Among the accessories included with the haptic device are nine screws and an orange hex key
that are required to assemble the device stand contained in the two smaller cardboard boxes. The
haptic device controller is mounted at the end of the setup procedure and is therefore best kept
in its protective box until then.
The operations described in the following steps are best performed by a team of two people.