ProCal 3
Instructions
NO PART OF THIS DOCUMENT MAY BE REPRODUCED WITHOUT PRIOR AGREEMENT AND WRITTEN PERMISSION OF
FORD PERFORMANCE PARTS.
Questions? http://bit.ly/1KdPDjy or (800) FORD788
Factory Ford shop manuals are available from Helm Publications, 1-800-782-4356
Page 7 of 14
Prepare Vehicle for Flashing
STEP 1: Make sure your vehicle’s battery is fully charged (at least 12.0 volts) and all accessories (radio, interior
fan, headlights, etc.) are off. Headlights on ‘auto’ will turn on during programming, so make sure the lights
are fully off. If you are unsure if your vehicle’s battery is fully charged, connect a battery charger prior to
beginning the programming process.
CAUTION: If your ProCal aborts programming due to low voltage or if the programming process is
interrupted for any reason, you can simply repeat the flash process, however, it may require 2
consecutive flash cycles to complete.
STEP 2: Locate the onboard Diagnostic Link Connector (DLC) beneath the driver side dashboard.
STEP 3: Plug your ProCal 3 unit into the DLC, be sure the ProCal 3 unit is fully seated.
STEP 4: If your vehicle has a physical key, turn the ignition key of your vehicle to the ON (not start) position. If your
vehicle has a key fob (instead of a physical key), with your foot OFF of the brake pedal, press the ignition
button once.
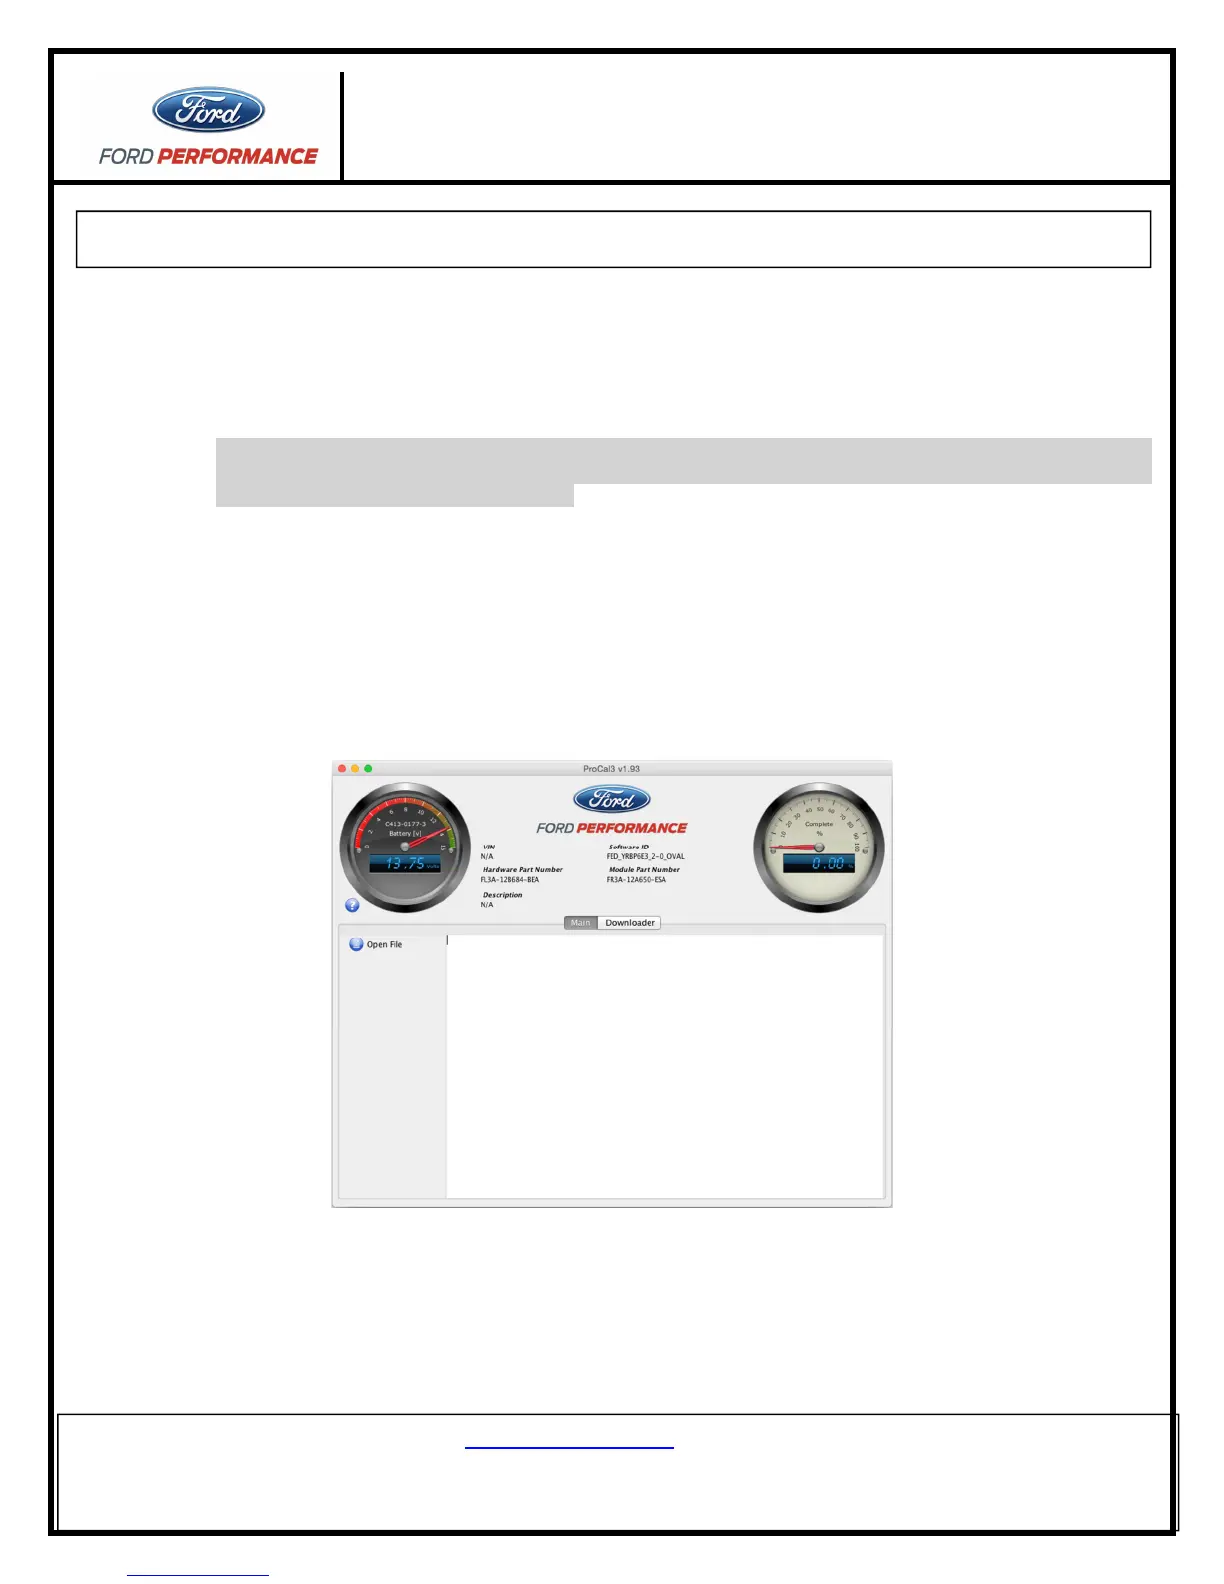
STEP 5: If the ProCal 3 box is properly connected, the HOME screen should now be similar to this:
STEP 6: Navigate to the “Diagnostics” tab and click on the “Read DTCs” Button
Diagnostic trouble codes that exist for your vehicle are displayed.