26
- Place the caliper on the adapter 6, making sure the disk enters inside the pads without any
interferences and that the caliper 7 is in place.
- Insert(makingsurethreadblockerispresent)thescrews8 with the washers 9 and tighten
thembutnotcompletelyusinga5mmhex.socketwrench.
- Slightly loosen the screws 8 and center the caliper and pads.
- Pullthepumplever2-3sothatthecalipercancenteritselfwiththedisk.
- Keepthepumpleverdownandtightenthescrewstoatorquesettingof9Nm±5%.
Gotostep4).
FRONT POST MOUNT FORK
WARNING! DO NOT DISASSEMBLE OR ATTEMPT TO MODIFY, THIS NEW
FORMULA SRL PRODUCT!
Serviceonthisproductmustbeperformedbyqualifiedprofessionalmechan-
ics only who are familar with and understand the technical details of how this
product works.
If you decide to ignore this important safety warning, you are doing so at your
ownriskandatnolegalliabilitytoFORMULASRLoritsdistributors.
CAUTION: You must use a torque wrench to assemble the the fasteners.
CAUTION:Whenremovingthescrews,alwaysmakesurethatmediumstrengthLoctite®
is applied when reassembling, and that the correct torque wrench settings are used.
CAUTION: Makesurethewashersareinstalledbeforeassemblingthefasteners.
CAUTION: Whenmountingthecaliperontothefork,checkthatthecaliperbodyisnotin
contact with the fork itself.
IT CAN BE USED FOR ALL FORMULA BRAKE MODELS
Thisadaptercanbeusedinvariousapplications:
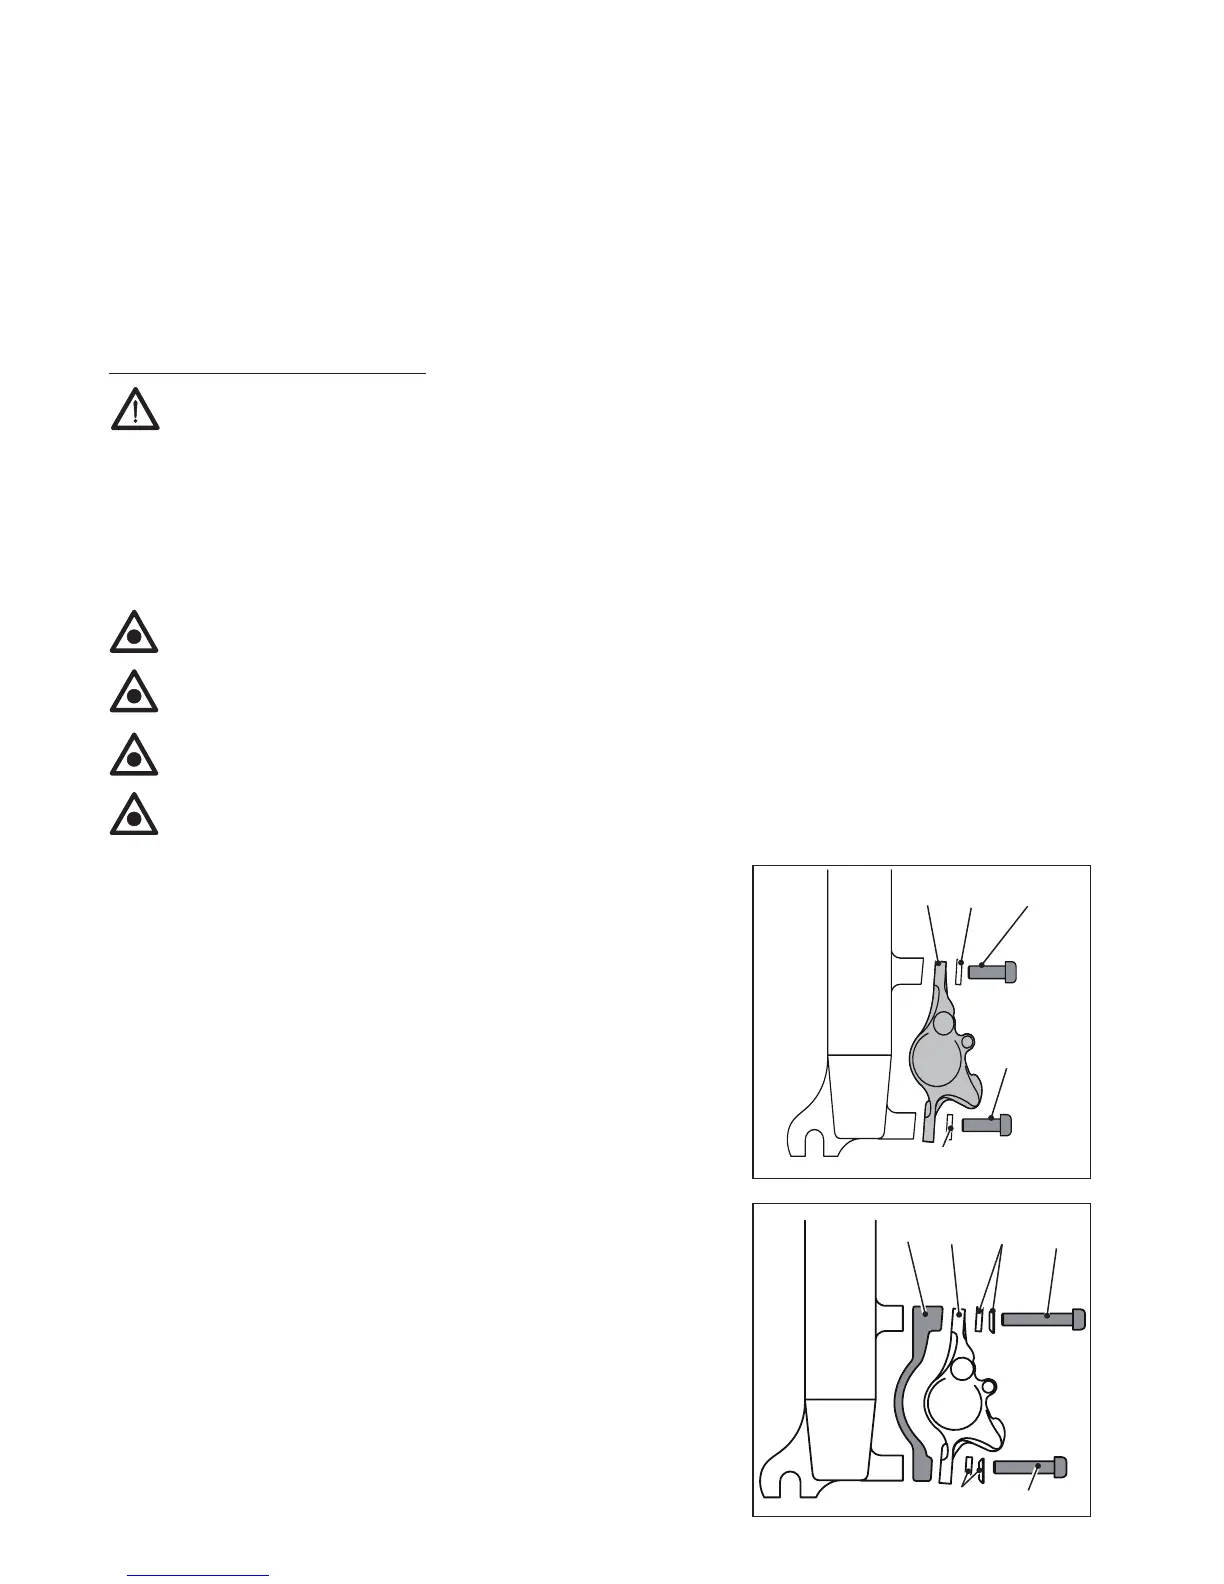
1) Installing directly onto a POST MOUNT fork
- Place the caliper 13 in the fork seat checking insertion
without forcing or interference of the pads in the disc and
caliper in the seat.
- Insert the screws 15(applymedium-strengthLoctite®if
notpresent)withtherelativewashers15a.
- Pullthepumplever2–3timestocenter.Keepitpulledand
tightenthescrewswitha5mmhex.socketwrench.
- Tighten the screws to a torque setting of 9Nm±5%.
(Gotostep4).
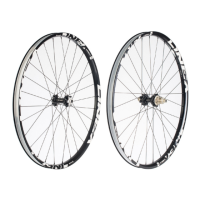
2)AssemblywithPOSTMOUNTadapterFOR180Disc
- Insert the special washers 17 on the screws 18 making sure
the concave and convex profiles material.
- MakesureLoctite®ispresentonthescrew(applymedi-
um-strengthLoctite®ifnotpresent).
- Put in all the parts, including the caliper 19 and adapter 20
on the screw following the order shown in the figure.
15
13 15a
15a
15
17
18
20 19
long
short
18
17