30
Version RX - T1S - T1 - R0 - R1S
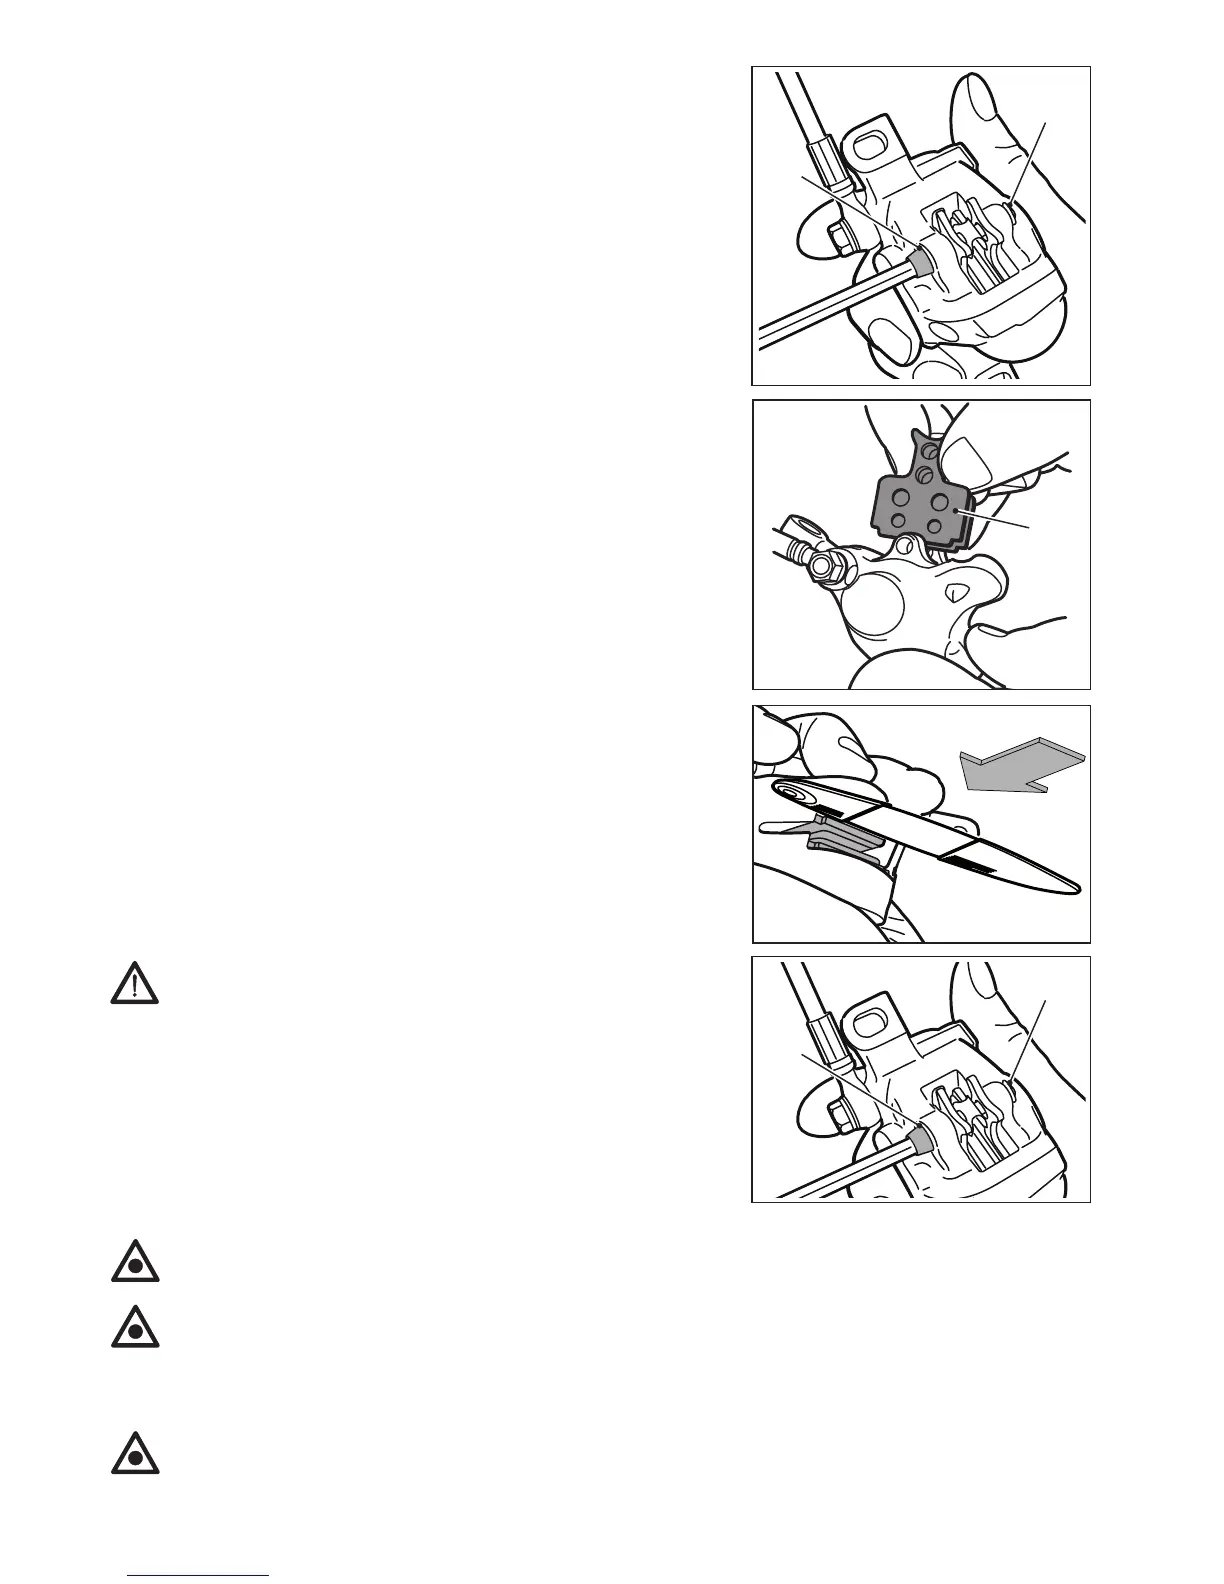
- Remove snap ring 38 and loosen fixing pin 39 of the
pads,usinga3mmAllenwrench.
- Removethepads40 and the spring.
- Carefully clean the pistons inside the caliper, using a
brush soaked in isopropyl alcohol.
- Carefully clean the disc using a cloth soaked in isopropyl
alcohol.
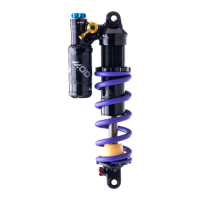
- TemporarilyputtheWORNpadsbackinpositionand,us-
ing a flat blade screwdriver to push down between the
pads, push the pistons fully back inside the caliper.
- Take the worn pads out again.
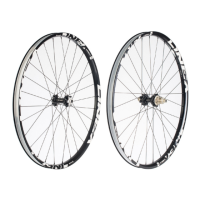
- Install the new pad kit, spring included.
NOTE: the pads are identical and can be placed on the left
or right side.
- Tighten fixing pin 39 of the pads to a torque setting of
2Nm±5%witha3mmAllenwrench,thenputsnapring
38 back in place.
BEDDING IN PROCEDURE:
WARNING: All FORMULA brake systems re-
quireabreakin(beddingin)periodtoobtain
top performance. We recommend running the
bikeonaflatsurfaceataspeedof30Km/hand
brakingitatleast50timesallowingittocome
to a full a stop (taking the required precau-
tions)beforeconsideringthesystembrokenin
and fully efficient.
CAUTION:Whenassemblingthefasteners,alwaysmakesuretheyaretorqueddown
to the correct torque setting.
CAUTION: Use a dynamometric wrench provided with the required hexagon or
TORX®insertstoinstallthescrews.
ATTENTION: Whentransportingthebikewiththewheelsoff,alwaysfittherelevant
spacer between the brake pads.
CAUTION: Never apply the lever without the pads in place or with the wheel removed.
If this does happen you will have to press the brake pads back into the caliper with a
clean flat-blade screwdriver.
38
39
38
39
40