29
3 PAD REPLACEMENT
WARNING! DO NOT TRY TO DISASSEMBLE OR ATTEMPT TO MODIFY THIS NEW
FORMULA SRL PRODUCT!
Serviceonthisproductmustbeperformedby
qualifiedprofessionalmechanicsonlywhoare
familar with and understand the technical de-
tails of how this product works.
If you decide to ignore this important safety
warning, you are doing so at your own risk
andatnolegalliabilityforFORMULASRLor
itsdistributors.
WARNING: Consult THE SAFETY REGULATIONS
foundinthismanual(pp.18-19-20).
Version R1 - R1 RACING
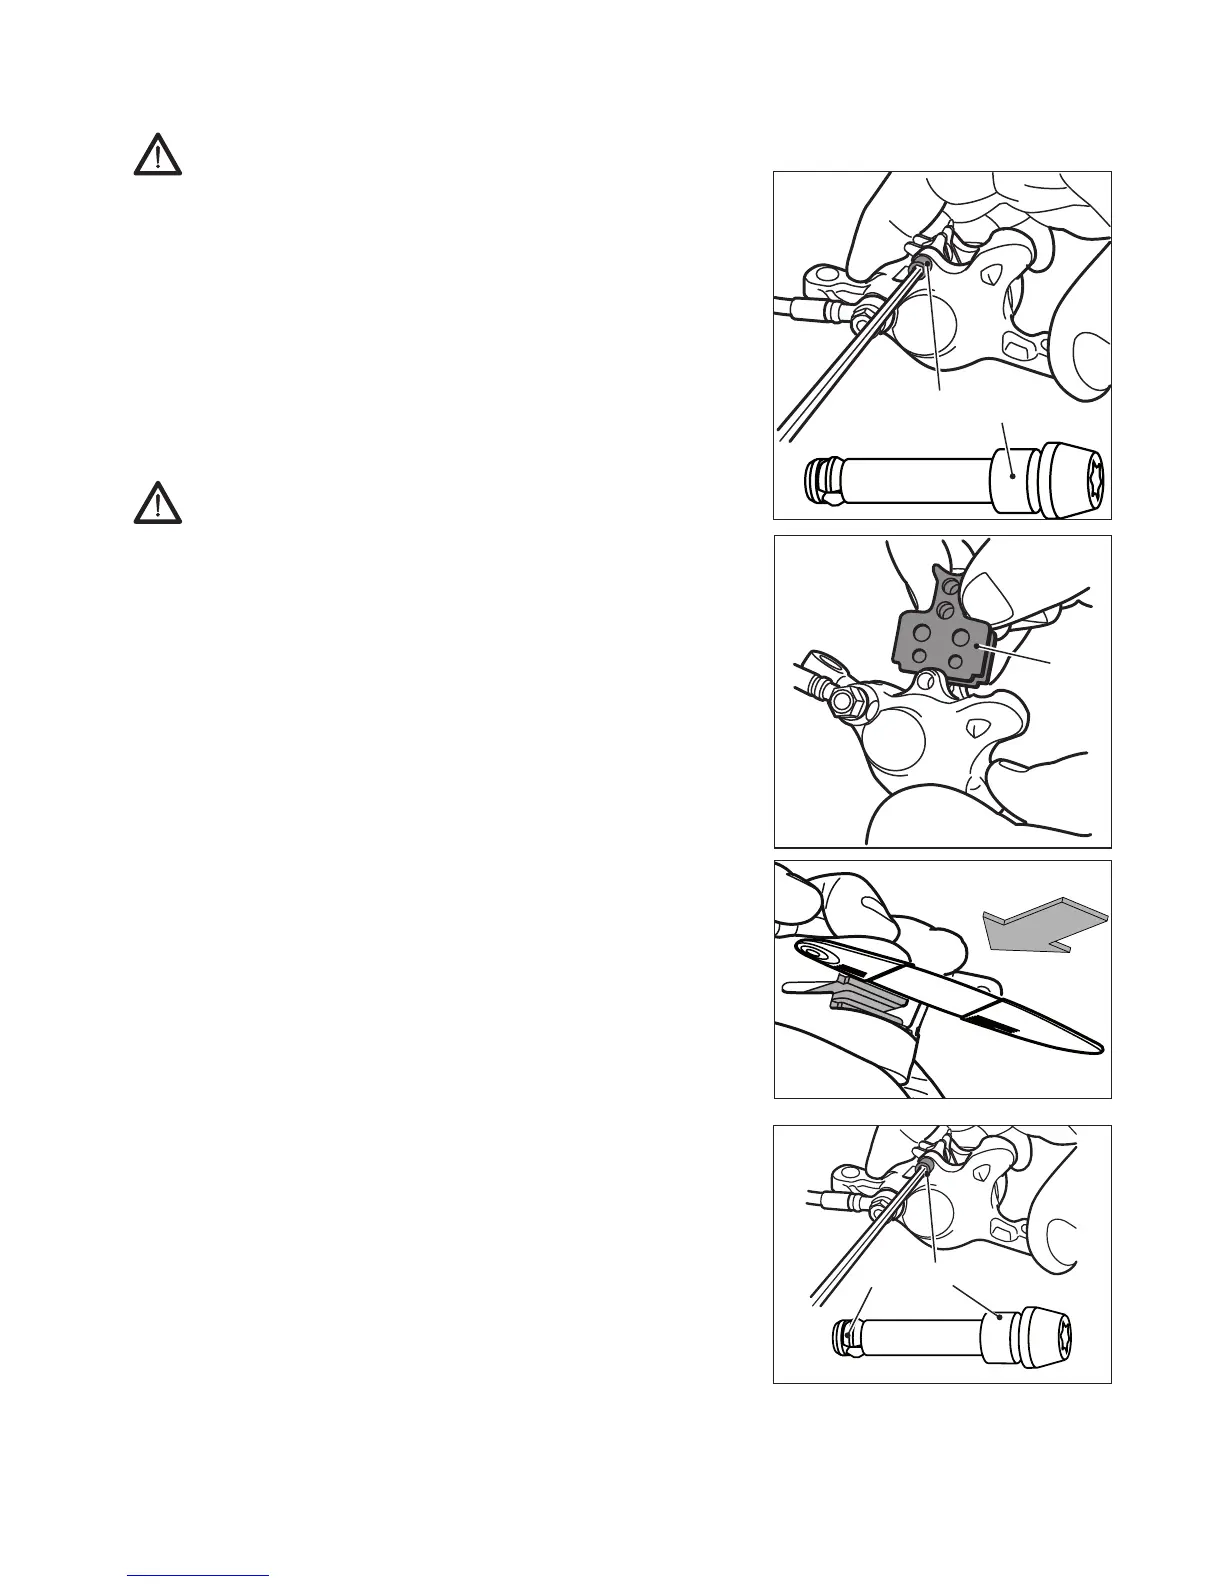
- Removetheringthatpreventsunscrewing37 from the
end of the pin 36.
- Loosen the fixing pin 36ofthepads,usingaTORX
®
T15
spanner.
- Removethepads40 and the spring.
- Carefully clean the pistons inside the caliper, using a
brush soaked in isopropyl alcohol.
- Carefully clean the disc using a cloth soaked in isopropyl
alcohol.
- TemporarilyputtheWORNpadsbackinpositionand,us-
ing a flat blade screwdriver to push down between the
pads, push the pistons fully back inside the caliper.
- Take the worn pads out again.
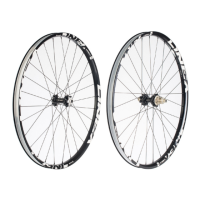
- Install the new pad kit, spring included.
NOTE: the pads are identical and can be placed on the left
or right side.
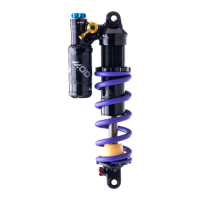
- Check the integrity of the anti-loosening ring 37 placed
on the fixing pin 36.
- Tighten fixing pin 36 of the pads to a torque setting of
2Nm±5%withaTORX
®
T15spanner.
36
36
40
36
37