24
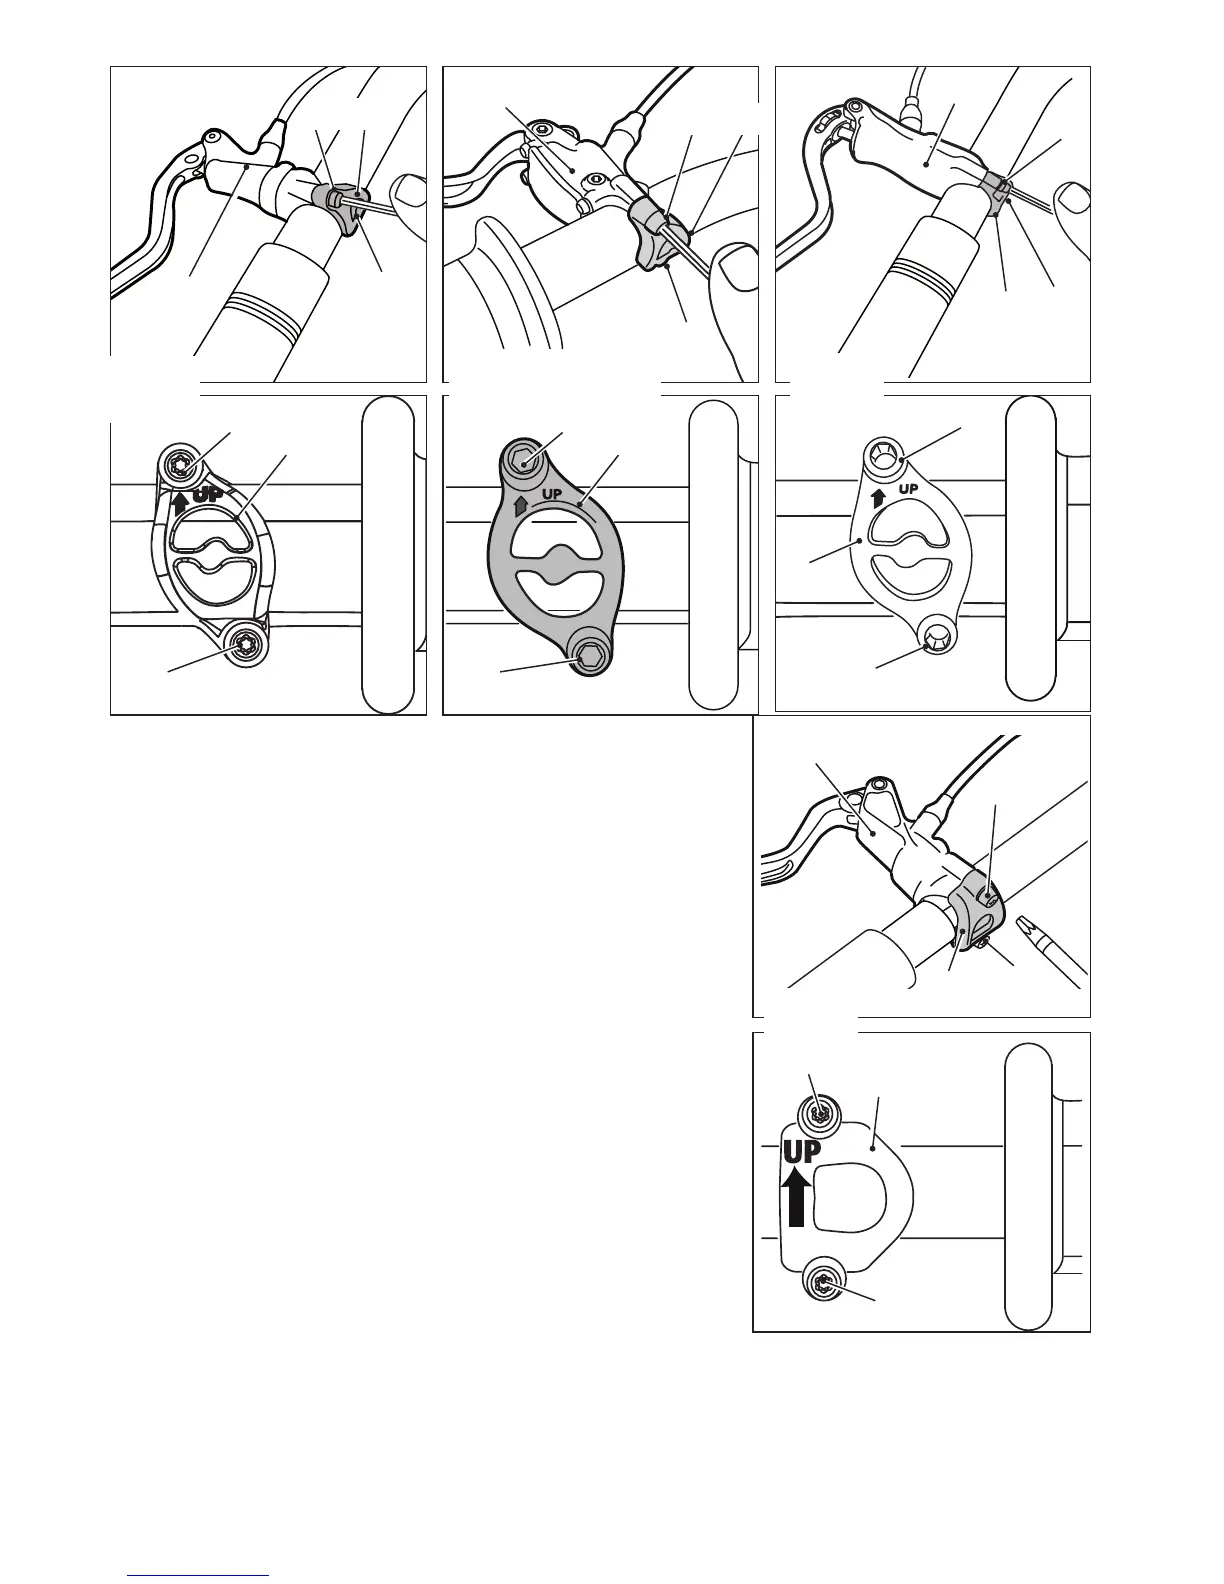
1.2 Installing the pump
- Thepump canbe supplied in aright-hand(rh)or left-
hand(lh)versionforinstallationonbothsidesofthehan-
dlebar.
ModelsR1–R0–T1–R1RACING–R1Shavejustone
collar that is interchangeable and used with the word “UP”
facing up.
ModelRX–T1Shasacollarfortheright-handsolution
(rh)andonefortheleft-handsolution(lh).
As a result, the side on which it will be used must be
specified when placing the order.
Theinstallationstepsaresimilarforbothmodels:
- Fit the pump body 4a to the handle bar positioning it as
shown in the figure and orientating it in the desired position.
- Fix the pump body 4a by mounting the collar 5a so that
the indication “UP”facestheupperpart(asshowninthe
figure).Firsttightentheupperscrew5 to a torque setting
of 2.5/3Nm±5% and then screw5b to a torque setting
of 2.5/3Nm±5%using 3mm(R1/RO)and4mm(RX)
hex. socket wrenches.
If the hose length needs to be adjusted, contact the manufacturer, if not proceed with the posi-
tioningofthehoseonthebicycle,carefullyfollowingtheinstructionsgivenbelow:
- the hose needs to be attached to the fork or frame in a way that does not interfere with the free
flow of fluid through the hose;
- thehoseshouldnotmakecurvessmallerthana20mmradiusandshouldnotinterferewith
any moving part of the bicycle.
5b
4a
5
5a
5b
5
5a
RX
5b
4a
5
5a
5b
5 5a
R1Racing
5
5b
5a
4a
5
5a
5b
RO
5b
4a
5
5a
5b
5 5a
R1