Then push it across the drive roller and into the gun assembly about 6”.
13. Line the wire up in the top groove of the drive roller, then push the drive tension arm against
the drive roller.
14. Flip the quick release drive tensioner back into position on the drive tensioner arm.
15. Tighten (turn clockwise) the drive tension adjusting knob until the tension roller is applying
enough force on the wire to prevent it from slipping out of the drive assembly.
16. Let go of the wire.
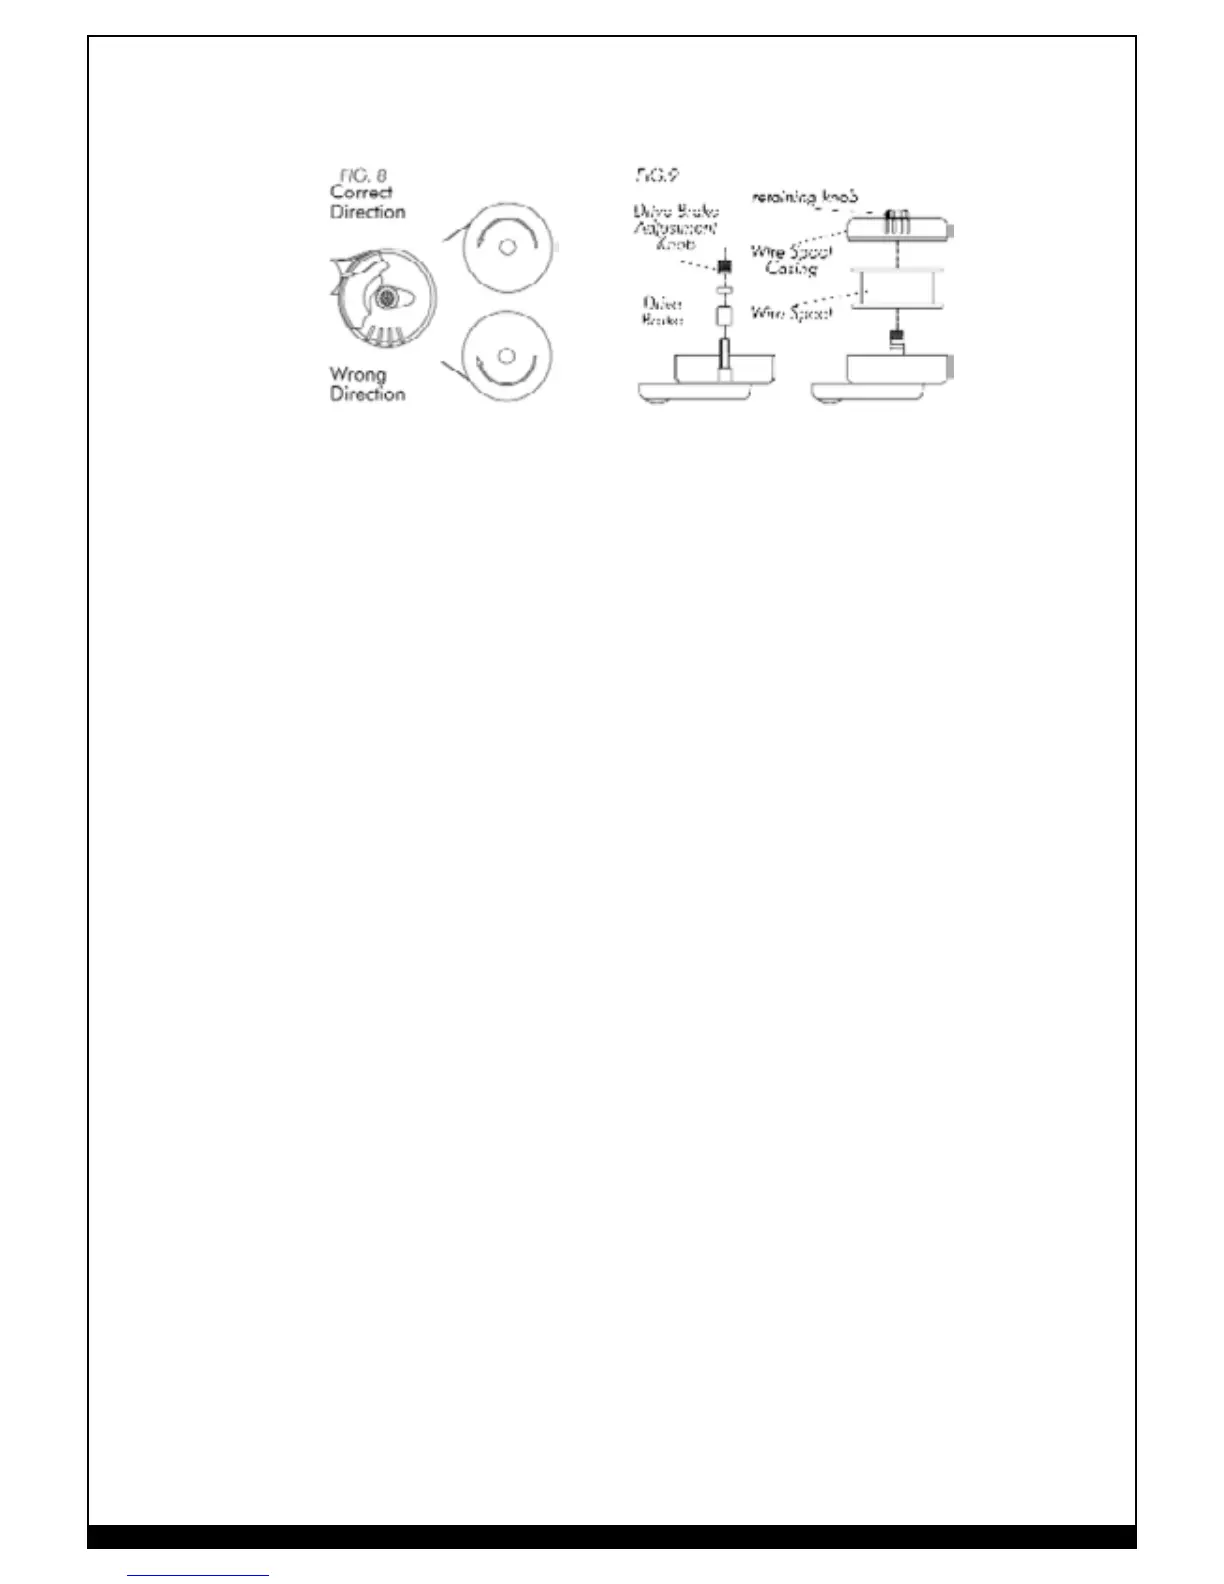
17. Place the spool on the spindle in such a manner that when the wire comes off the spool, it will
look like the top illustration in Figure 10. The welding wire should always come off the top of
the spool into the drive mechanism. Technical Note: The purpose of the drive brake is to cause
the spool of wire to stop turning at nearly the same moment that wire feeding stops.
18. Set the Drive Brake tension. Note: It is necessary to release the Drive Tensioner Arm while you
are setting the Drive Brake Tension. Make sure you return the Drive Tension Arm to its locked
position after adjusting the Drive Brake Tension.
a) With one hand, turn the wire spool counterclockwise - this will cause the wire to feed
through the gun assembly (and continue turning it while adjusting the tension on the spool).
b) With your free hand, tighten (turn clock-wise) the drive brake adjustment knob.
c) Stop tightening when drag is felt on the wire spool that you are turning, then stop hand-
turning the wire spool. Note: If TOO MUCH tension is applied to the wire spool, the
wire will slip on the drive roller or will not be able to feed at all. If TOO LITTLE tension is
applied, the spool of wire will want to unspool itself. Readjust the drive brake tension as
necessary to correct for either problem.
19. Trim the wire which is sticking out the end of the spool gun to about 1/2” in length.
20. Select a contact tip stamped with the same diameter as the wire being used.
21. Slide the contact tip over the wire(protruding from the end of the gun).Thread the contact tip
into the end of the gun and hand-tighten securely.
22. Install the nozzle on the gun assembly. For best results, coat the inside of the nozzle with anti-
stick spray or gel.
23. Cut off the excess wire that extends past the end of the nozzle.
24. Replace the Wire Spool Casing cover and tighten adjustment knob by turning it clockwise.
25. Connect the welder power cord to the ac power source. Turn the welder ON. Set the
VOLTAGE switch.