• Select the STICK, “SMAW”function with the Selector Switch (6) on the front panel.
• Check the electrode packaging to determine the recommended polarity and connect the
Electrode holder and ground clamp to the plus and minus Dinse sockets accordingly.
• Switch the unit ON thru the ON/OFF switch (14).
• If “Local (20)” is selected set the welding current with the Left Knob (8) on the front panel and
the strike over-current value of the electric arc (Hot Start) with the Right Knob (7)
• If “Remote (20)” is selected set the welding current using the foot pedal which has to be
connected to the 7-pin connector (12). The over-current value of the electric arc (Hot Start)
with the Right Knob (7).
Adjustable Welding current:
120V input voltage: Min 20 Amp - Max 80 Amp
230V input voltage: Min 20Amp - Max 170Amp
230V INPUT VOLTAGE REQUIRED
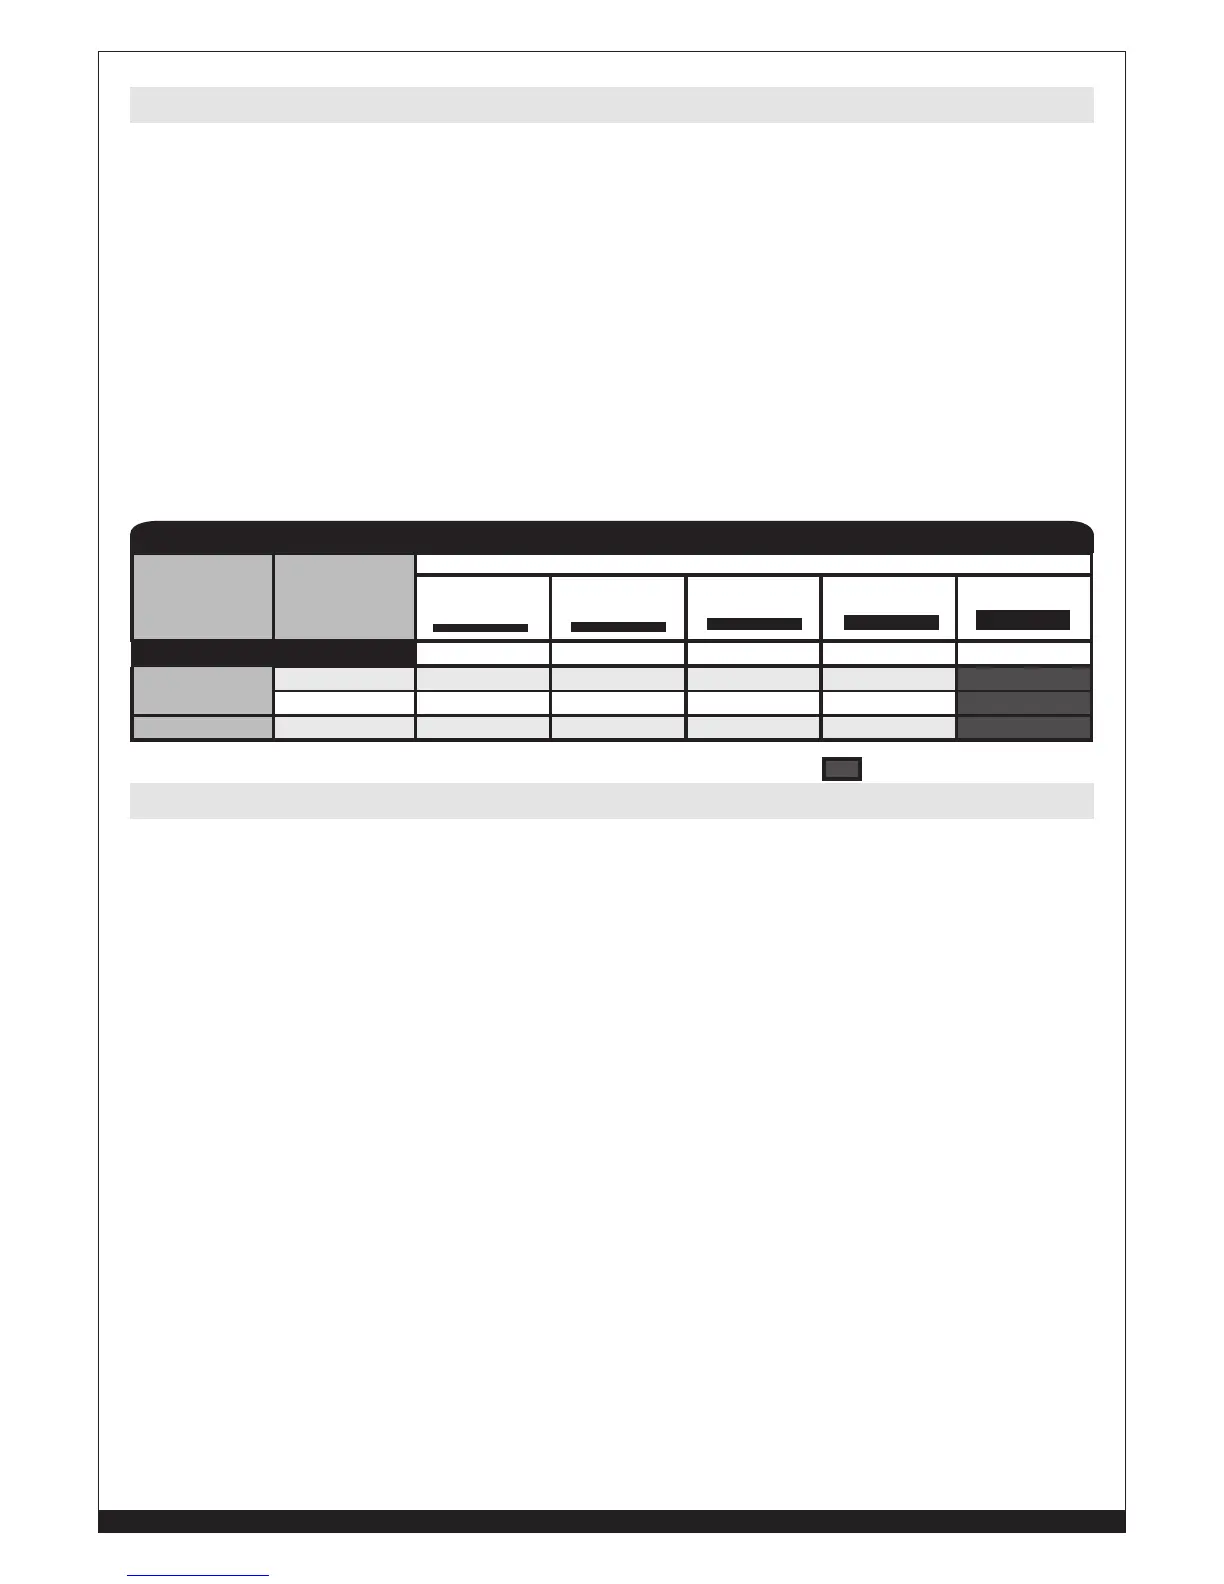
Regulation Knob
Left Knob Left Knob Left Knob Left Knob Left Knob
Mild Steel
6013 30-35 40-70 70-95 100-135 145-160
7018 30-35 40-70 70-110 90-160 130-160
Stainless Steel
316 30-35 40-70 40-80 60-110 90-150
MATERIAL
(Wire)
ELECTRODE TYPE
ELECTRODE DIAMETER
1/16” (1.6 mm) .0787” (2 mm) 3/32” (2.4 mm) 1/8” (3 mm) 5/32” (4 mm)
190 MP STICK SET-UP CHART
Setting up the Equipment for TIG Welding (GTAW) with no Foot Control:
• Select the TIG function on the control panel with knob (6).
• Choose LOCAL with switch (20).
• Connect the TIG torch cable to the negative Dinse socket (9) of the welder.
• Connect the ground cable connector to the positive Dinse socket (10) of the welder.
• Connect the TIG torch control cable to the 7 pin connector (12).
• Connect the TIG torch gas line to the gas regulator (argon gas only).
THE GAS FLOW IS MANUALLY CONTROLLED WITH THE KNOB ON THE TIG
TORCH. USE INERT GAS (ARGON) ONLY.
Setting up the Equipment for TIG Welding (GTAW) using a Foot Control:
• Switch the unit on thru the ON/OFF switch (14).
• Select the TIG function on the control panel with knob (6).
• Choose REMOTE with switch (20).
• Connect the TIG torch cable to the negative Dinse socket (9) of the welder.
• Connect the ground cable connector to the positive Dinse socket (10) of the welder.
• Connect the Foot Control cable to the 7 pin connector (12)
• Connect the TIG torch gas line to the gas regulator (argon gas only).
TURN ON GAS AT THE GAS REGULATOR, THEN OPEN THE VALVE ON THE TORCH
HANDLE AND CHECK FOR GAS FLOW.
Setup for Stick Welding (SMAW)
Setup for TIG Welding (GTAW) with Lift Arc