Getting started Quick installation using factory defaults
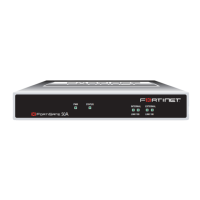
FortiGate-50A Installation Guide 01-28005-0017-20041101 15
To connect to the FortiGate CLI, you need:
• a computer with an available communications port,
• the RJ-45 to DB-9 cable included in your FortiGate package,
• terminal emulation software such as HyperTerminal for Windows.
To connect to the CLI
1 Connect the null modem cable to the communications port of your computer and to
the FortiGate Console port.
2 Make sure that the FortiGate unit is powered on.
3 Start HyperTerminal, enter a name for the connection, and select OK.
4 Configure HyperTerminal to connect directly to the communications port on your
computer and select OK.
5 Select the following port settings and select OK.
6 Press Enter to connect to the FortiGate CLI.
The following prompt is displayed:
FortiGate-50A login:
7 Type admin and press Enter twice.
The following prompt is displayed:
Welcome !
Type ? to list available commands. For information about how to use the CLI, see the
FortiGate CLI Reference Guide.
Quick installation using factory defaults
You can quickly set up your FortiGate unit for a home or small office using the web-
based manager and the factory default FortiGate configuration. All you need to do is
set your network computers to obtain an IP address automatically and to obtain DNS
server IP addresses automatically (using DHCP), access the web-based manager,
and configure the required settings for the FortiGate external interface. You can also
configure FortiGate DNS servers and add a FortiGate default route if needed.
The FortiGate internal interface acts as a DHCP server for the internal network,
automatically assigning IP addresses to up to 100 computers in the range
192.168.1.110 –192.168.1.210.
Note: The following procedure describes how to connect to the CLI using Windows
HyperTerminal software. You can use any terminal emulation program.
Bits per second 9600
Data bits 8
Parity None
Stop bits 1
Flow control None
 Loading...
