Step 3: Please click on the Save button after all settings have been entered and disconnect the network cable.
Never shut down the power of the camera until the IP camera is able to connect to the wireless network.
The LAN IP address will disappear on the window of Equipment Search Tool when the camera is configuring a
wireless connection. Wait about 1 minute, the camera should obtain a wireless connection, and the LAN IP of
the camera will show again on the window of the Equipment Search Tool The IP address may have changed
after the camera receives a wireless connection; we recommend setting a static local IP address if this IP
address changes by right clicking the camera in Equipment Search Tool, setting a static IP, and pushing OK .
Congratulations! You have set up the wireless connection of the camera successfully.
NOTE: If you fail to make a wireless connection, please refer to your seller or contact us directly for
assistance.
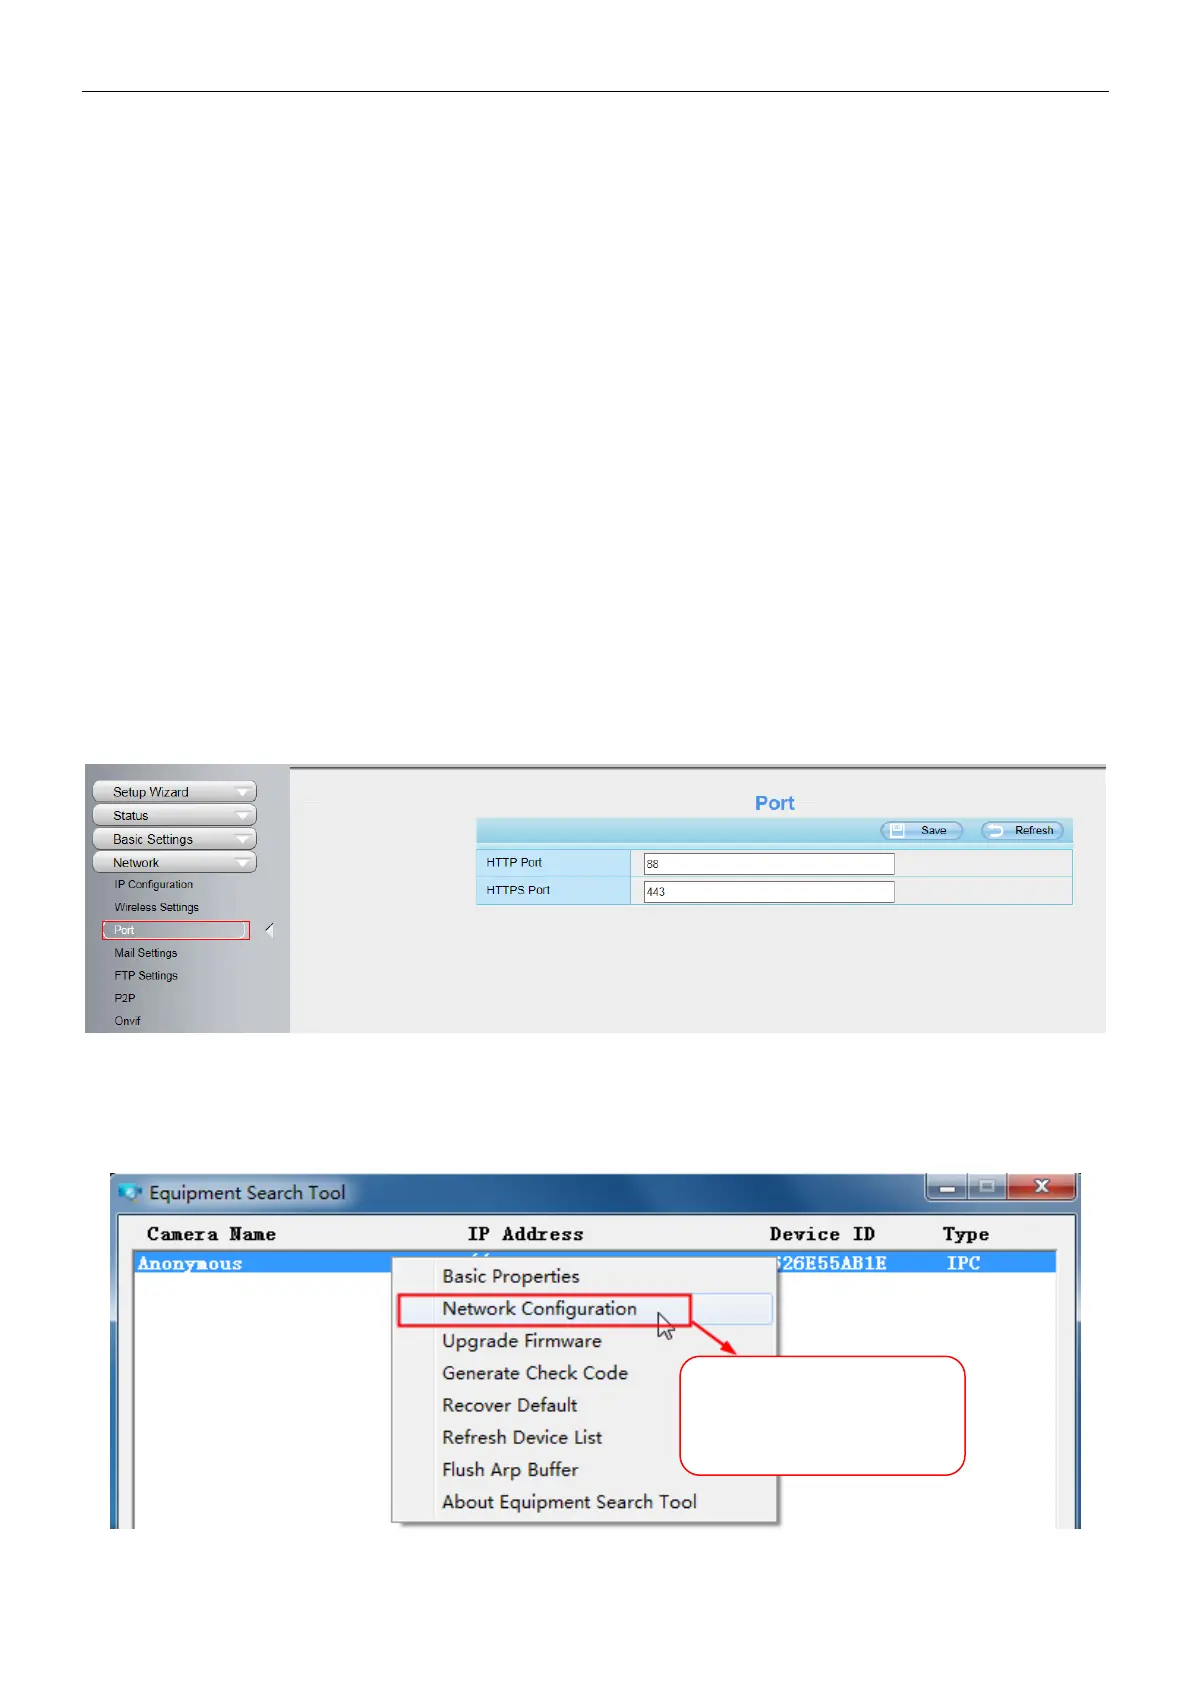
4.4.3 Port
This camera supports HTTP Port / HTTPS Port / ONVIF Port. HTTP Port is used to access the camera
remotely.
HTTP port: By default, the HTTP is set to 88. Also, they can be assigned with another port number between 1
and 65535. But make sure they can not be conflict with other existing ports like 25, 21.
Another way to change the HTTP port no.
Step 1: Open the Equipment Search Tool, select the camera you would like to change the port of, right click on
the IP address, and click on "Network Configuration", this brings up the network configuration box .
Select which camera
you’d like to change the
port for, and right click .