8
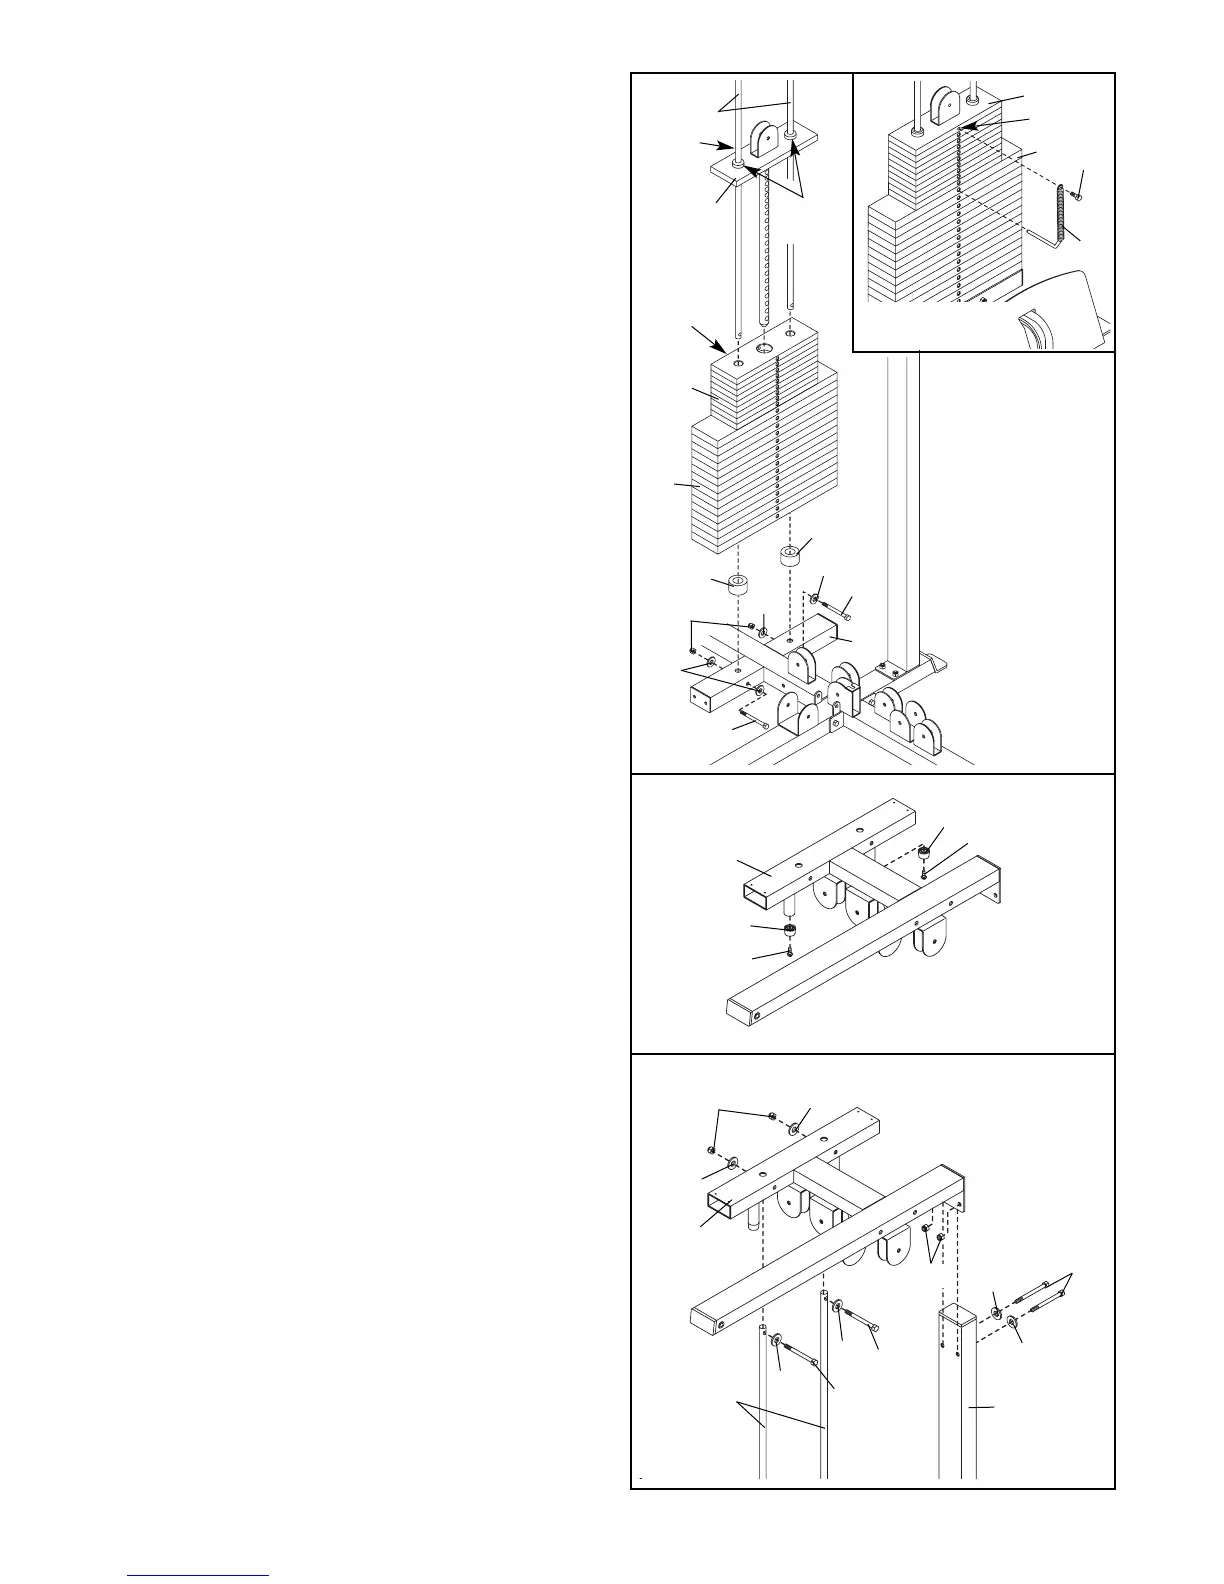
7. Attach the two Weight Guides (21) to the Weight
Base (2) with two M10 x 92mm Button Bolts (90),
four M10 Washers (98), and two M10 Nylon
Locknuts (101).
Slide two Weight Bumpers (66) onto the Weight
Guides (21). Starting with the Large Weight (23)
marked “400,” slide the fifteen Large Weights and
the nine Small Weights (22) onto the Weight
Guides. Make sure the Weights are stacked so
the numbers are in order and on the indicated
side.
Grease the guide holes in the Top Weight (27).
Slide the Top Weight onto the Weight Guides
(21). Make sure the Top Weight is oriented
with the hole on the indicated side.
See the inset drawing, shown from the
reverse side for clarity. Attach the tether on the
Weight Pin w/tether (67) to the hole in the Top
Weight (27) with an M8 x 19mm Button Screw
(88). Insert the Weight Pin into the stack of
Weights (23).
21
88
67
23
7
27
27
22
Hole
Numbers
Hole
Reverse View
23
66
98
98
98
90
2
90
66
101
8. Attach two Bumpers (61) to the Top Frame (5)
with two M4 x 16mm Screws (95).
8
5
61
61
95
95
9. Attach the Top Frame (5) to the two Weight
Guides (21) with two M10 x 92mm Button Bolts
(90), four M10 Washers (98), and two M10 Nylon
Locknuts (101). Do not tighten the Locknuts
yet.
Attach the Top Frame (5) to the Upright (4) with
two M10 x 70mm Button Bolts (87), two M10
Washers (98), and two M10 Nylon Locknuts
(101). Do not tighten the Locknuts yet.
9
5
98
98
90
90
21
87
98
98
98
98
4
101
101
Guide
Hole