4.2 Wash the strainer in solvent, and blow it
dry with compressed air to remove oil and
metal particles.
4.3 Install and tighten the magnetic strainer
40 to 60 lbf·ft (54 to 81 N·m).
5. Clean the fill and drain plugs as follows. Change
them if necessary.
5.1 For magnetic plugs, use a piece of key
stock or any other convenient steel slug
to short the two magnetic poles and divert
the magnetic field.
5.2 Clean away the collected material depos-
ited on each pole. Magnets will rapidly
lose their effectiveness as collected mate-
rial bridges the gap between the two
poles.
5.3 Inspect the drain plug for large quantities
of metal particles.
5.4 After cleaning, install the drain plug(s)
and tighten to 40 to 60 lbf·ft (54 to 81
N·m).
IMPORTANT: The use of friction modifiers is not
approved in Dana drive axles.
6. Fill the axle with the recommended lubricant as
follows. See Table 6 for recommended lubri-
cants, and Table 7 for drive axle lubricant ca-
pacities.
6.1 With the vehicle on a level surface, fill the
axle through the oil fill hole. Lubricant
should be level with the bottom of the oil
fill hole.
6.2 Check the fluid level; see
Fig. 4.
6.3 Install and tighten the fill plug 50 lbf·ft (68
N·m).
35–04 Wheel End Inspection,
Rear Axle
1. Park the vehicle on a level surface, shut down
the engine, set the parking brake, and chock the
tires.
WARNING
Never work around or under a vehicle that is sup-
ported only by a jack. Always support the vehicle
with safety stands. Jacks can slip, causing the
vehicle to fall, which could result in serious injury
or death.
2. Raise the rear of the vehicle until the tires clear
the ground. Then place safety stands under the
axle.
3. Remove the rear wheel and tire assemblies. For
instructions, see Group 40 of the 108SD and
114SD Workshop Manual.
4. Remove the brake drum. For more information,
see Group 35 of the 108SD and 114SD Work-
shop Manual.
5. Check for loose, damaged, or missing fasteners.
6. Check for lubricant at the wheel seal and drive
flange gasket. If lubricant is present, investigate
the cause and take corrective action.
7. Check for lubricant around the hub, brake hard-
ware, and brake shoes (if installed). If lubricant is
present, check the oil seal and replace it as nec-
essary. For instructions, see Section 35.02 of
the 108SD and 114SD Workshop Manual.
8. Remove the axle shaft.
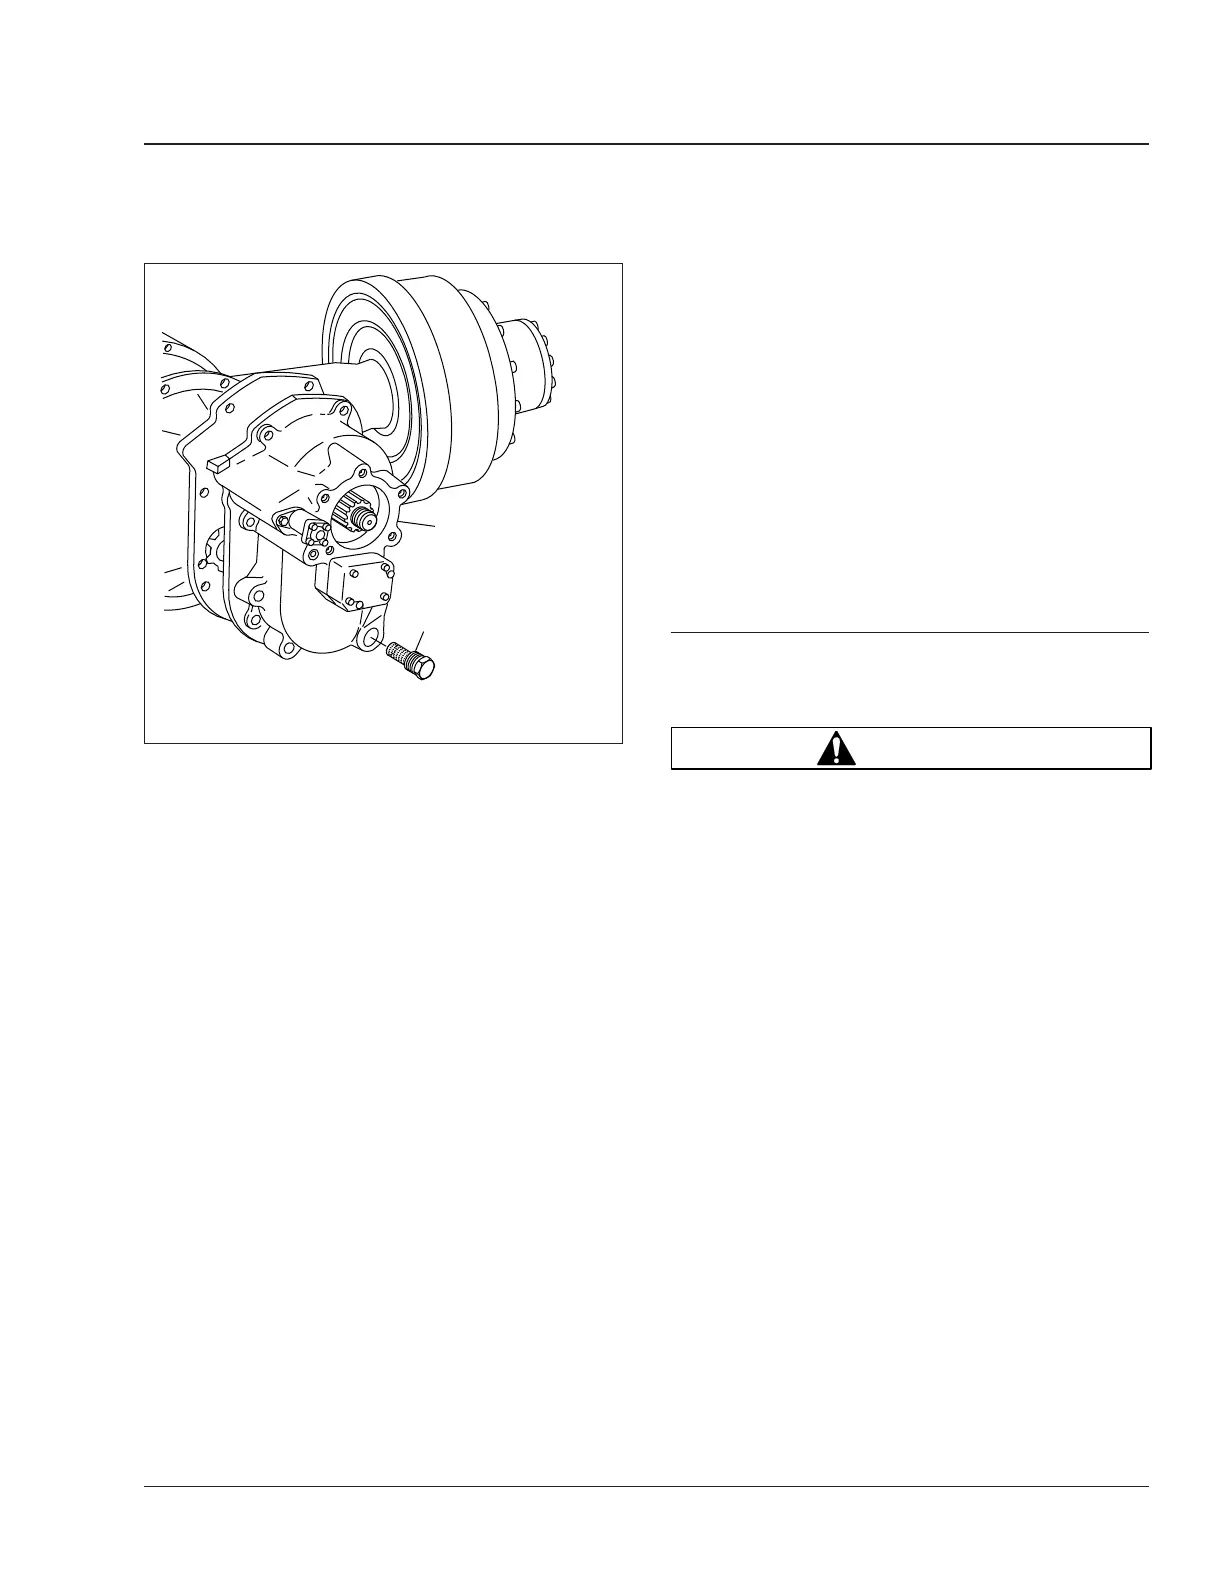
f350017a10/05/2016
1
2
1. Magnetic Strainer 2. Power Divider
Fig. 6, Dana Spicer Tandem-Drive Axle Magnetic
Strainer
Rear Axle 35
108SD and 114SD Maintenance Manual, November 2016 35/7