radiator and hoses for leaks. Repair if
necessary.
12.5 Shut off the engine, then check the cool-
ant level in the surge tank. Add coolant if
the level is not between the MIN and
MAX lines on the surge tank.
13. On Argosy’s with auxiliary radiators, bleed the
system while adding coolant as follows.
13.1 Open the remote bleed valve on the left
side of the frontwall.
13.2 Fill the cooling system at the surge tank;
continue adding coolant until a non-
aerated coolant stream comes out of the
remote bleed valve. This allows air to be
expelled from the auxiliary system.
13.3 Close the remote bleed valve.
13.4 Continue filling until the coolant reaches
the high level mark on the surge tank.
13.5 Run the engine for 5 minutes to allow the
system to de-aerate.
13.6 Check the coolant level again; add cool-
ant to the high level mark.
20–03 Fan Clutch Check (Noise
Emission Control)
Horton Advantage® Fan Clutch
NOTE: If any part of the fan clutch needs to be
repaired or replaced, after performing the
checks below, see Group 20 of the Century
Class Trucks Workshop Manual.
1. Disconnect the electrical cables from the battery.
Drain all air from the air system. If equipped with
an air starter, drain the air starter reservoir.
WARNING
If the engine starts during this procedure, the fan
could cause personal injury. If the vehicle is
equipped with an air starter, be sure that the air
starter reservoir is drained.
2. Inspect the electrical connections and wires to
the fan clutch solenoid. Secure the connection if
loose; replace wires and connectors if damaged.
3. Clean the fan clutch air solenoid valve filter, if
equipped.
3.1 Unscrew the fan clutch solenoid valve air
filter assembly and remove the filter ele-
ment.
3.2 Clean the filter element with cleaning sol-
vent.
3.3 Reassemble the clutch valve solenoid air
filter assembly and install on the vehicle.
4. Visually check the fan for bent, cracked, or dam-
aged blades. Replace if damaged. Check for ad-
equate clearance between the fan and other
components.
5. Check the fan belt for wear, tension, and align-
ment. Correct if necessary.
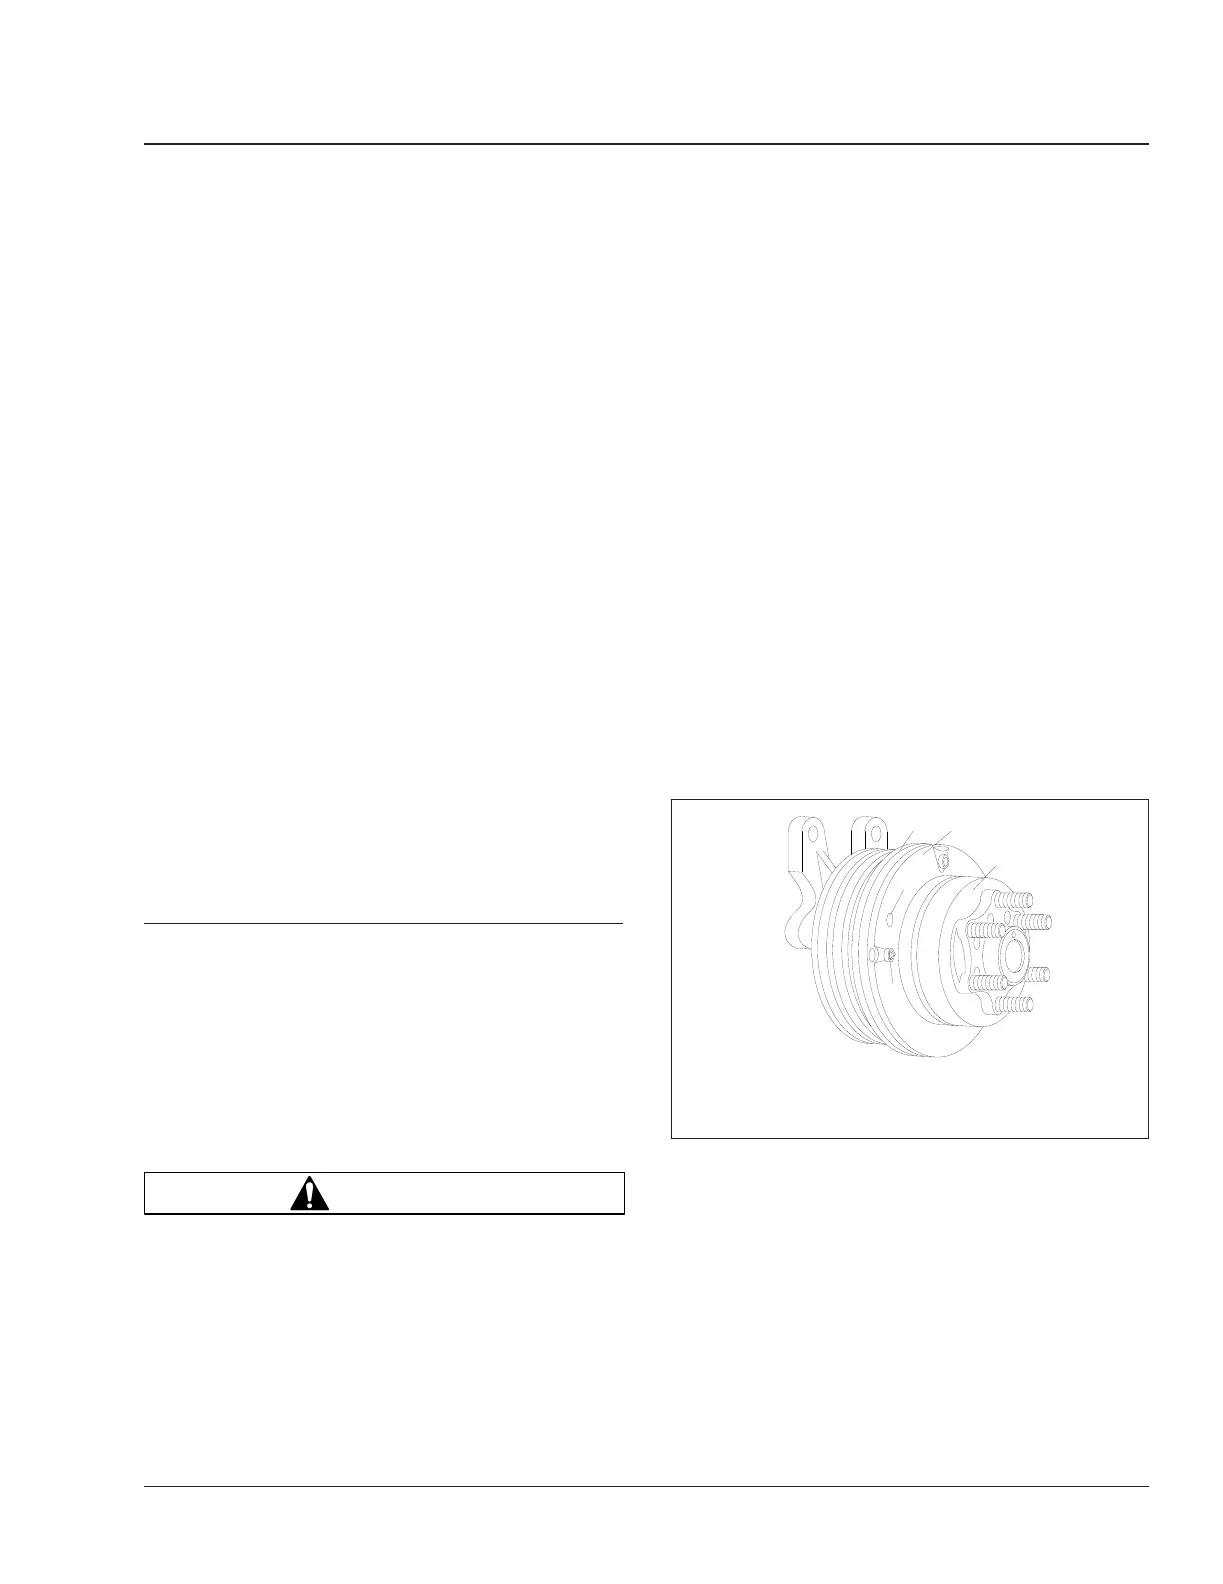
6. Check for wear on the friction facing. See
Fig. 7.
Replace the friction facing if it is worn to a 1/16-
inch (1.6-mm) thickness or less. Also check the
facing for signs of oil contamination or burn
marks. If evidence of oil or burn marks are
found, replace the friction facing.
7. Connect the battery cables. Start the engine, and
charge the air system to 120 psi (827 kPa). Shut
down the engine. Separate the halves of the fan
solenoid connector. The fan clutch should en-
gage.
If the fan does not operate correctly, see Group
20 of the Century Class Trucks Workshop
Manual for troubleshooting and repair proce-
dures.
f200290
1
2
08/08/94
3
4
5
1. System Sentry® Fuse
2. Safeguard Hole
3. Friction Facing
4. Piston Friction Disc
5. Air Chamber
Fig. 7, Horton Advantage Fan Clutch
Engine Cooling/Radiator 20
Century Class Trucks Maintenance Manual, January 2016 20/5
 Loading...


