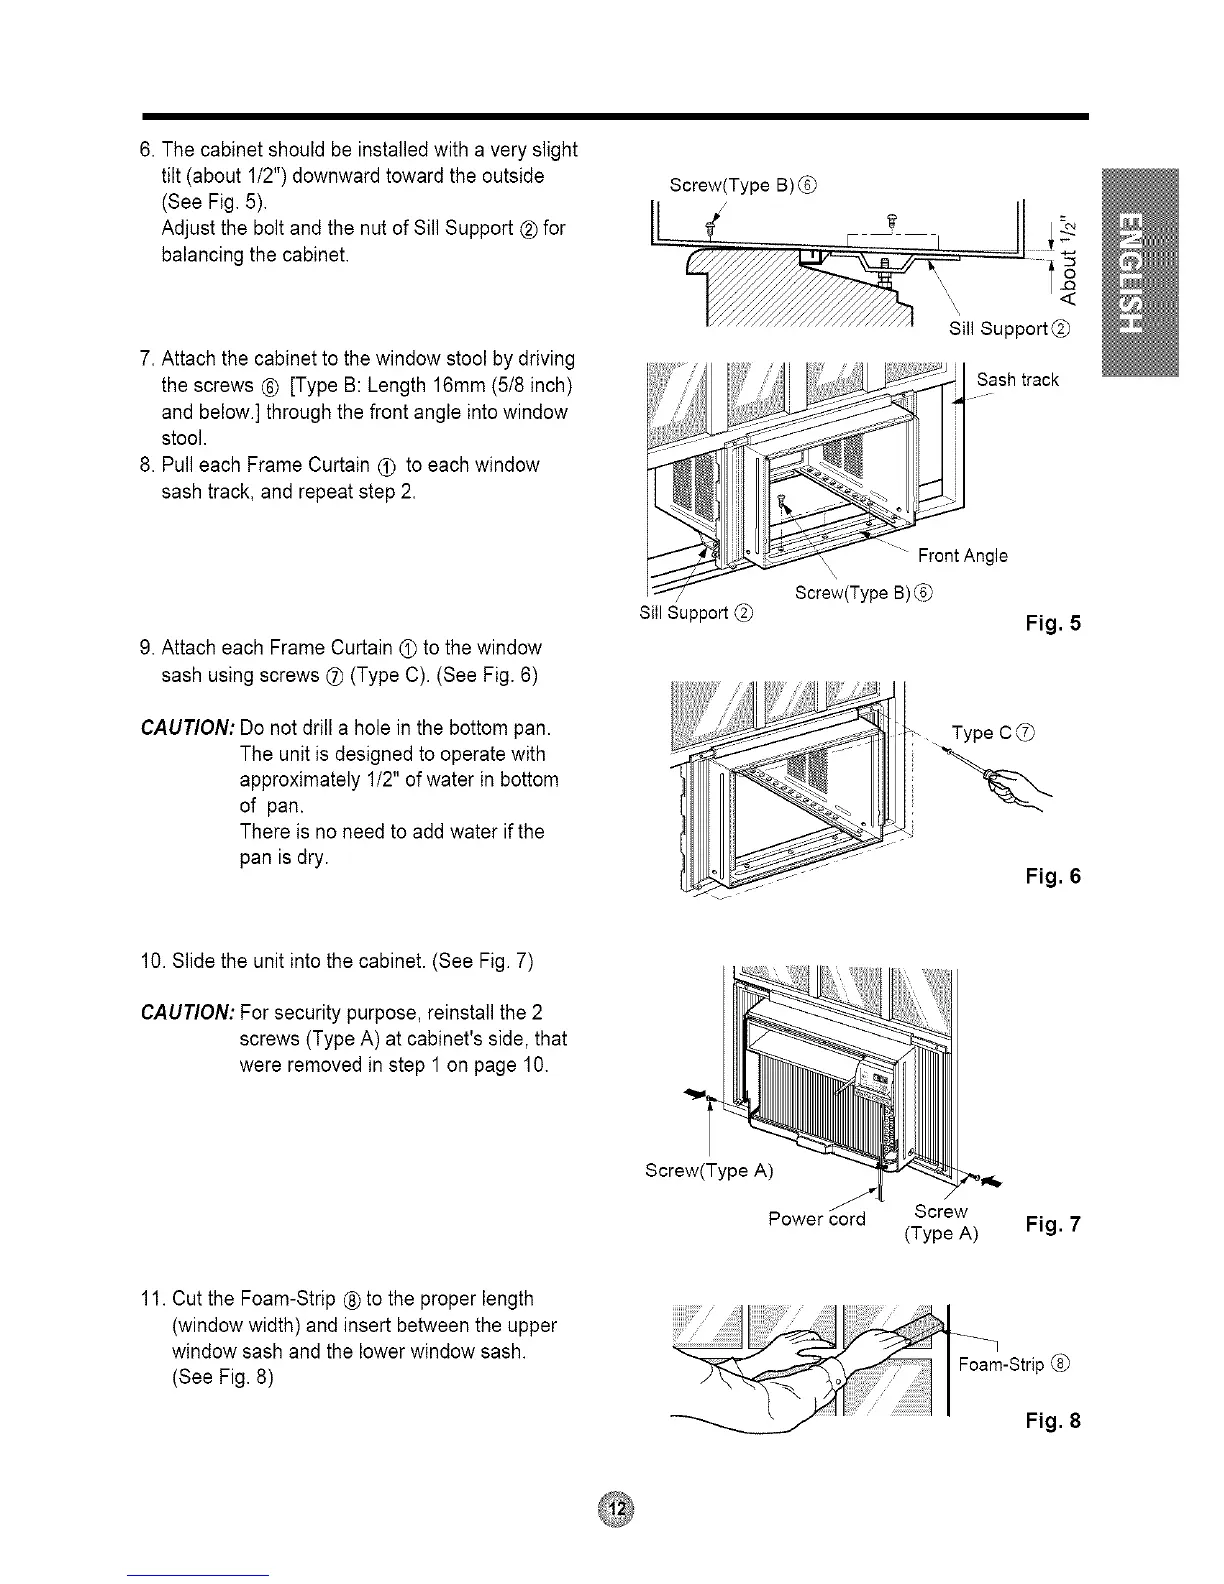
6. The cabinet should be installed with a very slight
tilt (about 1/2")downward toward the outside
(See Fig. 5).
Adjust the boltand the nut of Sill Support ® for
balancing the cabinet.
7. Attach the cabinet to the window stool by driving
the screws ® [Type B: Length 16mm (518inch)
and below.] through the front angle intowindow
stool.
8. Pull each Frame Curtain _ to each window
sash track, and repeat step 2.
9. Attach each Frame Curtain • to the window
sash using screws _ (Type C). (See Fig. 6)
CAUTION: Do not drill a hole in the bottom pan.
The unit is designed to operate with
approximately 1/2" of water in bottom
of pan.
There is no need to add water if the
pan is dry.
Screw(Type B) (._
/I J
LL_ ...., •
_k_..e__ \ Support@
...............
Sill Support
{ u .S_ash track
F,oot n0,e
Screw(Type B)
Fig. 5
Type C
Fig. 6
10. Slide the unit intothe cabinet. (See Fig. 7)
CAUTION: For security purpose, reinstall the 2
screws (Type A) at cabinet's side, that
were removed in step 1 on page 10.
Screw(Type A)
Screw
(Type A)
Fig. 7
11. Cut the Foam-Strip ® to the proper length
(window width) and insert between the upper
window sash and the lower window sash.
(See Fig. 8)
Fig. 8