3.1 MECHANICAL PARTS
3.1.1 BUCKET AND AIR FILTER
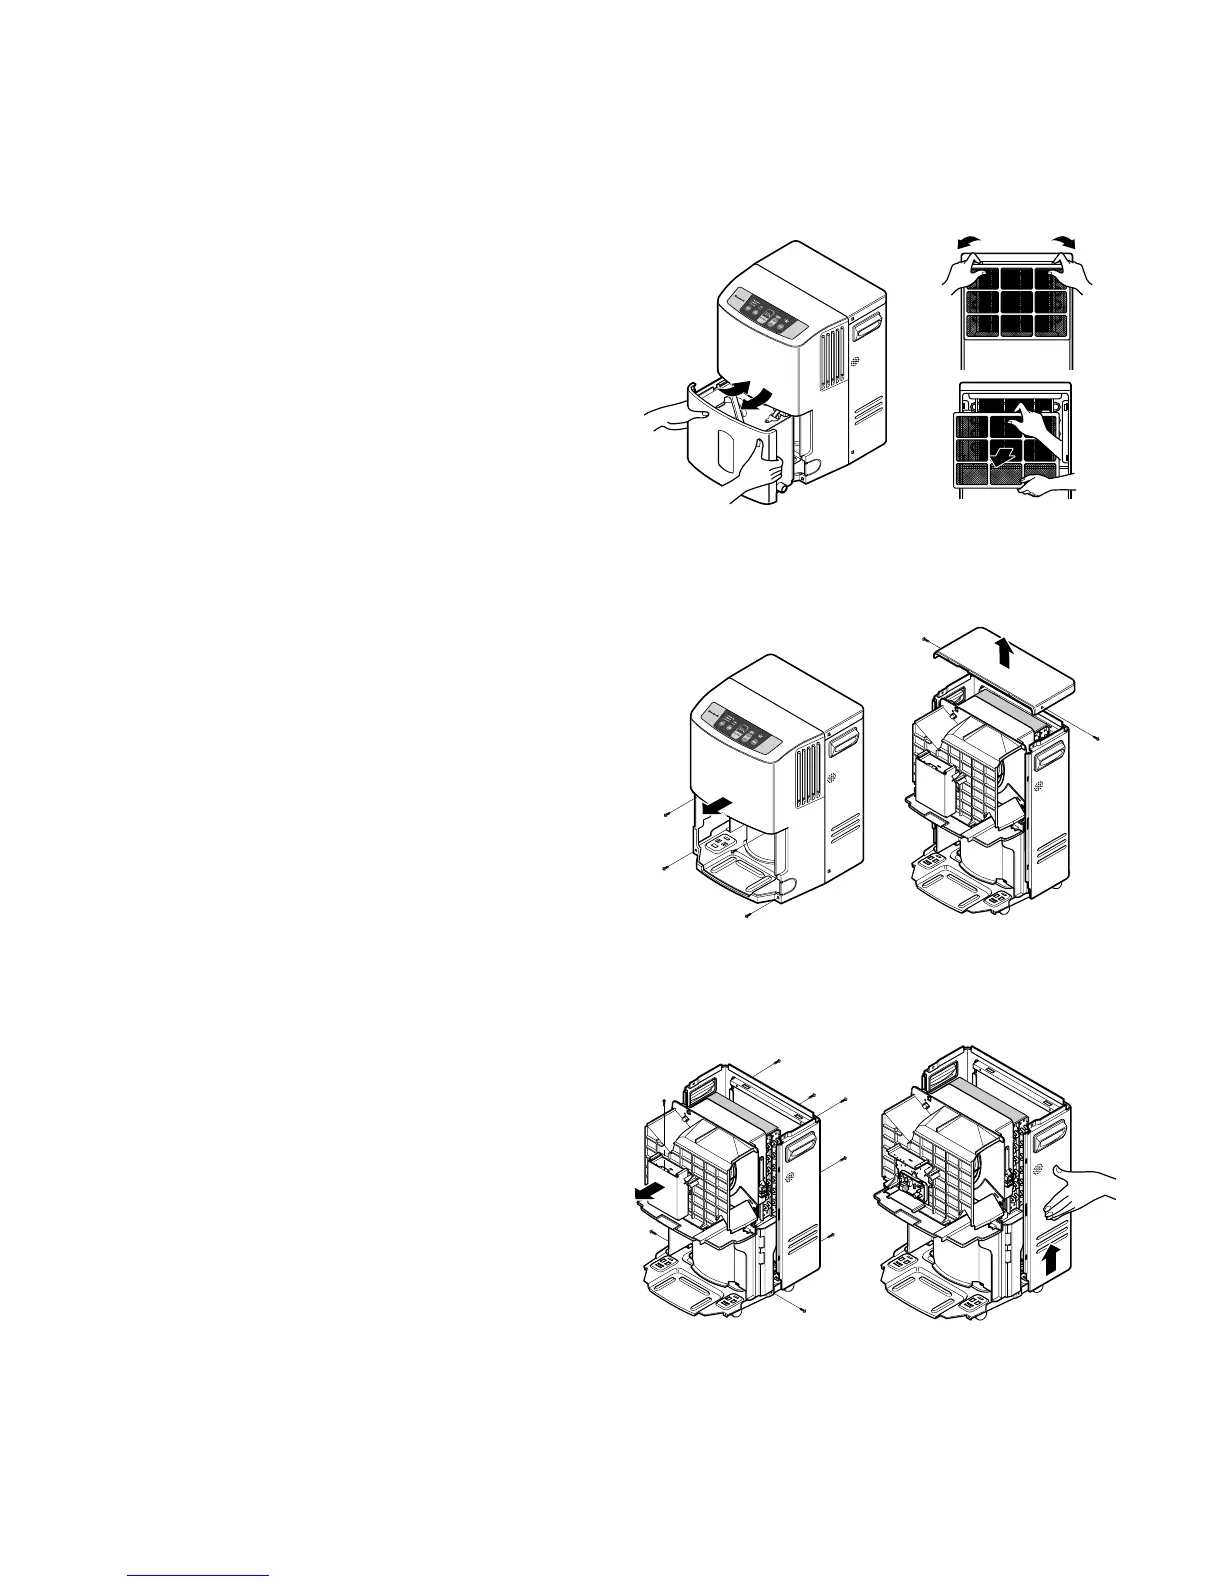
1. Disconnect the power supply.
2. Press the power button off.
3. Remove the bucket. (See Figure 7)
4. Pressing the hooks, pull out the air filter.
(See Figure 8)
3.1.2 FRONT CASE AND TOP COVER
1. Remove 4 screws which fasten the front case.
2. Pull the front case at the lower side to the front and
push front case upward. (See Figure 9)
3. Remove 2 screws that secure the top cover and
cabinet.
4. Separate the top cover. (See Figure 10)
3.1.3.
CABINET AND CONTROL BOX (Upper)
1. Remove the bucket, air filter and top cover
according to the procedure above.
2. Remove a screws which fasten the control box
(upper), and pull out the control box (upper). (See
Figure 11)
3. Disconnect housing PWB(PCB) ASSEMBLY,
DISPLAY from control box(lower) and remove front
case completely.
4. Remove 7 screws on all sides of the cabinet.
5. Lift up the cabinet a little from the base pan and
separate it by pulling out backward.
(See Figure 12)
—10—
3. DISASSEMBLY INSTRUCTIONS
Figure 7 Figure 8
Figure 9 Figure 10
Figure 11 Figure 12
 Loading...