1-3
1.6 Adjusting the Pilot Flame
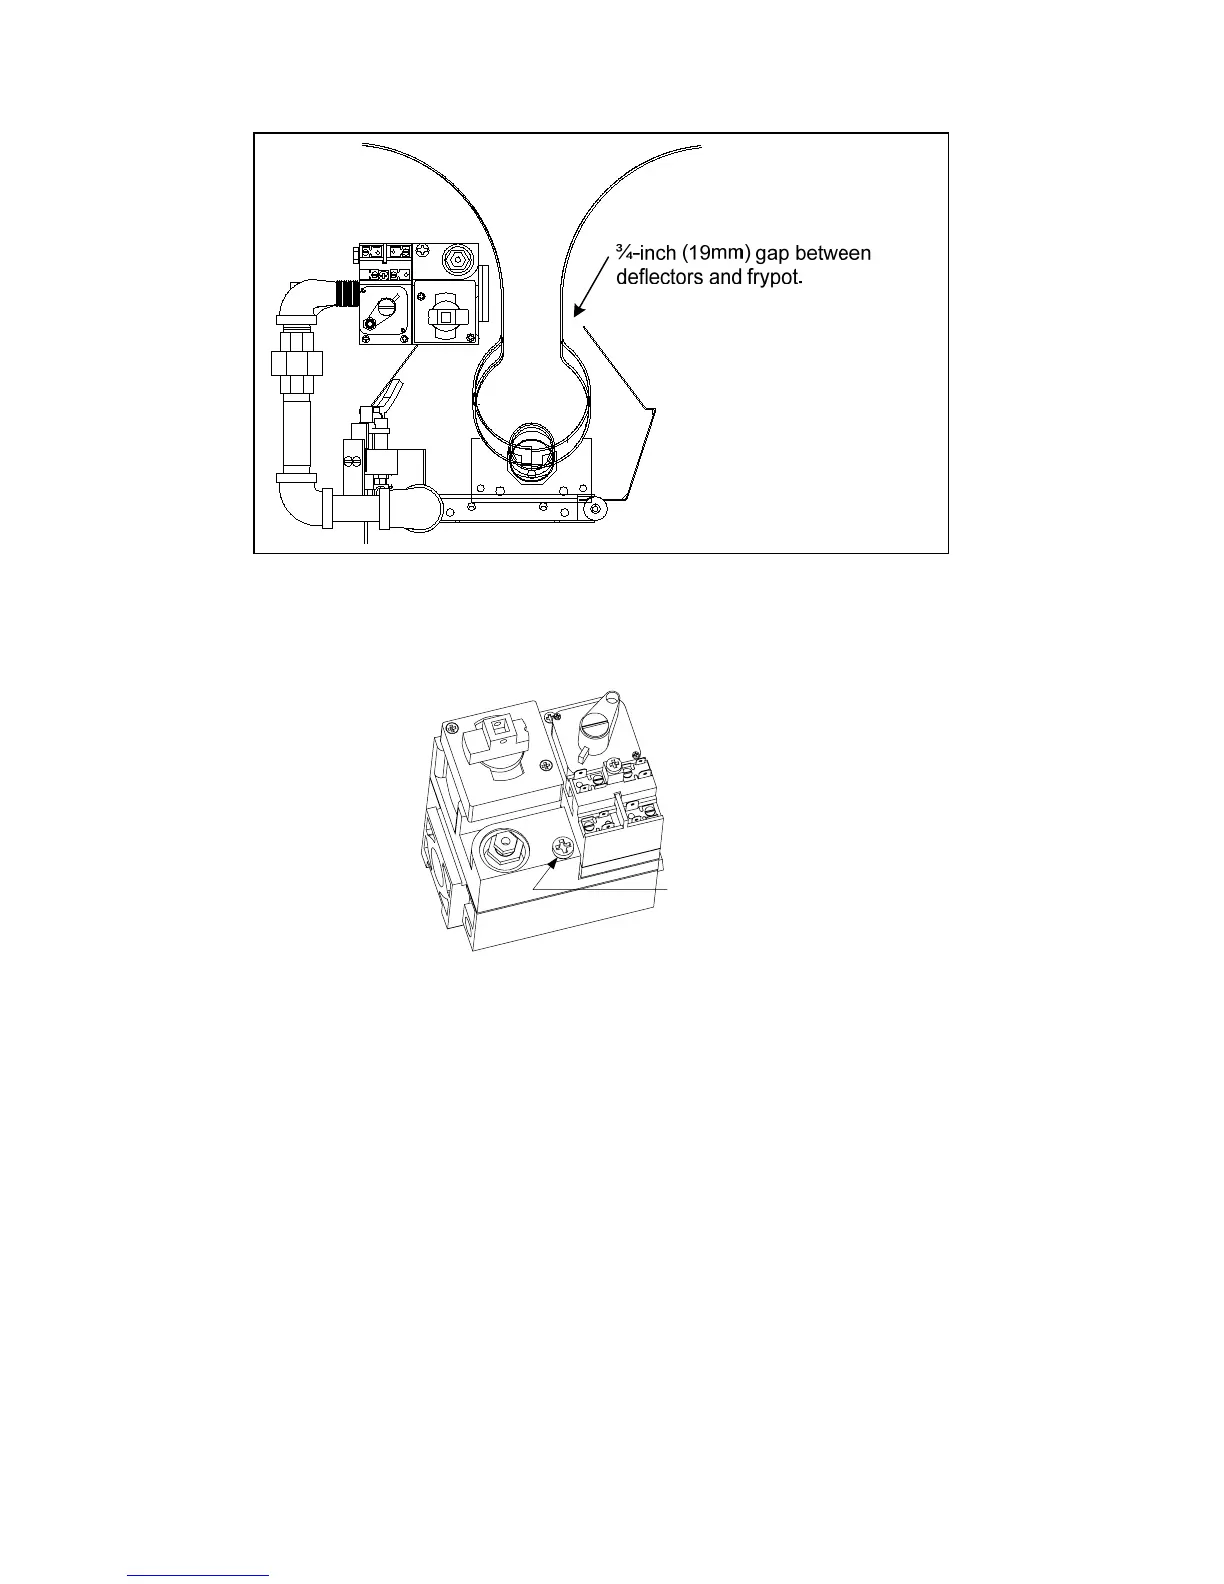
1. Remove the cap shown in the illustration below to access the pilot flame adjustment screw in the
gas valve.
Remove this cap to
access the pilot flame
adjustment screw.
2. Using a small, flat-tipped screwdriver, turn the pilot flame adjustment screw counterclockwise to
increase the length of the flame or clockwise to decrease the length of the flame. Adjust the
flame to a length of 1 to 1½ inches (25 to 38 mm).
3. Reinstall the pilot flame adjustment screw cap.
1.7 Replacing Fryer Components
1.7.1 Replacing the Operating Thermostat
1. Drain the fryer and turn the gas off.
2. Remove the thermostat knob by pulling straight out on the knob with a firm, steady pull.
3. Disconnect the wires from the thermostat.
4. Remove the two mounting screws to release the thermostat control from its mounting bracket.