Replacing Consumables
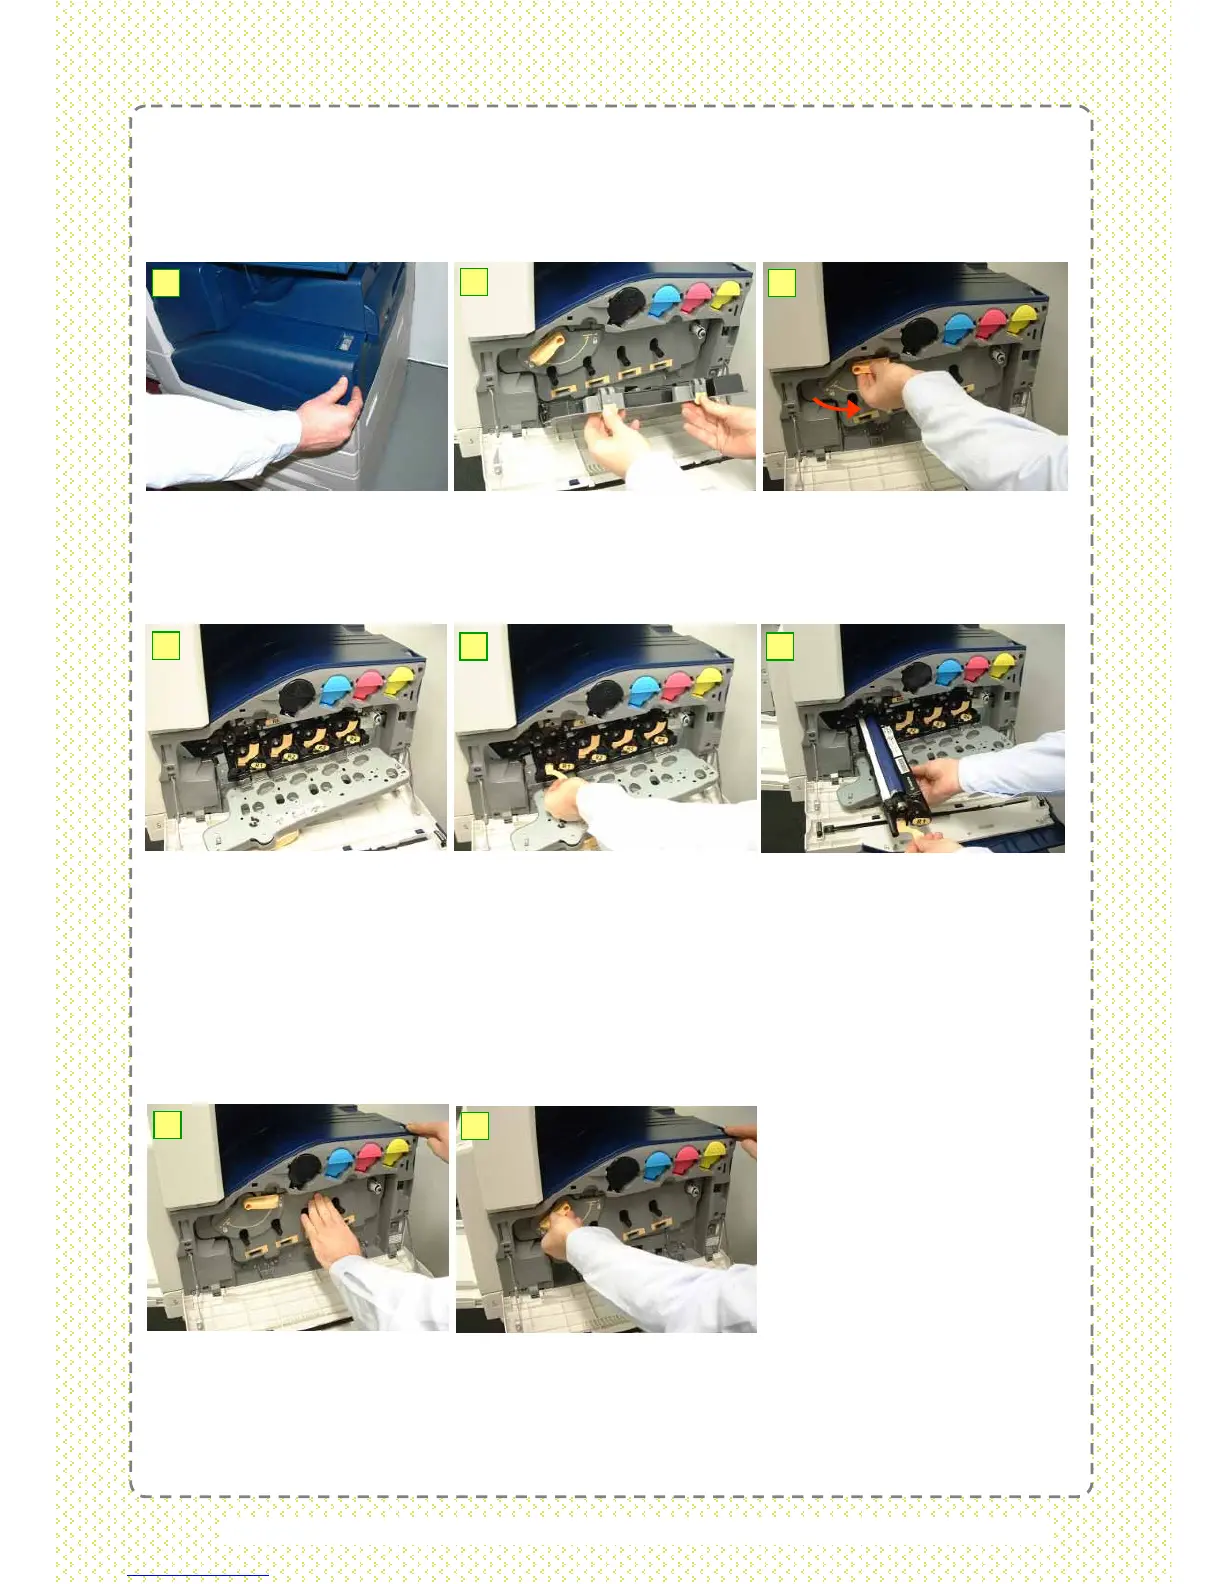
Replacing Drum Cartridge
CAUTION: Do not expose Drum Cartridge to direct sunlight or strong indoor fluorescent
lighting. Do not touch / scratch surface of the Drum. The Drum Cartridge can be replaced
with the machine powered ON. Ensure machine is idle before opening the Front Cover.
1: Remove the new Drum Cartridge from the box and place it on a flat surface near the
machine. Do not place the Drum Cartridge upright. Open the Front Cover.
2: Pull down the handle to open the Waste Toner Cartridge.
3: Grasp the tan handle marked R9 and unlock by rotating it to the right.
For used cartridges disposal, please call us @ 1-300-88-1163 for collection.
1
2
4
5 6
7
8
3
4: Pull down the handle to open the Drum Cartridge Cover and access the four cartridges.
NOTE: There is resistance from the cover in its final stages of travel. It will be harder to
push down. This is normal as the release mechanism requires this tension.
5-6: Lift orange cartridge handle. Gently pull out Drum Cartridge (R1=Black, R2=Cyan,
R3=Magenta, R4=Yellow), as indicated on Touch Screen. Place used Drum Cartridge into
polythene bag supplied and put it in the box. Grasp the new Drum Cartridge, with the
protective cover still on the handle, and insert the end of cartridge into the machine up to
the arrow mark. Remove the seal from the top side of the Drum Cartridge.
7: Push Drum Cartridge into the machine by sliding the colored tab on top of the cartridge
towards the machine. Put the protective cover into the box. Lift up the Drum Cartridge
Cover to lock the Drum Cartridge.
8: Rotate the tan handle marked R9 to the right to the to lock the cover in place. Close
the Front Cover.
41
41
 Loading...