Operations during Copying
105
Copy
3
2
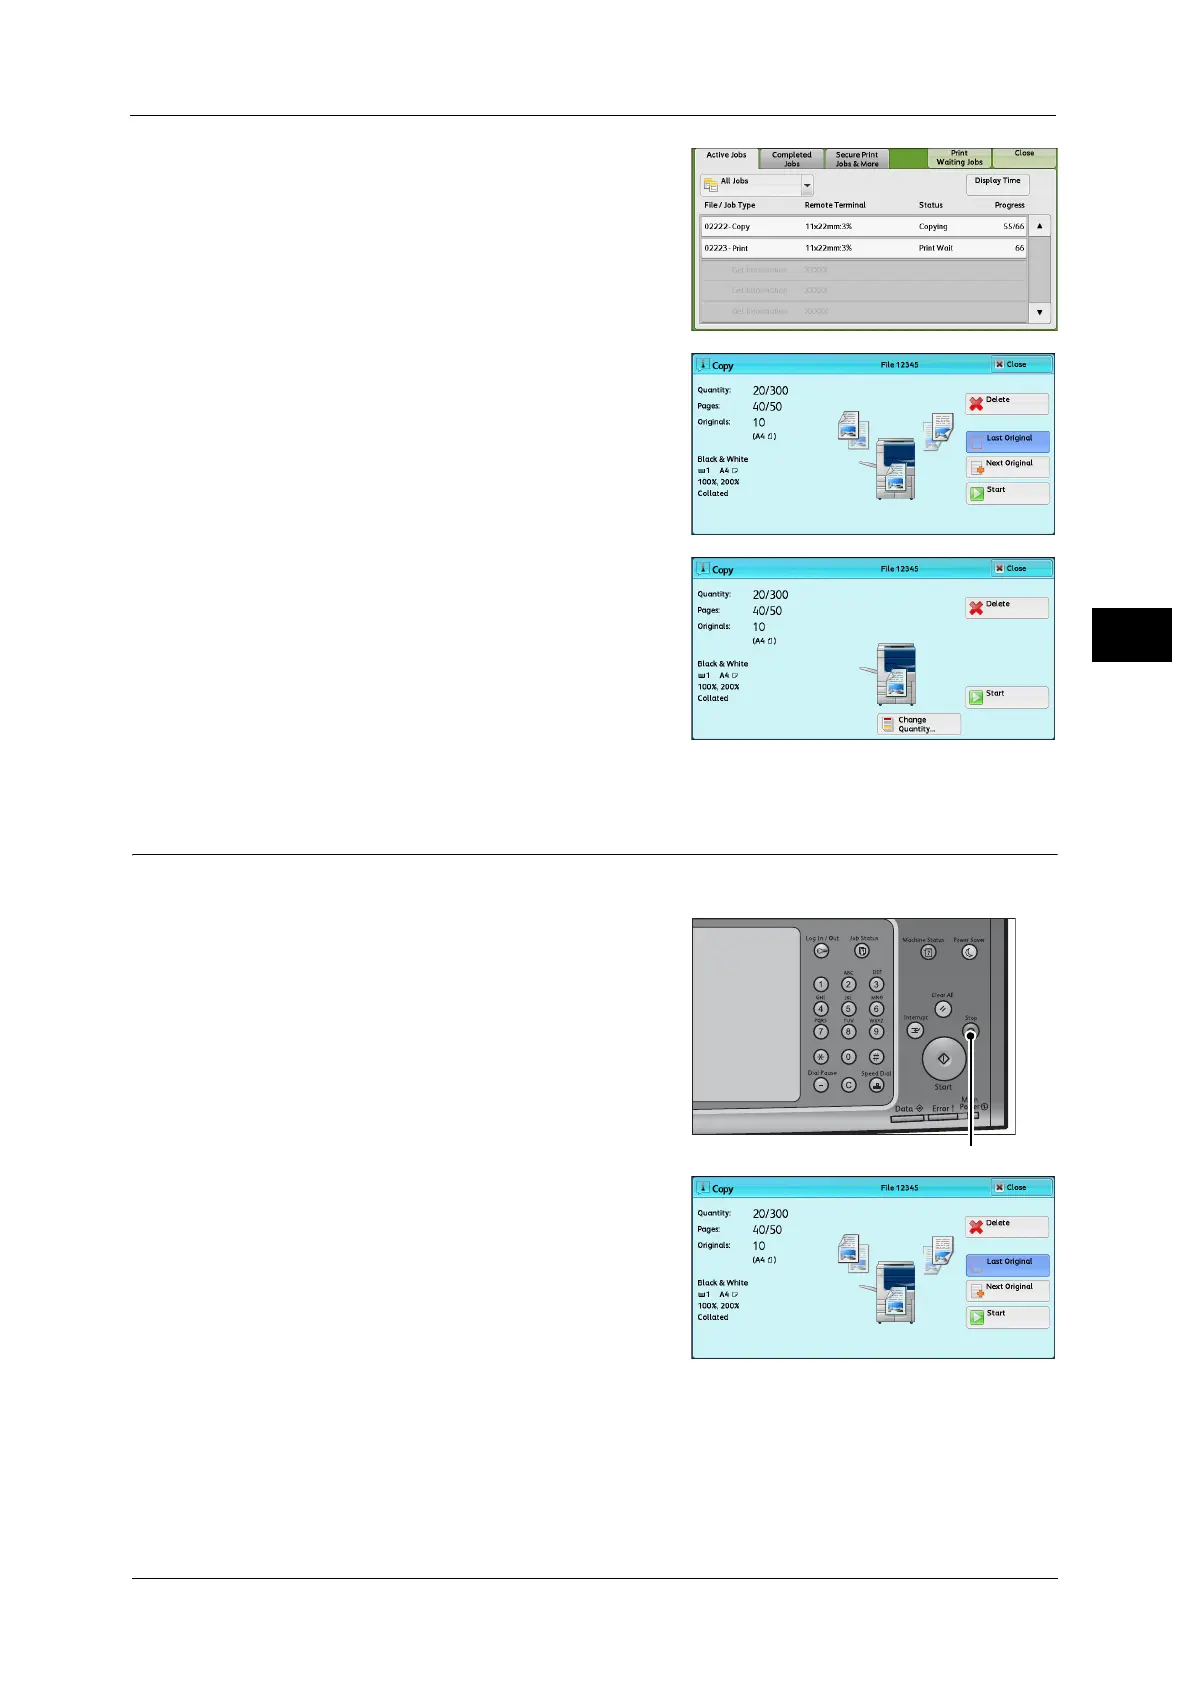
Select the job to cancel.
3 Select [Delete].
4 Select [Delete].
Changing the Number of Copies
To change the number of copy sets during scanning or copying, use the following procedure.
1 Press either the <Stop> button on the control
panel or [Delete] on the touch screen.
 Loading...


