EasyManua.ls Logo

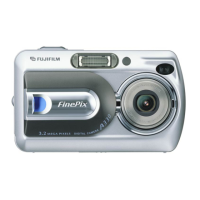
FujiFilm FinePix A120 User Manual

FujiFilm FinePix A120
43 pages
To Next Page IconTo Next Page
Page #1 background imageLoading...
Page #1 background image
Getting Ready
Using
the Camera
Advanced
Features
Software
Installation
Settings
Viewing Images
BL00360-200
(
1
)
1
2
3
4
5
6
This manual will show you how to use your
FUJIFILM DIGITAL CAMERA FinePix A120 correctly.
Please follow the instructions carefully.
OWNER’S MANUAL

Table of Contents

Other manuals for FujiFilm FinePix A120

Questions and Answers:

FujiFilm FinePix A120 Specifications

General IconGeneral
Optical Zoom3x
LCD Screen Size2.7 inches
Screen size2.7 inches
Video RecordingYes
Battery Type2 x AA batteries
Resolution4000 x 3000 pixels
Sensor size1/2.7-inch CCD
ISO Sensitivity100 / 200 / 400
Shutter Speed1/4 - 1/2000 sec
Video Resolution640 x 480
Storage MediaSD/SDHC
Image Sensor1/2.7-inch CCD

Summary

Getting Ready

Loading Batteries and Media

How to insert batteries and xD-Picture Card for camera operation.

Turning Camera On and Off

Instructions for powering the camera on and off in different modes.

Setting Date and Time

Configure the camera's internal clock for accurate date and time stamping.

Correcting Date and Time

Adjusting the camera's date and time settings after initial setup.

Changing Date Order

Customizing the date display format (Year/Month/Day).

Selecting Language

Choosing the on-screen display language for the camera menus.

Using the Camera

Still Photography Mode

Guides for taking still photos using various camera modes and features.

Taking Pictures (Auto Mode)

Step-by-step guide for capturing images using the automatic mode.

Using the Viewfinder

How to frame shots using the optical viewfinder and its indicators.

Number of Available Frames

Checking how many pictures can be saved on the memory card.

Using Digital Zoom

Instructions for magnifying the image digitally for closer shots.

Best Framing

Tips for composing shots using framing guidelines on the LCD monitor.

Playback Mode

Reviewing, managing, and deleting images stored on the camera.

Viewing Images (Playback)

Methods for displaying and navigating through recorded photos.

Erasing Images

Procedures for deleting unwanted photos from the camera.

Advanced Features

Still Photography Functions

Detailed settings for optimizing still image capture quality and effects.

Selecting Camera Settings

Guide to choosing photography mode, macro, flash, quality, self-timer.

Macro (Close-up) Photography

How to take sharp close-up photos using the macro function.

Flash Settings

Options for controlling flash modes like Auto, Red-eye, Slow Synchro.

Still Photography Menu

Accessing and using the camera's menu for detailed shooting options.

Photography Menu Operation

Navigating the photography menu and changing settings.

Quality Settings in Still Photography Mode

Choosing image resolution and compression for still photos.

Self-Timer Photography

Using the self-timer for group shots or when the photographer is included.

Shooting Mode Selection

Switching between Auto, Manual, and Movie shooting modes.

EV (Exposure Compensation)

Adjusting exposure to make images brighter or darker.

White Balance Settings

Setting color balance based on lighting conditions for accurate colors.

Playback Menu

Options for managing and manipulating images after they are taken.

Erasing Single/All Frames

Deleting single or all unprotected images from the memory card.

DPOF Set Frame

Specifying print order format (DPOF) for selected images.

Protecting Images

Preventing accidental deletion of important photos.

Settings

Adjusting Monitor Brightness

How to change the brightness of the LCD screen for better visibility.

Set-Up Menu

Accessing and configuring various camera system settings.

Using the Set-Up Screen

Navigating and changing options within the camera's setup menu.

Software Installation

Installation on Windows PC

Step-by-step guide to install camera software on a Windows computer.

Installation on Mac OS 9.2

Instructions for installing camera software on older Macintosh systems.

Installation on Mac OS X

Guide to installing camera software on modern Macintosh operating systems.

Viewing Images

Camera Connection

Methods for connecting the camera to external devices for image transfer.

Using AC Power Adapter

Connecting the camera to AC power for stable operation during use.

Connecting to TV

How to display camera images and videos on a television screen.

Connecting Directly to Printer (PictBridge Function)

Printing images directly from the camera to a PictBridge-compatible printer.

Specifying Images for Printing on the Camera

Selecting images and print options directly on the camera for printing.

Specifying Images for Printing Without DPOF

Printing individual images without using the DPOF format.

Connecting to Computer

Transferring images and using camera functions via PC connection.

Connecting to Computer

Steps to establish a connection between the camera and PC.

Disconnecting Camera

Proper procedures for safely disconnecting the camera from the PC.

Using FinePixViewer

Overview and operation of the bundled software for managing images.

Mastering FinePixViewer

Learning the features and functions of the FinePixViewer application.

Uninstalling Software

Steps to remove the camera software from your computer.

Related product manuals