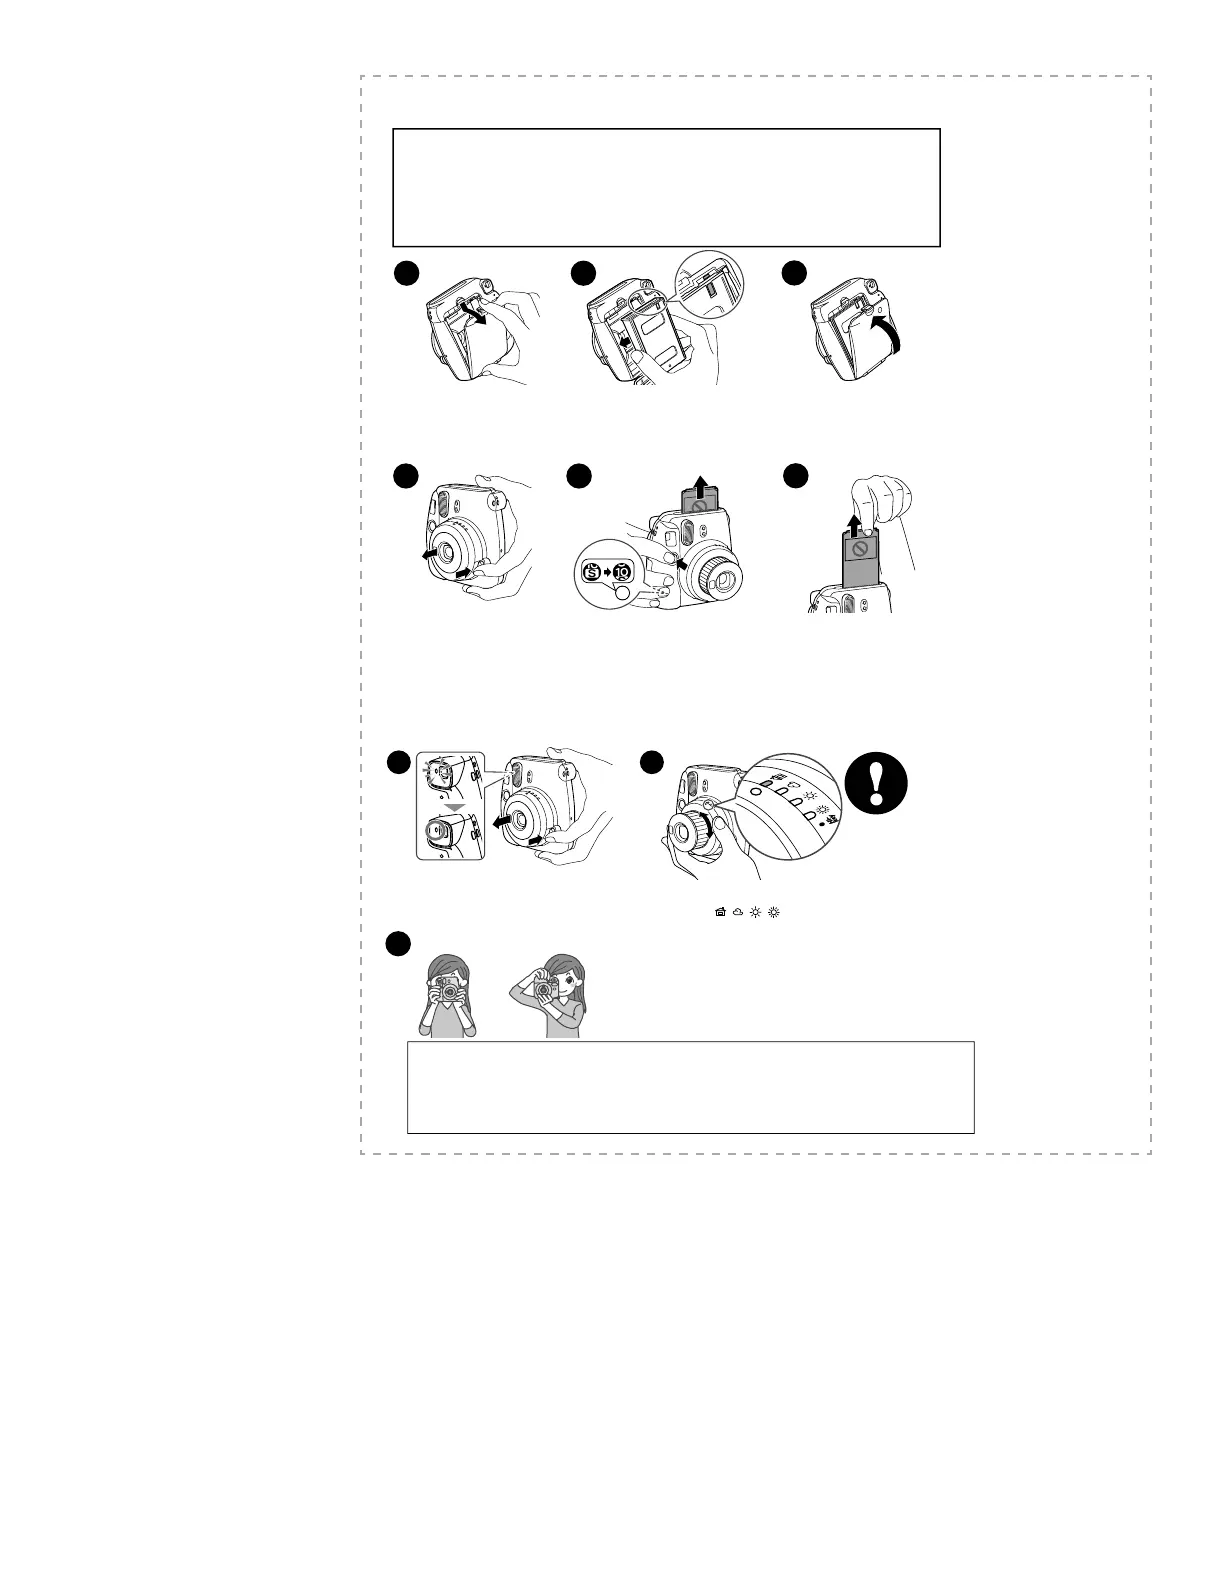
Loading the INSTAX mini Film Pack
1
Press down the back cover lock
to open the back cover.
Hold both sides of the lm pack, align the
yellow marks on the camera and the lm pack
as indicated on the INSTAX mini lm pack
instructions, then insert it straight.
2
3
Close the back cover until the back
cover lock clicks into place.
Caution
• Make sure that the batteries are installed before loading the lm pack.
• Avoid direct sunlight when loading the lm pack.
• Do not use any lm other than FUJIFILM INSTAX mini lm.
• When you load the lm pack, never press the two rectangular holes on the back.
• Do not open the back cover until you have used up the lm; otherwise, the rest of the lm is exposed and turns
white. The lm can no longer be used.
• Never use a lm pack beyond its shelf life; otherwise, it may damage the camera.
• For details, refer to the instructions and warnings on FUJIFILM INSTAX mini lm.
4
Press the power button to
turn the camera on.
The ash charging lamp on
the left of the eyepiece starts
blinking. (Indicates the ash is
charging.)
5
When you press the shutter button, the
lm cover (black) is ejected, and the lm
counter display on the back changes from
“S” to “10”.
After the lm cover has been ejected
(the camera stops making a sound),
grasp the edge of the lm, then take it
out.
Your camera is now ready to take a
photo.
6
[IMPORTANT] Taking Pictures
Press the power button to turn the camera on.
The ash charging lamp on the left of the eyepiece
starts blinking. (Indicates the ash is charging.)
You cannot take a photo while the lamp is blinking.
3
1
Turn the camera toward the subject, then turn
the brightness adjustment dial to move to the
position ( / / / ) where the lamp is lit.
Hold the camera, confi rm the desired composition of the fi nal image, then press the shutter button.
•
Keep a distance from the subject of at least 0.6 m. The fl ash has an eff ective range of between 0.6 m and 2.7m.
•
The subject will be out of focus using the regular lens if the distance is less than 0.6 m. Use the close-up lens for
short-distance photography. Using it enables you to photograph the subject between 35
cm and 50 cm.
•
In short-distance photography (including photography using the provided
close-up lens), the center of the
subject in the viewfi nder will be on the upper right on the actual print.
Caution on holding the camera
• For horizontal image, hold the camera with the ash lampface at the top.
• Do not take pictures where ash photography is forbidden.
•
Be careful so that your fi ngers or the strap do not cover the light sensor, ash lampface, fl ash, lens, or fi lm ejection slot.
• Do not grasp the lens barrel when positioning the camera; otherwise, the nished print may not look as expected.
• Look into the view nder so that the “O” mark appears in the center.
• Be careful not to touch the lens surface when you press the shutter button.
Vertical image Horizontal image
2