En-29
Selecting zone to be named:
1. In “Zone user setting” screen, select [Zone name setting]
with the [Cursor button (Up/Down)]. When you press the
[Enter button], “Name setting (group)” screen is displayed.
As a setting example, Zone 1 to 8 are supposed to be
connected in following instructions.
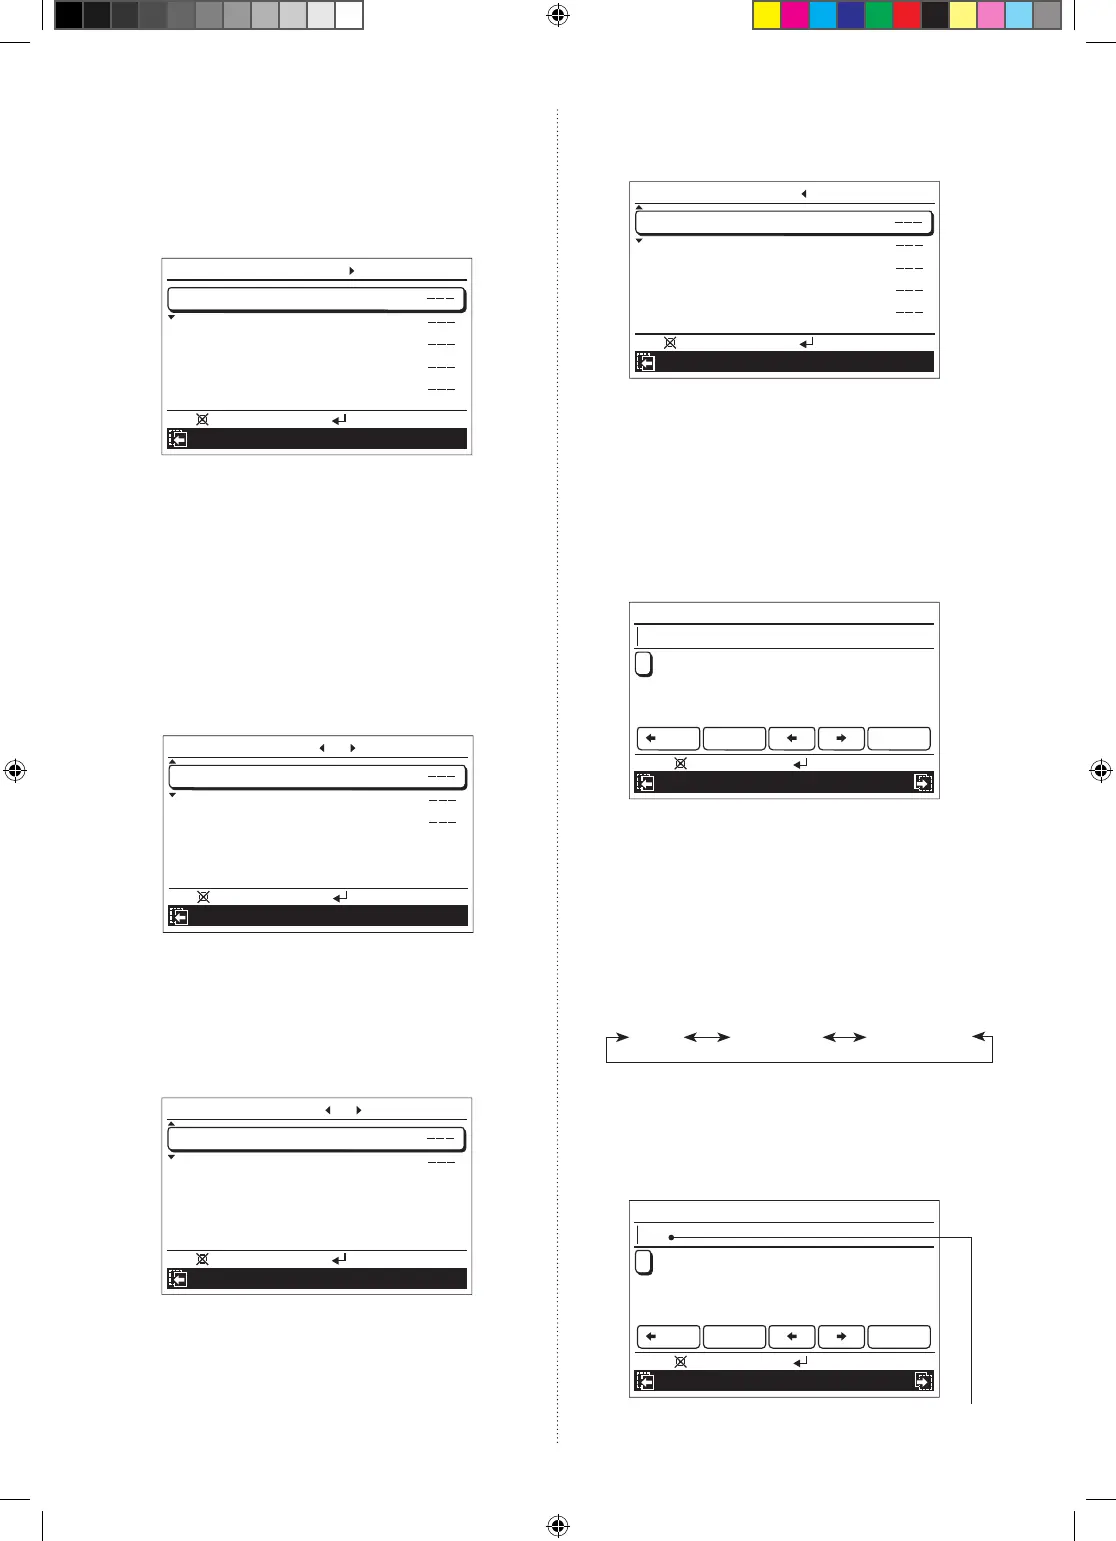
Name setting
(
zone
)
Zone 1
Zone 2
Zone 3
Zone 4
Zone 5
Mo
10:00
Setting:
Back:
Day/Night setting
[
1/4
]
If any names have been registered for the zones already,
the registered names are displayed instead of “---” on this
screen.
If more than 6 zones are connected, you will have an extra
page.
Any of following actions make the screen switches from
“Name setting (zone) [1/4]” to the extra setting screen.
•Pressing the [Cursor button (Right)] in “Name setting
(zone) [1/4]” screen.
•Pressing the [Cursor button (Down)] during the cursor
is set to the last zone name in “Name setting (zone)
[1/4]” screen.
Name setting
(
zone
)
Zone 6
Zone 7
Zone 8
Mo
10:00
Setting:
Back:
Day/Night setting
[
2/4
]
2. Select the zone to be named with the [Cursor button (Up/
Down)], and press the
[Enter button]
.
Selecting group to be named:
1. In “Name setting (zone)” screen, press the
[Cursor button
(Right)]. “Name setting (group)” screen opens.
Name setting
(
group
)
Day
Night
Mo
10:00
Setting:
Back:
Day/Night setting
[
3/4
]
If any names have been registered for the groups already,
the registered names are displayed instead of “---” on this
screen.
2. Select the group to be named with the [Cursor button (Up/
Down)], and press the
[Enter button]
.
Selecting room-temperature sensor to be named:
1. In “Name setting (group)” screen, press the
[Cursor button
(Right)]. “Name setting (sensor)” screen opens.
Name setting
(
sensor
)
Indoor unit
Primary RC
Secondary RC
Optional 1
Optional 2
Mo
10:00
Setting:
Back:
Day/Night setting
[
4/4
]
If any names have been registered for the sensors already,
the registered names are displayed instead of “---” on this
screen.
2. Select the sensor to be named with the [Cursor button (Up/
Down)], and press the
[Enter button]
.
When you press the [Enter button] after selecting any of zone,
group, or sensor, “Name setting” screen opens.
As the setting example, name setting screen for “Zone 1” is
used in following instructions.
Name setting
(
Zone 1
)
A
B C D E F
G
H I
J
K
L
M
N
O P
Q
R
S
T U V
W
X
Y
Z
&
( )
0
1 2 3 4 5 6 7 8
9
-
+
; :
.
,
/
_
Back Space End
Mo
10:00
Enter:
Cancel:
Preset names
Lower case
3
Enter desired name.
For entering the text of the name, there are following 3
screens.
•Capital
•Lowercase
•Presetnames
You can enter mixed text with “Capital”, “Lower case”,
and “Preset names”, up to 12 characters.
When you press the [Screen switch button (Left/Right)]
during entering the text, the screen switches as follows.
Capital Lower case Preset names
Capital:
You can select and enter desired capital letter
.
In “Capital” screen, set the cursor to the target letter with the
[Cursor button], and press the [Enter button].
Selectedletterisdisplayedinthetexteld.
Name setting
(
Zone 1
)
A
B C D E F
G
H I
J
K
L
M
N
O P
Q
R
S
T U V
W
X
Y
Z
&
( )
0
1 2 3 4 5 6 7 8
9
-
+
; :
.
,
/
_
Back Space End
Mo
10:00
Enter:
Cancel:
Preset names
Lower case
Texteld
9381067145_OM_EN.indd 29 14/09/2015 13:48:07
 Loading...