En-10
9. REMOVING AND REPLACING PARTS
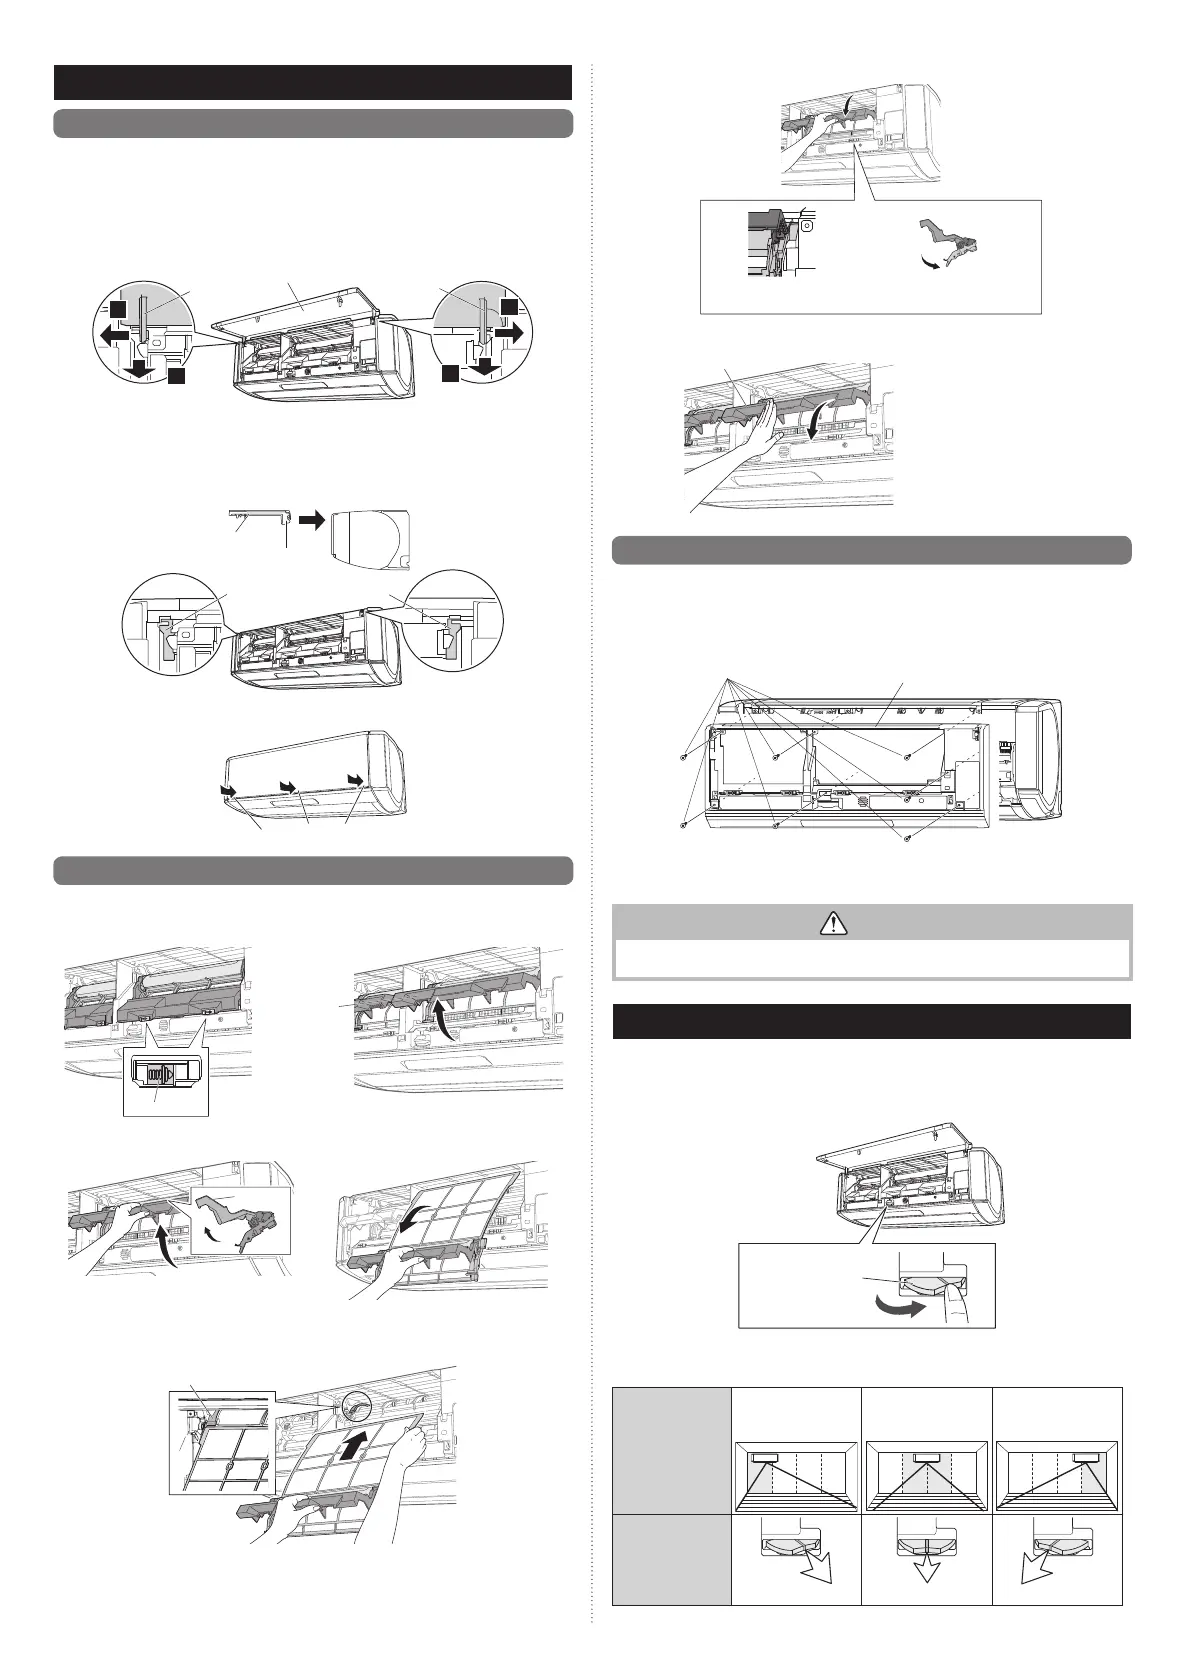
9.1. Intake grill removal and installation
Intake grill removal
(1) In the recesses of the lower ends of the intake grill, carefully work on them and pull them
to the front, and open the intake grill wide until it is slightly higher than the horizontal
line.
(2) While gently pressing and expanding the intake grill left and right mounting shaft to the
outside (arrow “a” direction), remove the intake grill in the arrow “b” (front) direction.
a
b
a
b
Intake grill
Mounting shaft Mounting shaft
Intake grill installation
(1) Attach the left and right mounting shaft in the direction of the arrow to the panel top
bearing while supporting the intake grill horizontally. Press this until it clicks so that each
shaft snaps into place.
Intake grill
Mounting shaft
Bearing Bearing
(2) Press and close the intake grille.
Press here
9.2. Dust box removal and installation
Dust box removal
(1) Slide the stopper to the right.
Stopper
The handle
opens.
(2) Pull out the dust box and air fi lter.
Handle
Hold the handle and
pull upward.
Pull out towards you.
Dust box installation
(1) Insert the air fi lter along the indoor unit rails.
Rails (left and right)
(2) Push the dust box to the rear and attach it, downwards to the lower side.
(1) Push to the rear of
the indoor unit.
(2) Push down to the
lower side to attach.
(3) Close the handle.
Handle
The stopper locks when
the handle is lowered.
9.3. Front panel removal and installation
* This description has the intake grill, dust box and wire cover removed.
Front panel removal
Remove the screws (7 places) on the front panel, and remove the front panel by pulling it
to the front.
Front panelScrew
Front panel installation
Fit the front panel, and attach the front panel screws (7 places).
CAUTION
Please take caution when removing or installing the front panel. If the front panel falls,
there is a risk of injury.
10. SETTING THE ORIENTATION OF THE HUMAN SENSOR
(1) Open the intake grille.
(2) Press the human sensor operation part with your fi nger and align the detection direc-
tion. (The detection direction can be changed by approximately 30° to the left and
right.)
Human sensor
operation part
(3) Press and close the intake grille.
[Guide to selection of installation position]
Indoor unit installa-
tion position
Center of indoor unit
is on the left of the
wall
Center of indoor unit
is in the center of the
wall
Center of indoor unit
is on the right of the
wall
Direction of human
sensor (detection
direction)
Right direction Center direction Left direction
9319357096_IM.indb 109319357096_IM.indb 10 2016/8/31 13:33:182016/8/31 13:33:18
 Loading...