En-4
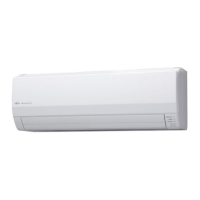
6.4. Installing the wall hook bracket
(1)Installthewallhookbracketsothatitiscorrectlypositionedhorizontallyandvertically.
Ifthewallhookbracketistitled,waterwilldriptotheoor.
(2)
Installthewallhookbracketsothatitisstrongenoughtosupporttheweightoftheunit.
•Fastenthewallhookbrackettothewallwith5ormorescrewsthroughtheholesnear
theouteredgeofthebracket.
•Checkthatthereisnorattleatthewallhookbracket.
Wallhookbracket
Tappingscrew(large)
(Accessory,8pcs)
CAUTION
Installthewall-hookbracketbothhorizontallyandverticallyaligned.
Misalignedinstallationmaycausewaterleakage.
6.5.
Forming the drain hose and pipe
CAUTION
•Insertdrainhoseanddraincapsecurely.Drainshouldslopedowntoavoidwaterleakage.
•When inserting the drain hose, no other material than water should be applied.
Applicationofothermaterialthanwaterwillcausedeteriorationofthehose,andmay
causewaterleakage.
•Afteryouremoveadrainhose,besuretoattachthedraincap.
•Whenyousecurethepipinganddrainhosewithtape,arrangethedrainhosesothat
itisatthebottomofthepiping.
•Fordrainhosepipinginlowtemperatureenvironment,youneedtoapplyfreeze
protectiontopreventafrozendrainhose.
Aftercoolingoperationisperformedinlowtemperatureenvironment,(whenoutdoor
temperatureunder0°C,)waterinthedrainhosecouldbefrozen.Frozendrainwater
willblockthewaterowinthehose,andmaycausewaterleakageattheindoorunit.
[Rear piping, Right piping, Bottom piping]
•Installtheindoorunitpipinginthedirectionofthewallholeandbindthedrainhose
andpipetogetherwithvinyltape.
•Installthepipingsothatthedrainhoseisatthebottom.
•Wrapthepipesoftheindoorunitthatarevisiblefromtheoutsidewithdecorativetape.
Rightpiping
Bindwithvinyltape
Indoorunitdrainhose
(bottom)
Pipe(top)
Rearpiping
Bottompiping
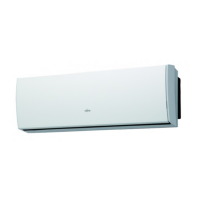
[For Left rear piping, Left piping]
Interchangethedraincapandthedrainhose.
Draincap
Indoorunit
drainhose
Removethedraincapbypull-
ingattheprojectionattheend
ofthecapwithpliers,etc.
Forleftoutletpiping,cut
offthepipingoutletcutting
groovewithahacksaw.
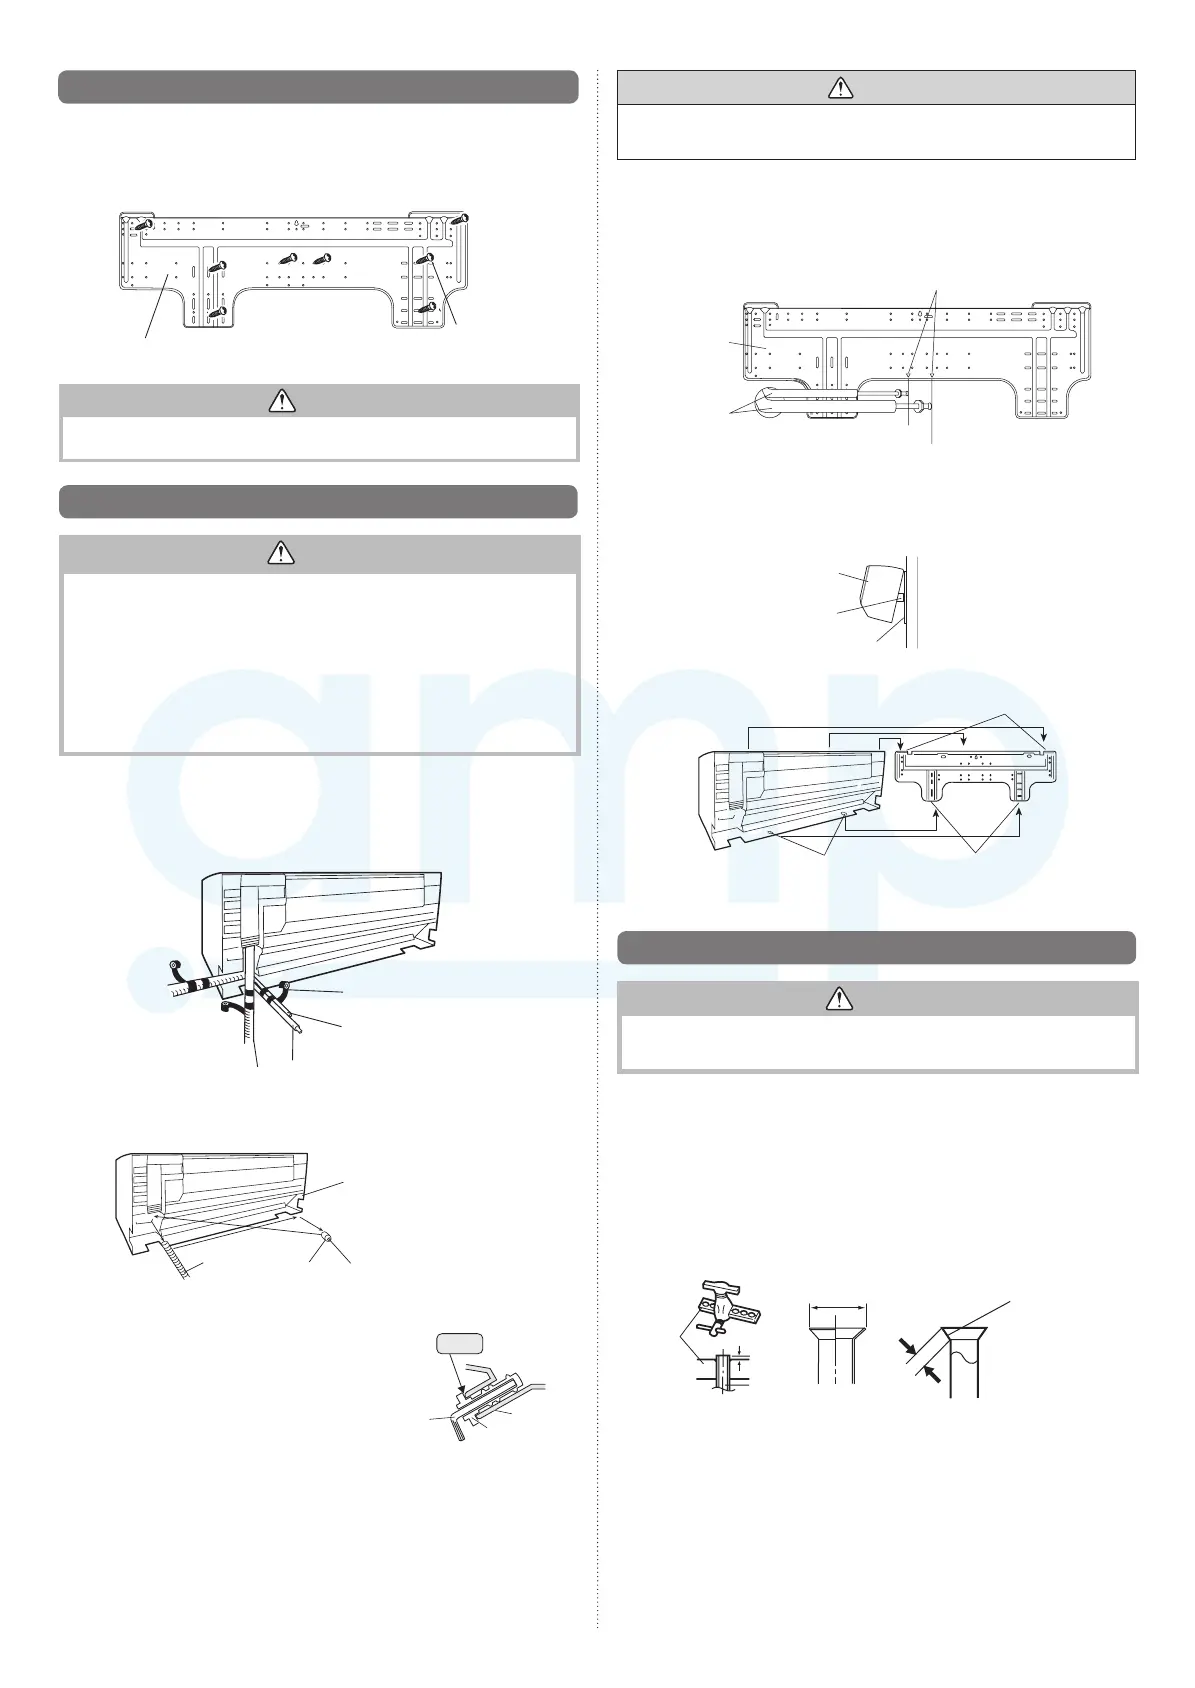
Installing the Drain cap
Useahexagonalwrench4mmatoppositesideto
insertthedraincap,tillthedraincapcontactsthetip
ofthedraincock.
Nogap
Hexagonal
wrench
Drain
cock
Draincap
CAUTION
Insertthedrainhoseanddrain capinto thedrain port,making surethat itcomes
incontact with the back of the drain port, and then mount it.If the drain hose is not
connectedproperly,leakingwilloccur.
•Forleftpipingandleftrearpiping,alignthemarksonthewallhookbracketandshape
theconnectionpipe.
•Bendtheconnectionpipingatthebendradiusof100mmormoreandinstallnomore
than35mmfromthewall.
•Afterpassingtheindoorpipinganddrainhosethroughthewallhole,hangtheindoorunit
onthehooksatthetopandbottomofthewallhookbracket.
Wallhook
bracket
Alignmentmarks
Smallpiping
Connection
piping
Largepiping
[Installing the indoor unit]
• Hangtheindoorunitfromthehooksatthetopofthewallhookbracket.
• Insertthespacer,etc.betweentheindoorunitandthewallhookbracketandseparate
thebottomoftheindoorunitfromthewall.
Indoorunit
Wallhookbracket
(Spacer)
Tophooks
Indoor
unit
(Fitting)
Bottomhooks
Wallhook
bracket
• Afterhookingtheindoorunittothetophook,hookthettingsoftheindoorunittothe2
bottomhookswhileloweringtheunitandpushingitagainstthewall.
6.6. Flare connection (Pipe connection)
CAUTION
Tightentheflarenutswithatorquewrenchusingthespecifiedtighteningmethod.
Otherwise,thearenutscouldbreakafteraprolongedperiod,causingrefrigeranttoleak
andgeneratehazardousgasiftherefrigerantcomesintocontactwithaame.
6.6.1. Flaring
UsespecialpipecutterandaretooldesignedforR410Apipework.
(1) Cuttheconnectionpipetothenecessarylengthwithapipecutter.
(2) Holdthepipedownwardsothatcuttingswillnotenterthepipeandremoveanyburrs.
(3) Insertthearenut(alwaysusethearenutattachedtotheindoorunit(s)andoutdoor
unitorbranchboxrespectively)ontothepipeandperformtheareprocessingwitha
aretool.UsethespecialR410Aaretool,ortheconventionalaretool.Leakageof
refrigerantmayresultifotherarenutsareused.
(4) Protectthepipesbypinchingthem orwithtape topreventdust, dirt,orwaterfrom
enteringthepipes.
Die
A
Pipe
B
L
Checkif[L]isflareduniformly
andisnotcrackedorscratched.
9387082050_IM.indb 4 12/10/2015 13:33:22
www.ampair.co.uk | sales@ampair.co.uk

 Loading...