En-8
13. SELECTING THE REMOTE CONTROLLER CUSTOM CODE
Whentwoormoreairconditionersareinstalledinaroomandtheremotecontrolleris
operatinganairconditionerotherthantheoneyouwishtoset,changethecustomcode
oftheremotecontrollertooperateonlytheairconditioneryouwishtoset(4selections
possible).
Whentwoormoreairconditionersareinstalledinaroom,pleasecontactyourretailerto
settheindividualairconditionercustomcodes.
Selecting the Remote Controller Custom Code
Usethefollowingstepstoselectthecustomcodeoftheremotecontroller.(Notethatthe
airconditionercannotreceiveasignaliftheairconditionerhasnotbeensetforthematch-
ingcustomcode.)
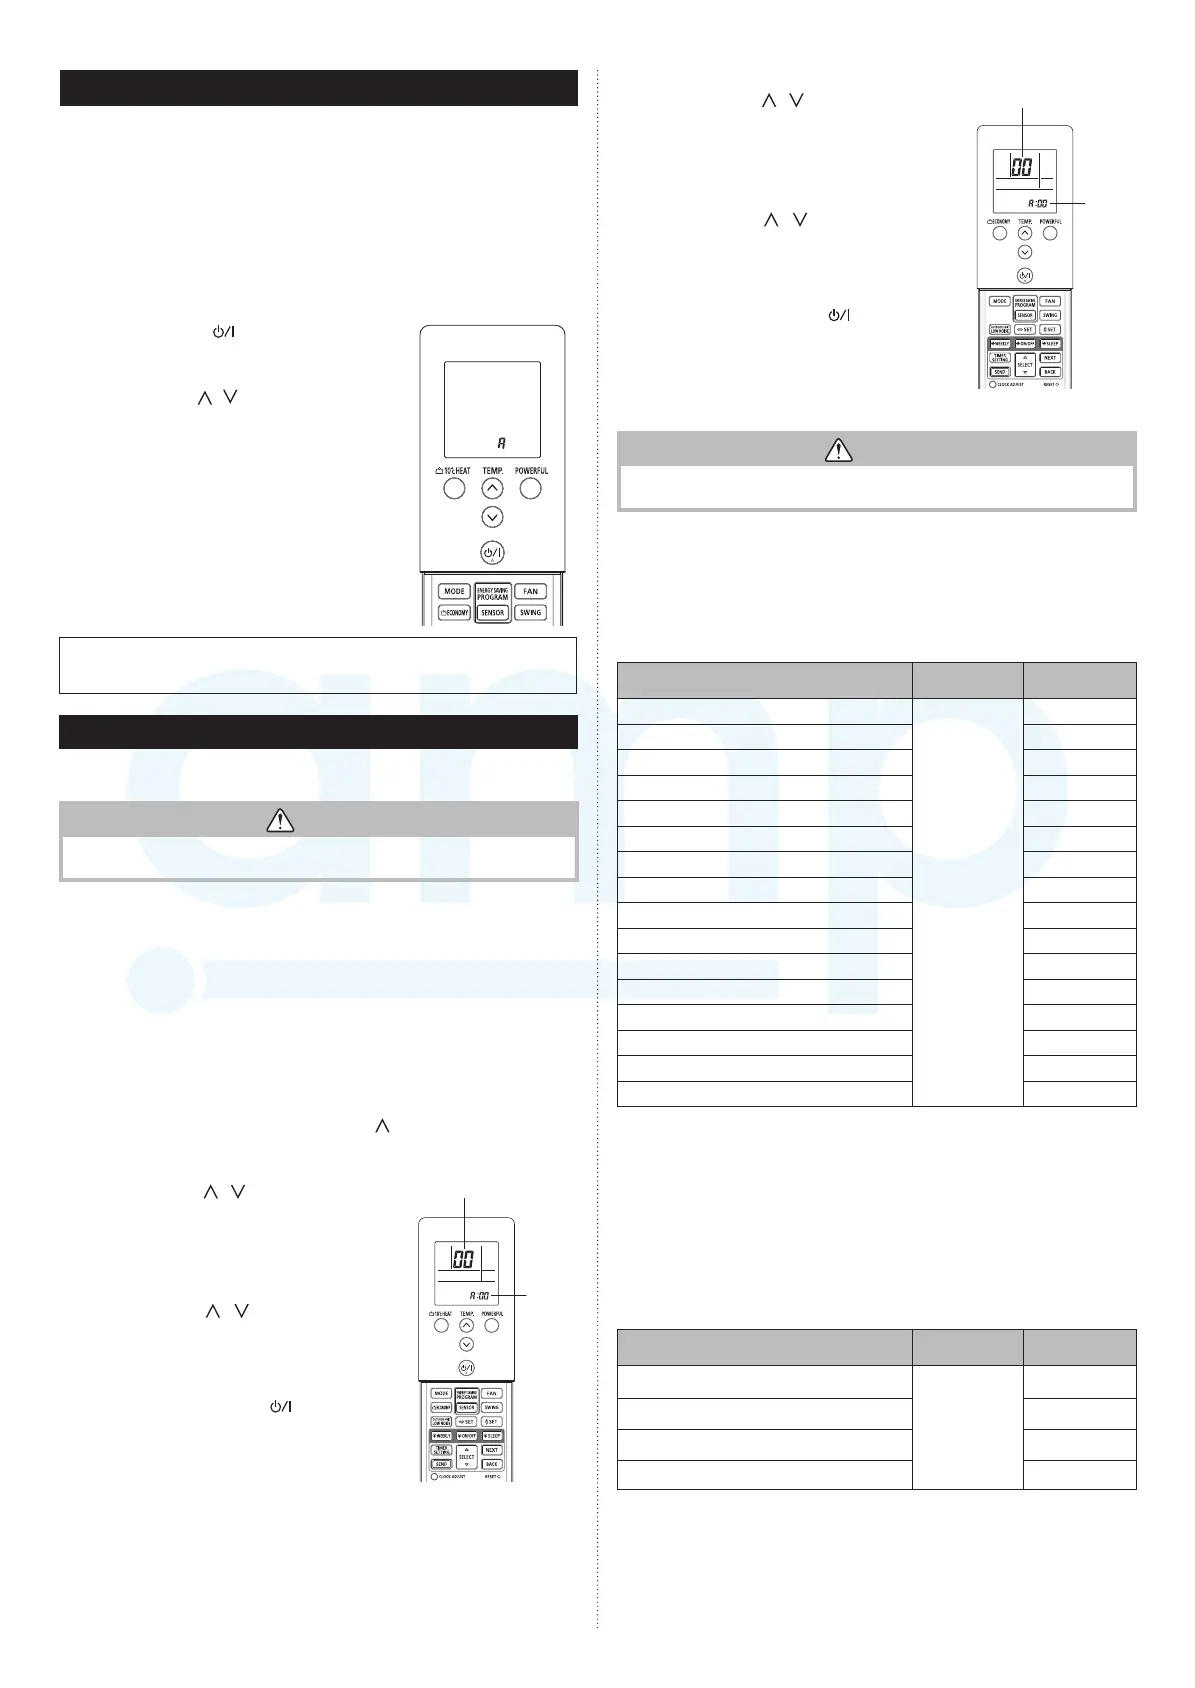
(1) Pressthe“Start/Stop(
)”buttonuntilonlytheclockis
displayedontheremotecontrollerdisplay.
(2) Pressthe“MODE”buttonforatleast5secondstodis-
playthecurrentcustomcode(initiallysettoA).
(3) Pressthe“TEMP.”(
/ )buttonstochangethecus-
tomcodebetweenA→B→C→D.
Matchthecodeonthedisplaytotheairconditioner
customcode.
(4) Pressthe“MODE”buttonagaintoreturntotheclock
display.Thecustomcodewillbechanged.
•Ifnobuttonsarepressedwithin30secondsafterthecustomcodeisdisplayed,the
systemreturnstotheoriginalclockdisplay.Inthiscase,startagainfromstep1.
•TheairconditionercustomcodeissettoApriortoshipment.
14. FUNCTION SETTING
Performthe“FUNCTIONSETTING”accordingtotheinstallationconditionsusingthe
remotecontroller.
CAUTION
•Conrmwhetherthewiringworkforoutdoorunithasbeennished.
•Conrmthatthecoverfortheelectricalenclosureontheoutdoorunitisinplace.
• Thisprocedurechangestothefunctionsettingsusedtocontroltheindoorunit
accordingtotheinstallationconditions.Incorrectsettingscancausetheindoorunitto
malfunction.
• Afterthepoweristurnedon,performthe“FUNCTIONSETTING”accordingtothe
installationconditionsusingtheremotecontroller.
• Thesettingsmaybeselectedbetweenthefollowingtwo:FunctionNumberorSetting
Value.
• Settingswillnotbechangedifinvalidnumbersorsettingvaluesareselected.
• Refertotheinstallationmanualenclosedwiththeremotecontrolunitwhenthewired
remotecontrolunit(option)isused.
Entering the Function Setting Mode
Whilepressingthe“POWERFUL”buttonand“TEMP.”( )buttonsimultaneously,press
the“RESET”buttontoenterthefunctionsettingmode.
Selecting the Function Number and Setting Value
[Reverse cycle model]
(1) Pressthe“TEMP.”(
/ )buttonstoselectthefunc-
tionnumber.(Pressthe “10°C HEAT”button to switch
betweentheleftandrightdigits.)
(2) Pressthe“POWERFUL”button toproceedto setting
value.(Pressthe“POWERFUL”buttonagainto return
tothefunctionnumberselection.)
(3) Press the “TEMP.” (
/ )buttons to select theset-
tingvalue.(Press the“10°C HEAT”buttontoswitch
betweentheleftandrightdigits.)
(4) Pressthe“MODE”buttononcetosendthefunctionset-
tinginformation.Pleaseconrmthebeepingsound.
(5) Next,pleasepress“Start/Stop(
)”buttononcetox
thefunctionsetting.Pleaseconrmthebeepingsound.
(6) Pressthe“RESET”buttontocancelthefunctionsetting
mode.
(7) AftercompletingtheFUNCTIONSETTING,besureto
turnoffthepowerandturnitonagain.
Function Number
Setting
Value
Selecting the Function Number and Setting Value
[Cool model]
(1) Pressthe“TEMP.”(
/ )buttonstoselectthefunc-
tionnumber.(Press the “ECONOMY” button to switch
betweentheleftandrightdigits.)
(2) Pressthe“POWERFUL”button toproceedto setting
value.(Pressthe“POWERFUL”buttonagainto return
tothefunctionnumberselection.)
(3) Press the “TEMP.” (
/ )buttons to select theset-
tingvalue.(Pressthe“ECONOMY”buttontoswitch
betweentheleftandrightdigits.)
(4) Pressthe“MODE”buttononcetosendthefunctionset-
tinginformation.Pleaseconrmthebeepingsound.
(5) Next,pleasepress“Start/Stop(
)”buttononcetox
thefunctionsetting.Pleaseconrmthebeepingsound.
(6) Pressthe“RESET”buttontocancelthefunctionsetting
mode.
(7) AftercompletingtheFUNCTIONSETTING,besureto
turnoffthepowerandturnitonagain.
Function Number
Setting
Value
CAUTION
Afterturningoffthepower,wait30secondsormorebeforeturningonitagain.The
functionsettingdoesnotbecomeactiveunlessthepoweristurnedoffthenonagain.
Remote controller address setting
*Becausethissettingisnormallydoneautomaticallywhen2-wire-typewiredremotecontroller
isinstalled,settingisunnecessary.
Multipleindoorunitscanbeoperatedbyusingonewiredremotecontroller.
Settheunitnumberofeachindoorunit.
(♦...Factorysetting)
Setting Description
Function
Number
Setting Value
♦ Unitno.0
00
00
Unitno.1 01
Unitno.2 02
Unitno.3 03
Unitno.4 04
Unitno.5 05
Unitno.6 06
Unitno.7 07
Unitno.8 08
Unitno.9 09
Unitno.10 10
Unitno.11 11
Unitno.12 12
Unitno.13 13
Unitno.14 14
Unitno.15 15
*WhenconnectingPolar3-corewiredremotecontroller,settheremotecontrolleraddress
intheorderof0,1,2,.....,and15.
*Whendifferenttypeofindoorunits(suchaswall-mountedtypeandcassettetype,cassette
typeandducttype,orothercombinations)areconnectedusinggroupcontrolsystem,some
functionsmaynolongerbeavailable.
Filter sign
Selectappropriateintervalsfordisplayingtheltersignontheindoorunitaccordingtothe
estimatedamountofdustintheairoftheroom.
Iftheindicationisnotrequired,select“Noindication”(03).
(♦...Factorysetting)
Setting Description
Function
Number
Setting Value
Standard(400hours)
11
00
Longinterval(1,000hours) 01
Shortinterval(200hours) 02
♦ Noindication 03
9387082050_IM.indb 8 12/10/2015 13:33:28
www.ampair.co.uk | sales@ampair.co.uk

 Loading...