|Installing a Cisco Nexus 9336C-FX2 switch and pass-through panel in a Fujitsu cabinet|
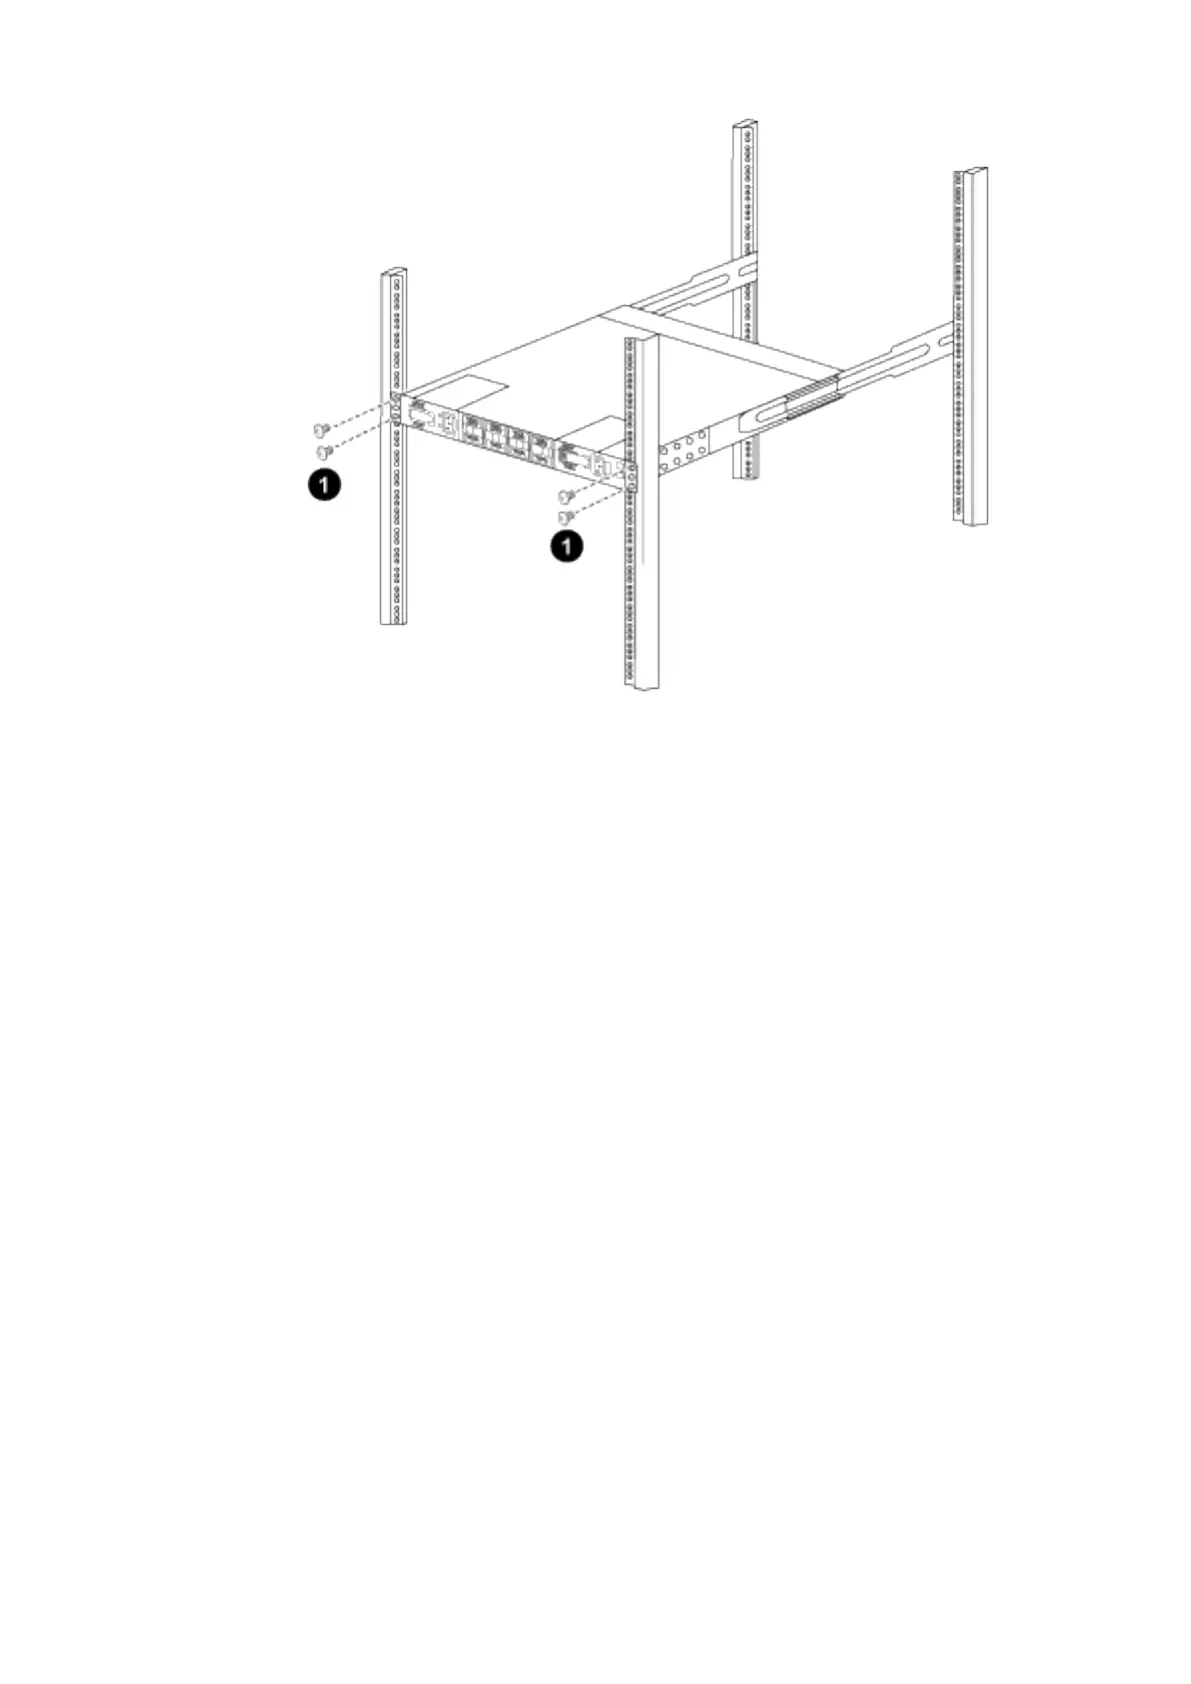
1. With one person holding the front of the chassis level, the other person should fully tighten the four
rear screws to the cabinet posts.
c) With the chassis now supported without assistance, fully tighten the front screws to the posts.
d) Repeat steps 5a through 5c for the second switch at the RU42 location.
Note: By using the fully installed switch as a support, it is not necessary to hold the front of the second
switch during the installation process.
6. When the switches are installed, connect the jumper cords to the switch power inlets.
7. Connect the male plugs of both jumper cords to the closest available PDU outlets.
Note: To maintain redundancy, the two cords must be connected to different PDUs.
8. Connect the management port on each 9336C-FX2 switch to either of the management switches (if
ordered) or connect them directly to your management network.
The management port is the upper-right port located on the PSU side of the switch. The CAT6 cable for
each switch needs to be routed through the pass-through panel after the switches are installed to connect
to the management switches or management network.
6
 Loading...


