WWW.FUNNMTB.COM
RIPPER CLIPLESS PEDALS 2024.05.01 / REV. 2
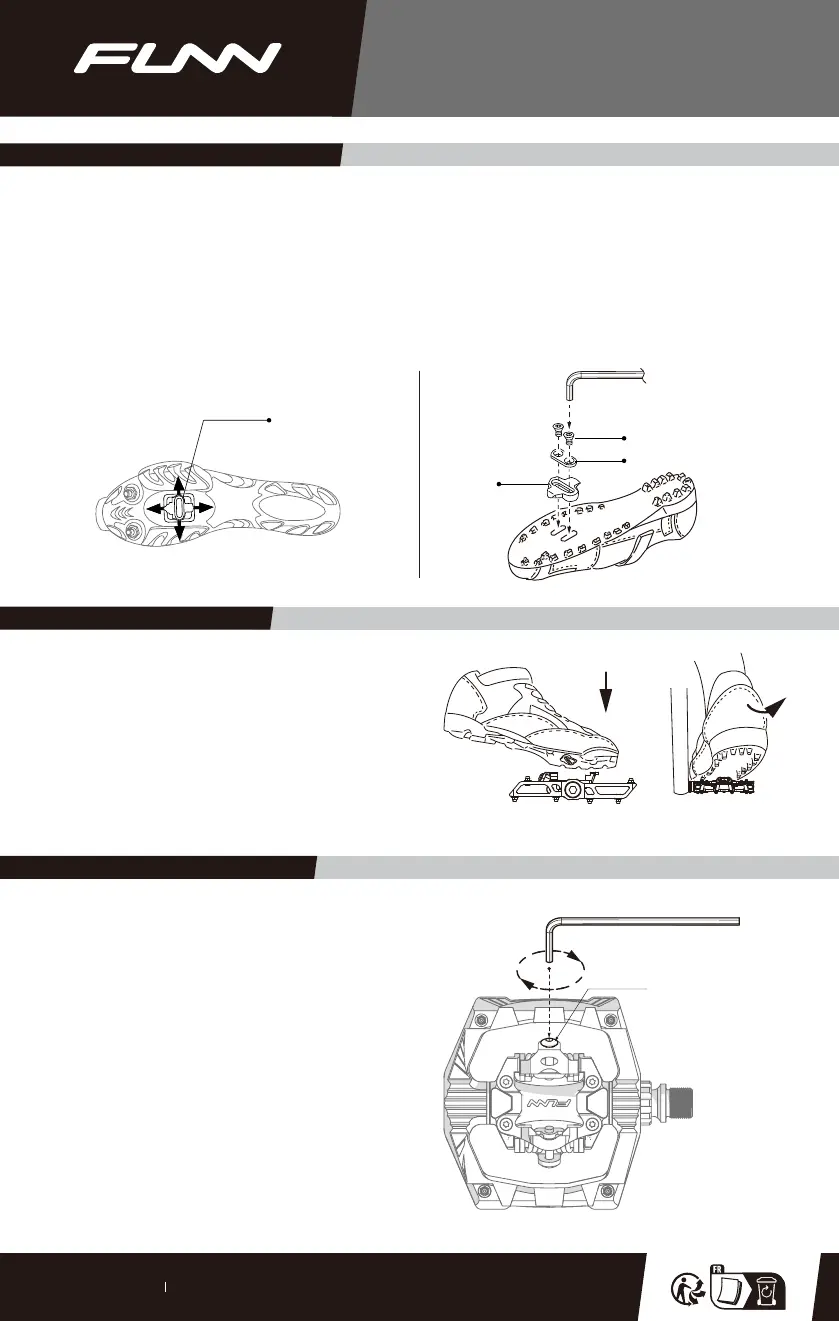
INSTALLATION AND USE
Tension adjuster
Binding tension range
8-14 Nm (69–121 lb-in)
INCREASE
3mm hex key
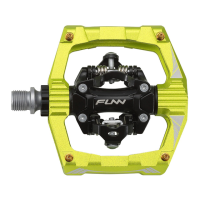
RIPPER CLIPLESS PEDALS
4mm hex key
Cleat bolts
Cleat
Cleat washer
Adjust cleat vertically
and horizontally
Install Cleats to Cycling Shoes
Engage and Disengage
Apply a thin layer of grease to the cleat bolt threads, then loosely attach the cleat bolts and washers to the shoe soles using
the 4mm hex key.
Position the cleat so that it aligns directly beneath the center of the ball of your foot. Vertical adjustment can be achieved
through the slots in the shoe's sole. For horizontal alignment, utilize the interplay between the cleat washer and the cleat itself.
Secure the cleat with a torque of 5-8Nm (44–70lb-in), being careful to avoid applying excessive force. The cleat's position
can be adjusted according to personal preference following initial trial rides. Finding the ideal cleat configuration may require
several rides to achieve perfection.
To engage cleated shoes with the pedals, align the cleat between
the front and rear bindings while applying downward pressure.
Disengage by twisting the heel outward (away from the bicycle).
If necessary, the cleat can also be released by twisting the heel
inward.
Binding Tension Adjustment
The tension adjuster is positioned on the rear binding. To
adjust the binding tension, utilize a 3mm hex key to turn the
tension adjuster.
Increase tension by turning clockwise for a firmer shoes binding,
albeit with more resistance in engaging and disengaging.
Decrease tension by turning counter-clockwise for a looser
shoes binding, offering easier engagement and disengagement.