19
3.4 Testing the Button
The SSAS buttons can be tested as below.
Note 1: An actual SSAS report cannot be transmitted during the testing.
Note 2: The equipment must be in the SSAS manager mode to conduct the test.
FELCOM 15
1. Press the [F7] key to display the Options menu.
2. Press the [7] key ([6] key when the FELCOM functions as an EGC receiver) to display
the Test menu.
Test
1. PV Test
2. PV Test Result
3. Diagnostic Test
4. Distress/SSAS Button Test
3. Press the [4] key.
1. Login
2. Logout
3. Abort
4. Select NCS
5. Ocean Region
6. Test
Options
1. PV Test
2. PV Test Result
3. Self Test
4. Distress Alarm Button Test
Test
Distress/SSAS Button Test
Start
No
Yes
4. Press the [Enter] key to start the test.
1. Login
2. Logout
3. Abort
4. Select NCS
5. Ocean Region
6. Test
Options
1. PV Test
2. PV Test Result
3. Self Test
4. Distress Alarm Button Test
Test
Distress/SSAS buttons are under test mode.
Press any key to escape.
Distress/SSAS Button Test
CAUTION
INF: Distress/SSAS Buttons entered into TEST MODE.
<Press ESC key to continue>
The display shows the message (in red) “Distress/SSAS buttons are under test. Cancel
the test mode if a real distress/SSAS needs to sent.” appears.
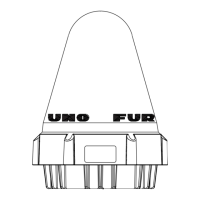
5. Open the button cover on the No.1 SSAS.
6. Push the button in ( ). The CAUTION window displays the message “SSAS UNIT
works correctly.” appears if the unit is functioning properly.
Note: 30 seconds after step 6, the SSAS test report is automatically sent. If you do not
need to send the SSAS report, go to step 8 within 30 seconds.
7. The SSAS test report is automatically sent once to the address specified for the
youngest SSAS report number (1-5).
8. Turn the button of the No. 1 SSAS off (
).
Note: To test the No. 2 and No. 3 SSAS repeat steps 6-8.
 Loading...