Getting Started
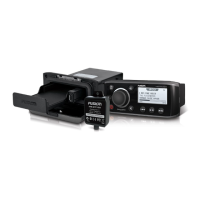
What's In the Box
• Two Mounting plates
• Mounting hardware
◦ Four 8-gauge, self-tapping screws
◦ Four M4 machine screws
• Power and speaker wiring harnesses
• RCA splitter
• Micro-USB to USB cable (UD models only)
• Lightning
™
connector to USB cable (UD models only)
• Apple
®
30-pin to USB cable (UD models only)
• Remote control (AV models only)
• Two AAA batteries (AV models only)
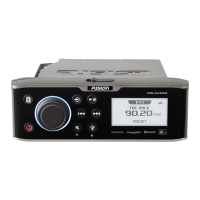
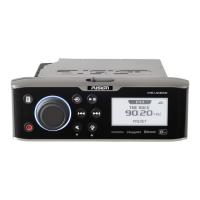
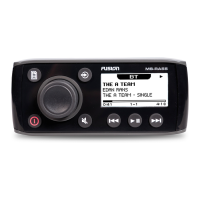
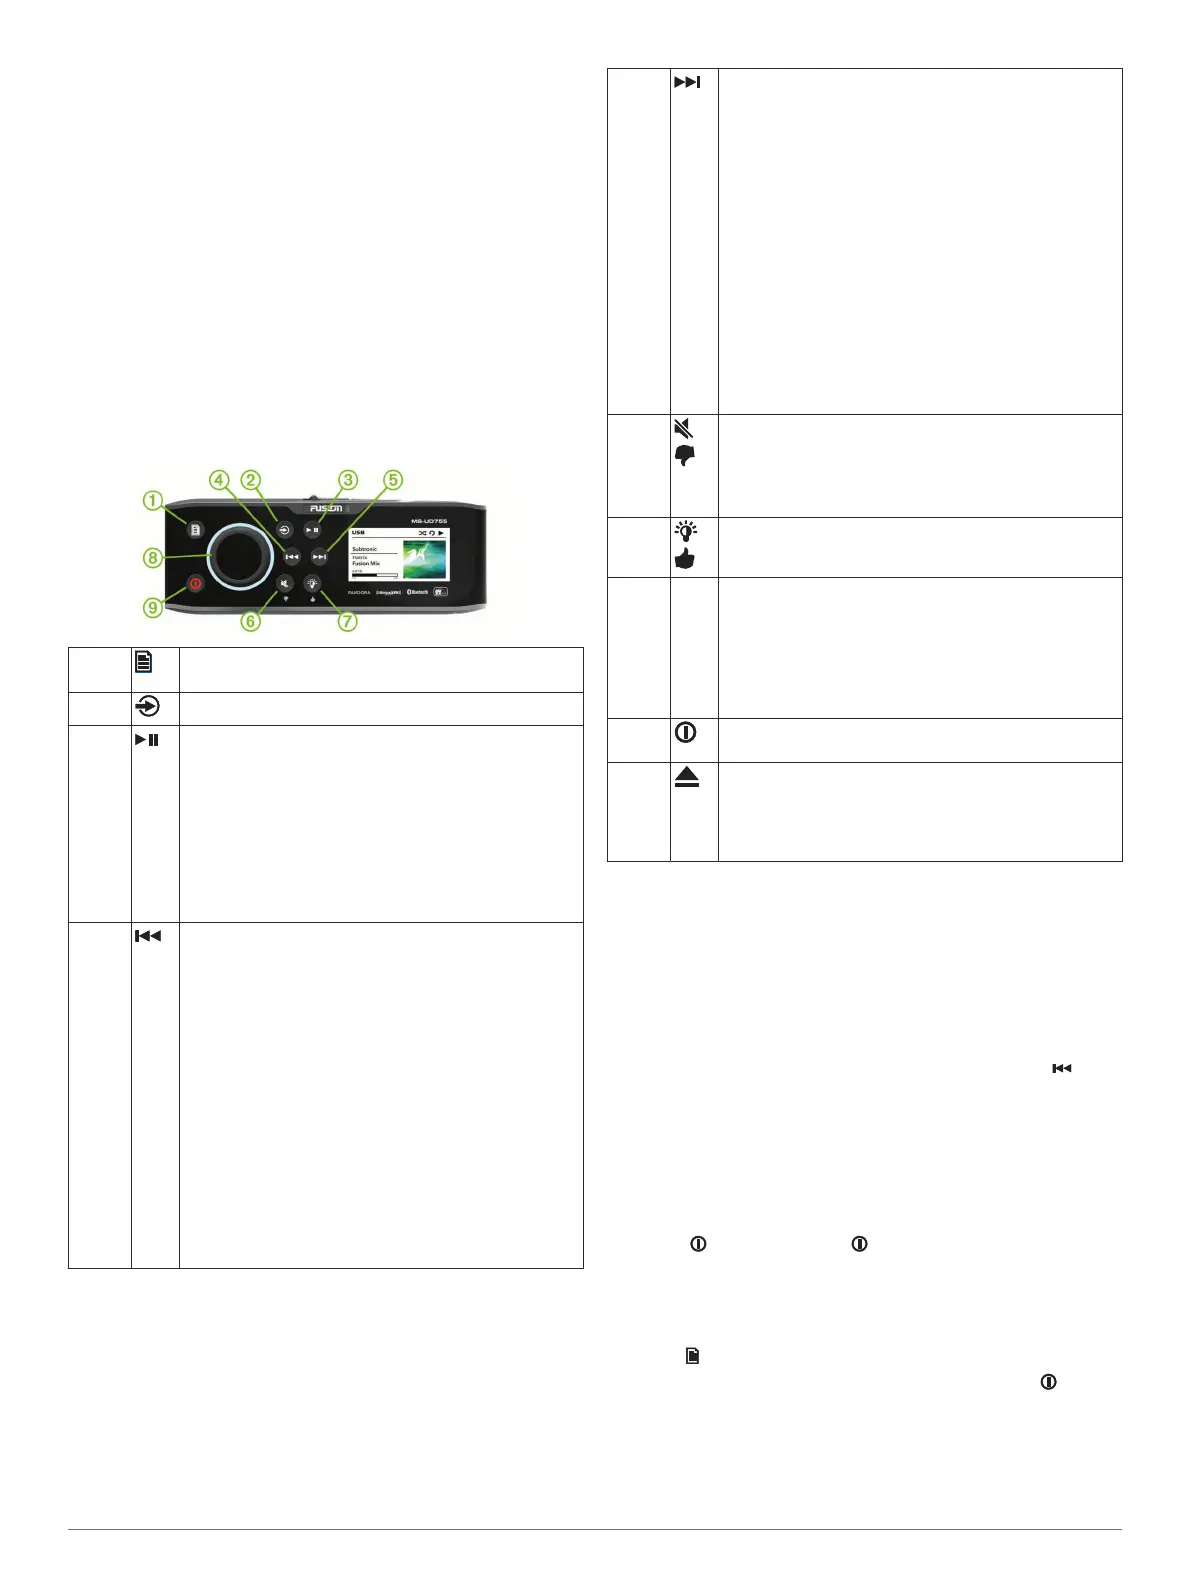
Stereo Controls
À
• Press to open a menu.
• Press to return to the previous screen or menu.
Á
Press to move through the available sources.
Â
• Press to pause or resume.
• AM, FM source:
◦ Press to move through the tuning modes: auto,
manual, and presets (when two or more presets
are saved).
◦ Hold to save this station as a preset.
• SIRIUSXM source: Press to move through the tuning
modes (auto and presets), when you have at least
one preset channel.
• DAB source: Press to scan for DAB stations.
Ã
• Press to skip to the previous track, when using an
applicable source.
• Hold to rewind the current track, when using an
applicable source.
• AM, FM source:
◦ Press to tune to the previous station.
◦ Hold for faster tuning (manual mode only).
• AUX1, AUX2 source: Press to decrease the gain for
the connected source.
• ARC source: Press to decrease the gain for the
connected source (FUSION
®
MS-AV755 only).
• SIRIUSXM source: Press to return to the previous
channel.
• DAB source: Press to return to the previous DAB
station in the ensemble. When you reach the
beginning of the current ensemble, the stereo
automatically changes to the last available station in
the previous ensemble.
Ä
• Press to skip to the next track, when using an
applicable source.
• Hold to fast forward the current track, when using an
applicable source.
• AM, FM source:
◦ Press to tune to the next station.
◦ Hold for faster tuning (manual mode only).
• AUX1, AUX2 source: Press to increase the gain for
the connected source.
• ARC source: Press to increase the gain for the
connected source (FUSION MS-AV755 only).
• SIRIUSXM source: Press to advance to the next
channel.
• DAB source: Press to advance to the next DAB
station in the ensemble. When you reach the end of
the current ensemble, the stereo automatically
changes to the first available station in the next
ensemble.
Å
• Press to mute the audio output.
• Press to unmute the muted audio.
The volume continues at the previously set level.
• Pandora
®
: Press and hold to tell Pandora not to play
this track.
Æ
• Pandora: Press and hold to tell Pandora you like this
track and would like this station to play more tracks
similar to it.
Ç
Dial • Turn to adjust the volume.
• Press to switch between zones when adjusting
volume.
• Press and hold for at least one second to adjust the
subwoofer levels.
• Turn to move through the menus or adjust a setting.
• Press to select the highlighted option.
È
• Press to turn the stereo on and off.
• Hold for six seconds to reset the stereo.
Not
shown
• Press to eject an inserted CD or DVD (FUSION MS-
AV755 only).
• Located on the back side of the stereo face, and
accessible only when the door is open (Inserting a
DVD or CD, page 5).
Using the Dial to Select Items
You can use the dial to highlight and select items on the screen.
• Turn the dial to highlight an item on the screen.
• Press the dial to select the highlighted option.
Entering Text
You can enter text to change some settings field values on this
device.
1
In a settings field that allows you to enter text, select to
erase the existing characters.
2
Use the dial to choose a letter, and press the dial to select it.
3
Add additional letters to finish entering the text.
4
Hold the dial to save the new text.
Enabling Standby Mode
You can set the stereo to enter a low-power standby mode when
you press . When you press again, it takes less than the
typical 30 seconds to turn on.
NOTE: When the stereo is in low-power standby mode, it
continues to draw current from the battery. The maximum
current draw in standby mode is 200 mA.
Select > Settings > Standby Mode.
The stereo now enters standby mode when you press .
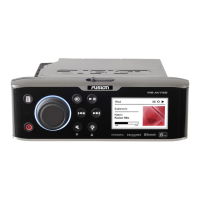
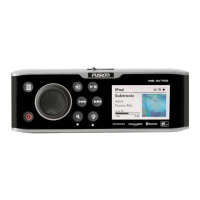
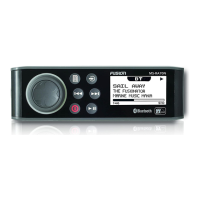
Stereo Screen
The information displayed on the stereo screen varies
depending on the source selected. This example shows the
stereo playing a track from a connected USB device.
Getting Started 1