85
0RGHO0HQX$LUSODQH*OLGHU)XQFWLRQV!
nd return to the Model
menu by touch
ensorTouch™>
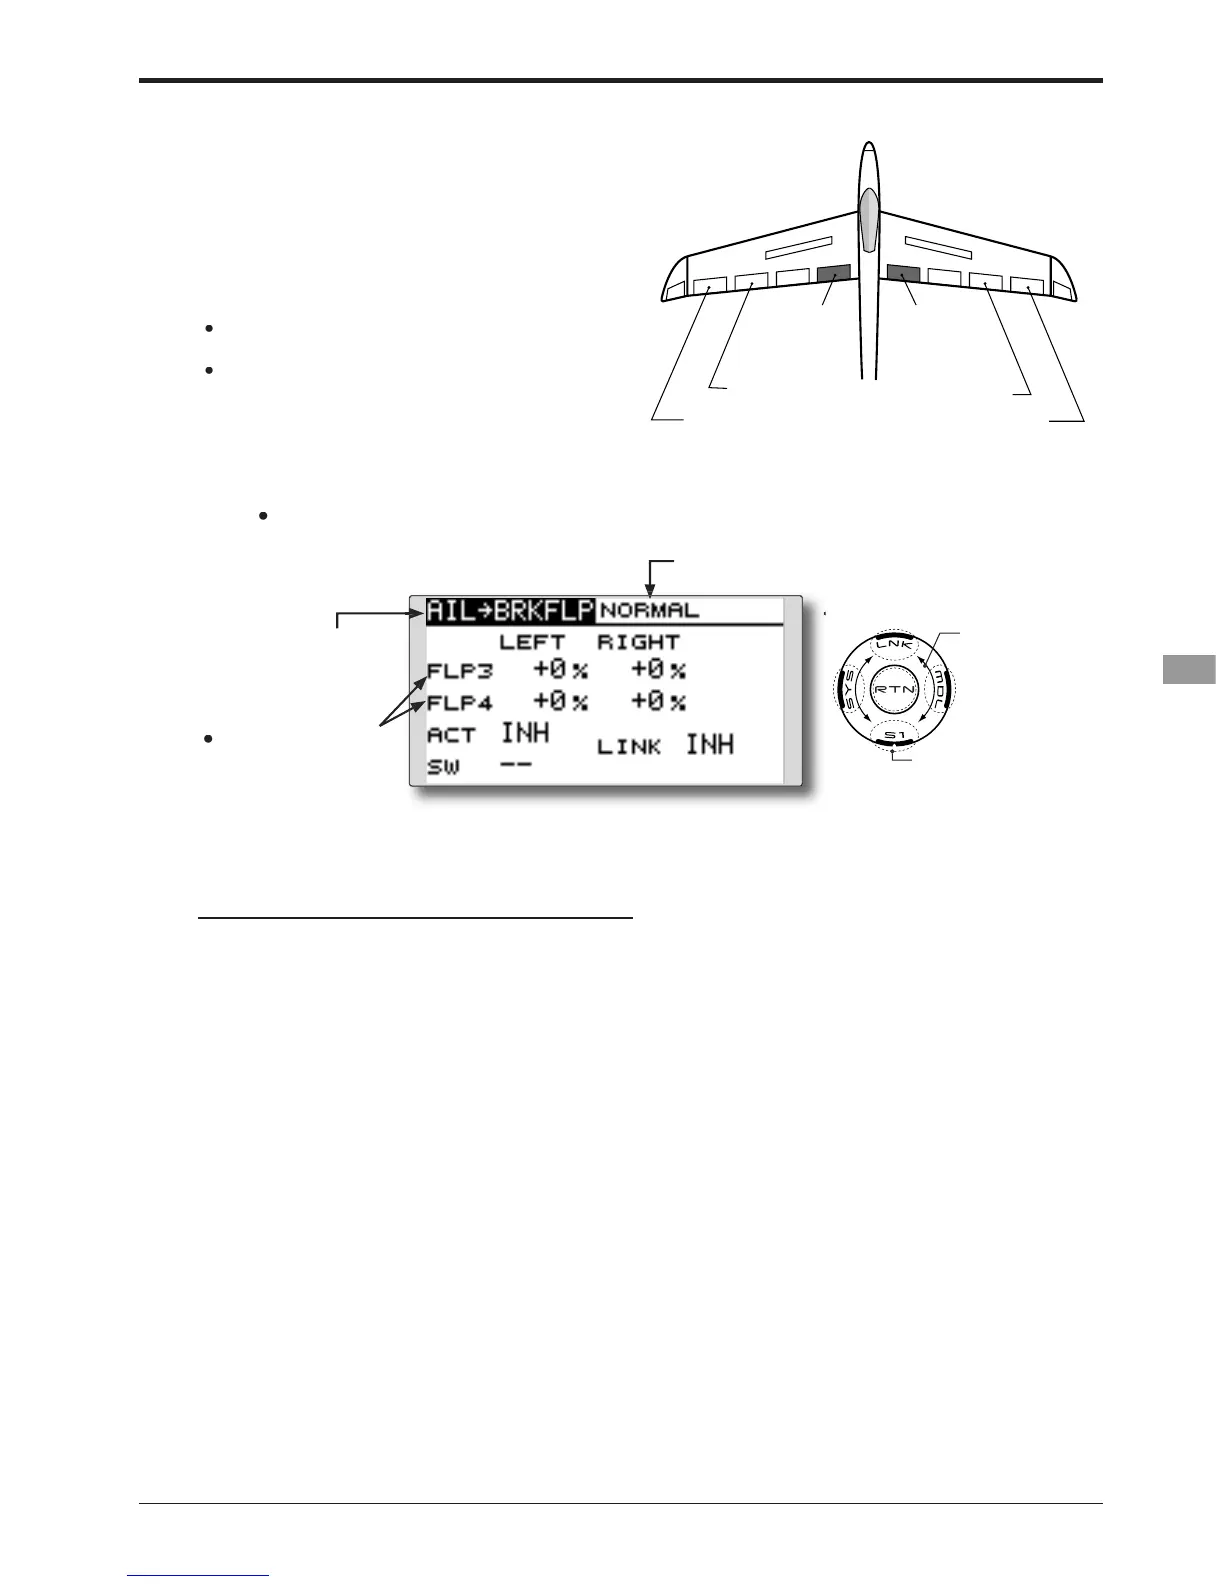
AIL 3
(Chip Aileron)
AIL 4
(Chip Aileron)
AIL1
(Main Aileron)
AIL 2
(Main Aileron)
FLP 3
(Brake Flap)
FLP 4
(Brake Flap)
$,/WR%5$.()/3
>&RUUHVSRQGLQ
in the aileron mode. When the aileron stick is
PDQL
XODWHGWKHDLOHURQDQGEUDNHÀD
e setup screen
shown below by touch
screen depends on the model type
$FWLYDWHWKHIXQFWLRQ
Move the cursor to the [ACT]
he RTN button to switch to the data input
ode. Select the ACT mode by scrollin
unction and return to the cursor mode.
tem and touch the RTN button
witch and set its ON direction.
tem and touch the RTN button to sw
o the data input mode. Adjust the mixing
ate independently by scrollin
HVHWWRWKHLQLWLDOYDOXH
Touch the RTN button to end the ad
ng, move the cursor to
the [LINK] item and touch the RTN button to
switch to the data in
ut mode. Select the
ON mode by scrollin