97
0RGHO0HQX$LUSODQH*OLGHU)XQFWLRQV!
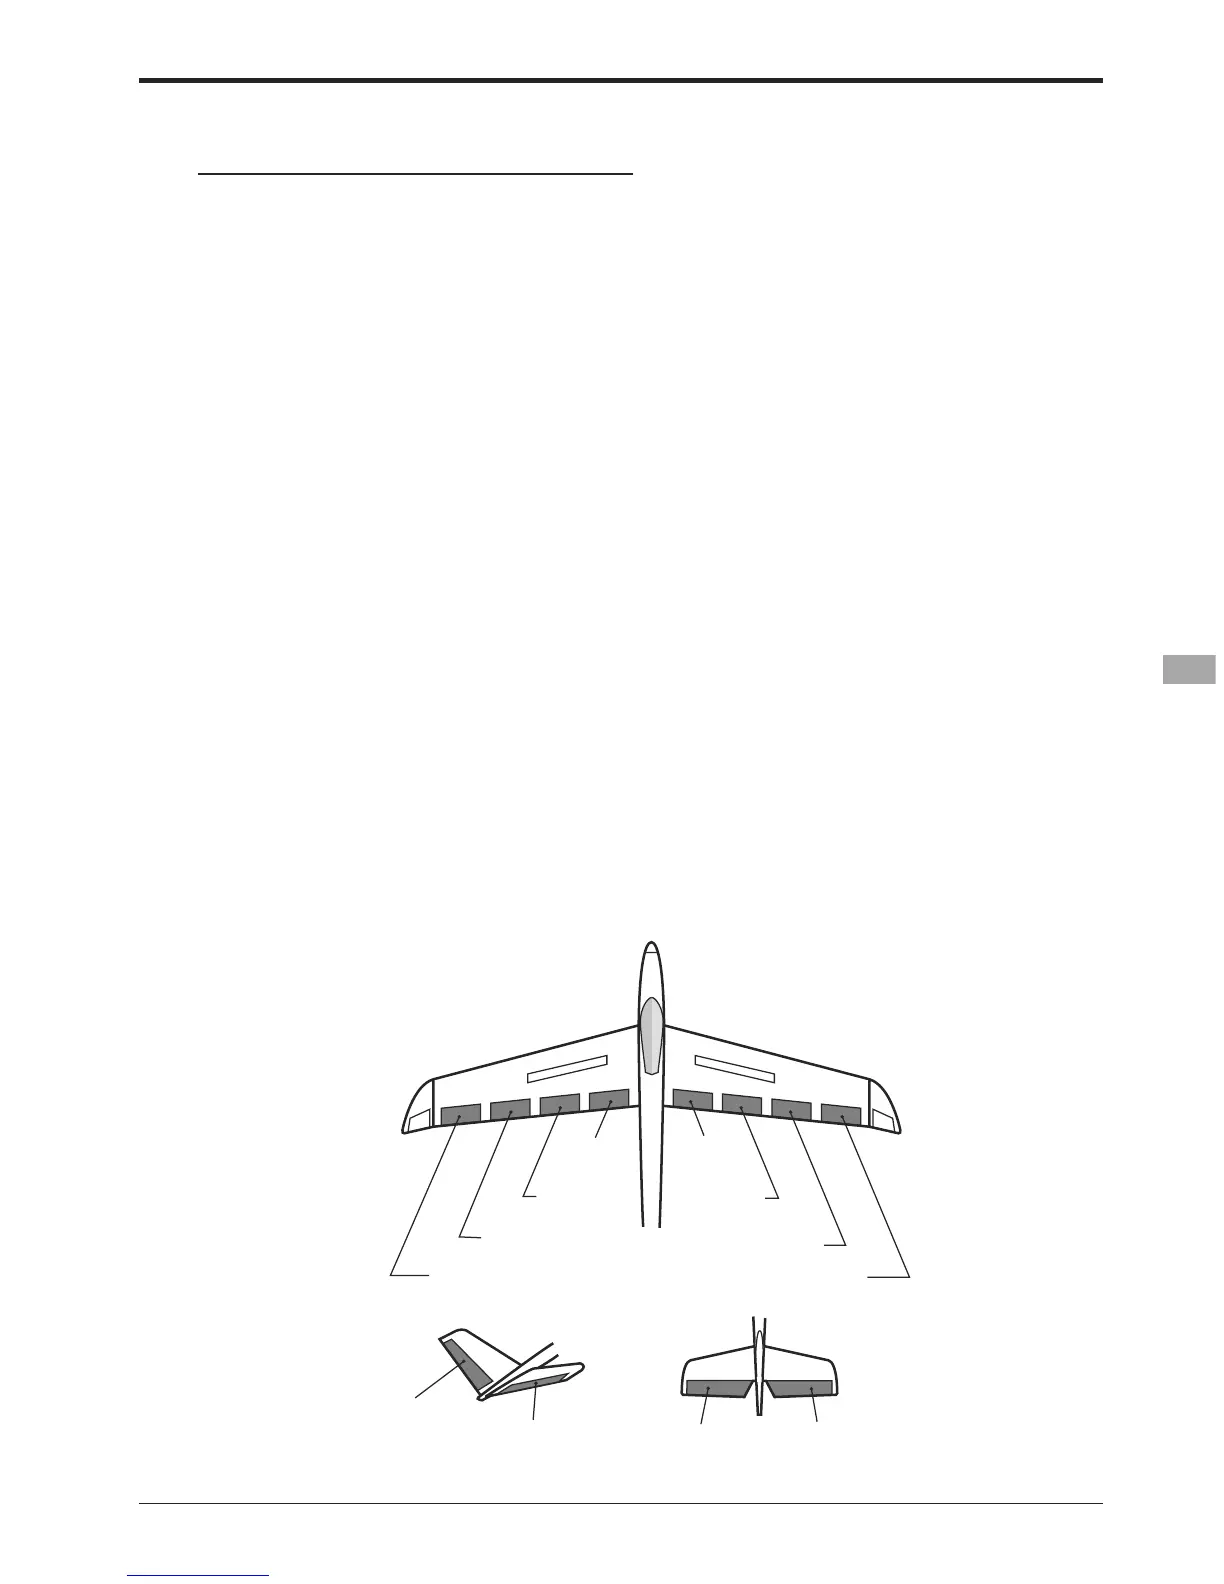
AIL 3
(Chip Aileron)
AIL 4
(Chip Aileron)
AIL1
(Main Aileron)
AIL 2
(Main Aileron)
FLP 2
(Camber Flap)
FLP 1
(Camber Flap)
FLP 3
(Brake Flap)
FLP 4
(Brake Flap)
ELEVATOR
ELEVATOR 2
V-TAIL
ELEVATOR
ELEVATOR 2
AILVATOR
6HWWLQJPHWKRG
Ɣ$FWLYDWHWKHIXQFWLRQ
Move the cursor to the [ACT] item and touch
the RTN button to switch to the data input
mode. Select the ACT mode by scrolling the
touch sensor.
*The display blinks.
Touch the RTN button to activate the
function and return to the cursor mode. (ON
is displayed.)
When setting a switch, move the cursor to
the switch item and touch the RTN button
to access the selection screen. Select the
switch and set its ON direction. (Always ON
at "--" setting)
)RUDGHVFULSWLRQRIWKHVZLWFKVHOHFWLRQPHWKRGVHHWKH
description at the back of this manual.
Ɣ2IIVHWUDWHDGMXVWPHQW
Move the cursor to the aileron, flap or
elevator rate item and touch the RTN button
to switch to the data input mode. Adjust the
rate independently by scrolling the touch
sensor.
,QLWLDOYDOXH
$GMXVWPHQWUDQJHa
:KHQWKH571EXWWRQLVWRXFKHGIRURQHVHFRQGWKHUDWHLV
UHVHWWRWKHLQLWLDOYDOXH
Touch the RTN button to end the adjustment
and return to the cursor mode.
Ɣ6HUYRVSHHGVHWWLQJ
Move the cursor to the aileron, flap or
elevator speed item and touch the RTN
button to switch to the data input mode.
Adjust the rate by scrolling the touch sensor.
Initial value: 0
Adjustment range: 0~27 (maximum delay)
:KHQWKH571EXWWRQLVWRXFKHGIRURQHVHFRQGWKHUDWHLV
UHVHWWRWKHLQLWLDOYDOXH
Touch the RTN button to return to the cursor
mode.
Ɣ$XWRVZLWFKVHOHFWLRQ
When setting a auto switch, move the cursor
to the [AUTO-SW] item and touch the RTN
button to access the selection screen. Select
the switch and set its ON direction. (Always
ON at "--" setting)
)RUDGHVFULSWLRQRIWKHVZLWFKVHOHFWLRQPHWKRGVHHWKH
description at the back of this manual.