51837556_V_1_1.DOC
26/58
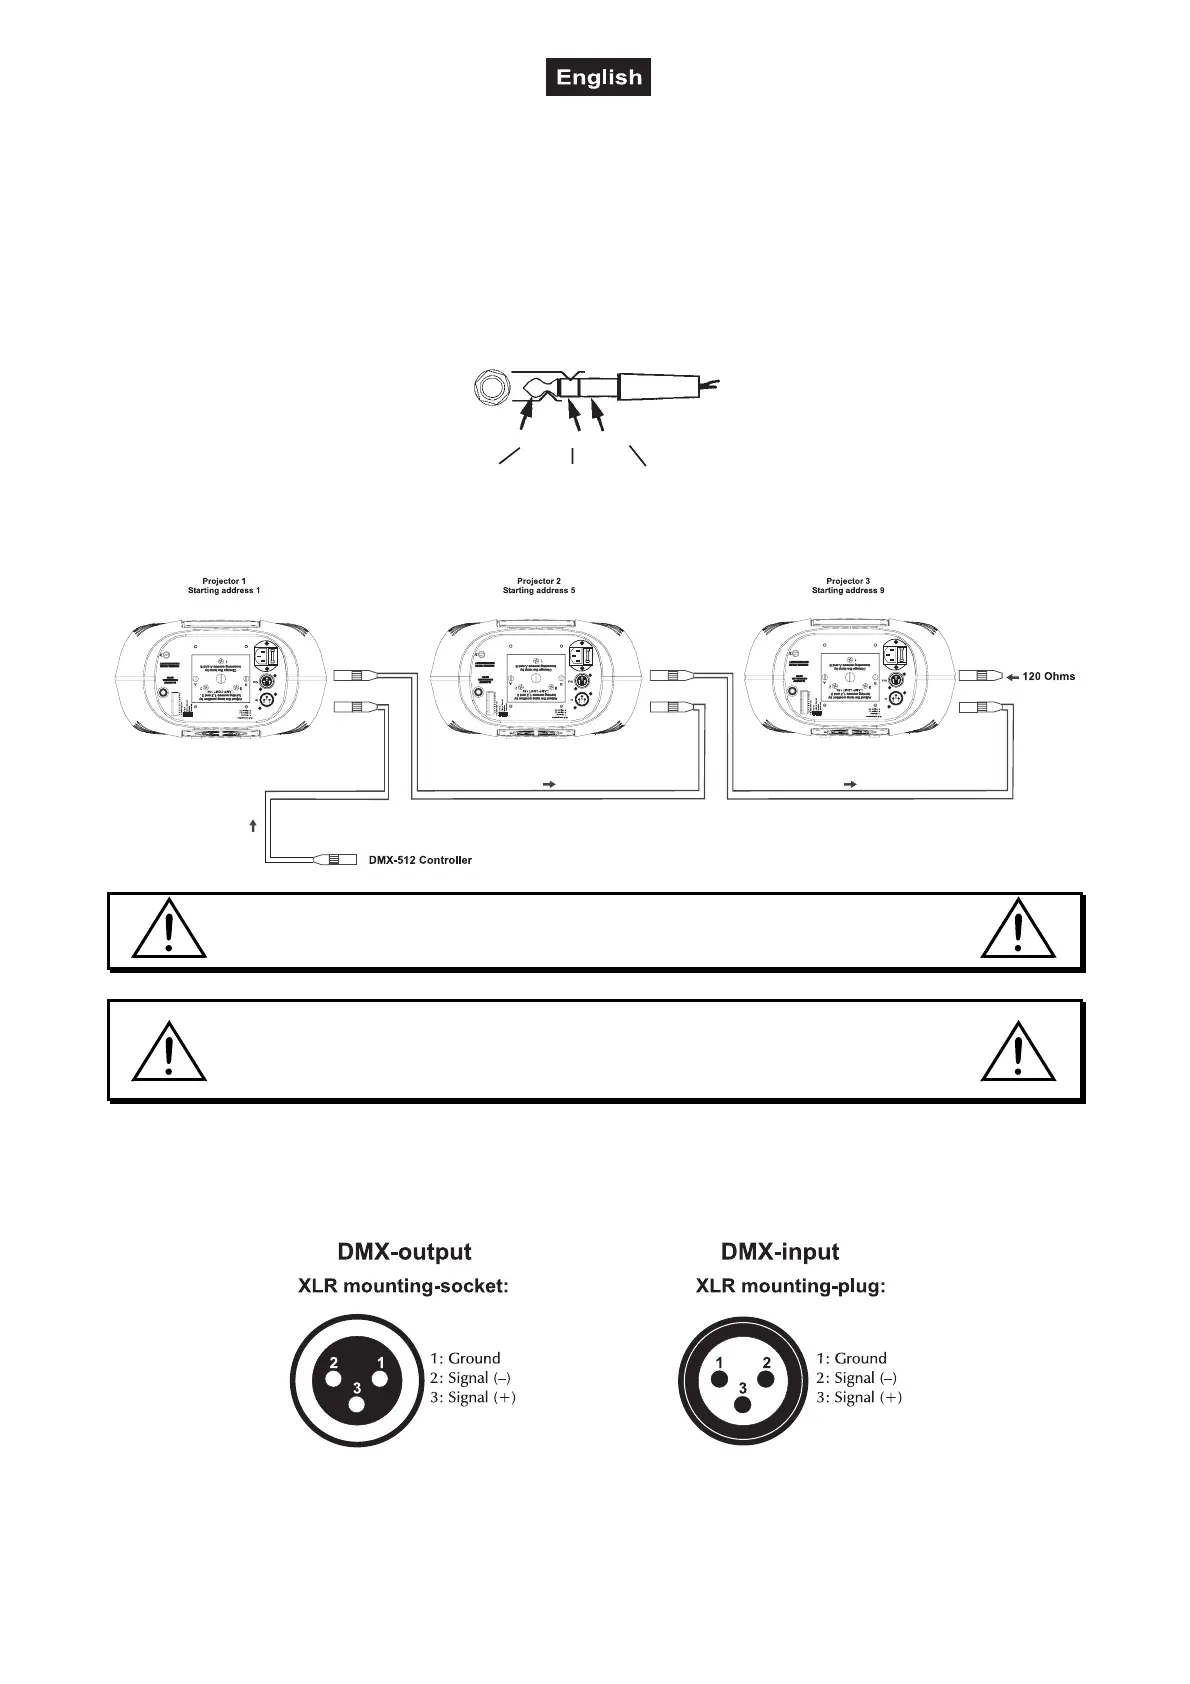
Terminal
Building a serial DMX-chain: At the last fixture, the DMX-cable has to be terminated with a 120 Ω resistor.
Set the DIP-switch no. 12 of the last projector to On.
Blackout-socket
If you wish to lock the light output - e.g. via an optional footswitch (Blackout-mode), connect your footswitch
via a stereo-jack plug to the Blackout-socket.
Stereo 1/4“ jack-plug:
Tip
- 5 V Black Out Ground
Ring Sleeve
DMX-512 connection / connection between fixtures
The wires must not come into contact with each other, otherwise
the fixtures will not work at all, or will not work properly.
Please note, the starting address depends upon which controller is being used.
Only use a stereo shielded cable and 3-pin XLR-plugs and connectors in order to connect the controller with
the fixture or one fixture with another.
Occupation of the XLR-connection:
If you are using controllers with this occupation, you can connect the DMX-output of the controller directly
with the DMX-input of the first fixture in the DMX-chain. If you wish to connect DMX-controllers with other
XLR-outputs, you need to use adapter-cables.