8M093X01 R1.0 17
Mounting Instructions
Preparation
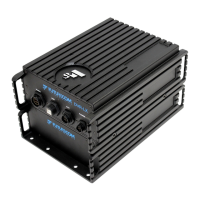
The flat mount DVR-LX is shipped with a mounting base attached by 4 screws. If a
template is needed for installation, the mounting base may be removed and used for that
purpose. (See
Figure 11: DVR-LX Mounting Screws- Flat) When reattaching, ensure that the
orientation of base to repeater is lined up by having the Futurecom logos at the same
end.
Instructions
Step 1: Secure DVR-LX to mounting surface with 4 fasteners. (recommend 6mm or ¼”)
Cautionary Notes & Considerations
ACCESSIBILITY: When planning the DVRS installation, make sure to leave
adequate room around all DVRS modules to allow for easy RF and control cabling
connections, to enable programming / re-flashing access to both the DVR-LX and
MSU ports and access to the DVR-LX mounting screws.
CABLE RANGE: Ensure all DVRS components, including the remote mount MSU,
are mounted within the interconnecting cables range.
CONTROL HEAD: Ensure control head is installed in front of the vehicle.
MSU AND ACCESSORIES: For detailed MSU and accessories installation
instructions, please refer to the installation manuals available from Motorola.