Error! Use the Home tab to apply 标题 1,l1,H1,Title1,Normal + Font:
Helvetica,Bold,Space Before 12 pt,Not Bold,Heading
One,h1,Head1,Head,1,Numbered,nu,Level 1 Head,1st level,Section
Head,Sec1,h11,1st level1,h12,1st level2,h13,1st level3,h14,1st level4,h15,1st leve 2
1.2 Installing HDD
For the first time installation, check whether the HDD has been installed or not. We recommend
to use HDD of enterprise level or surveillance level. It is not recommended to use PC HDD.
Shut down the NVR and unplug the power cord before opening cover to replace the HDD.
Different models have different HDD numbers. The actual product shall prevail.
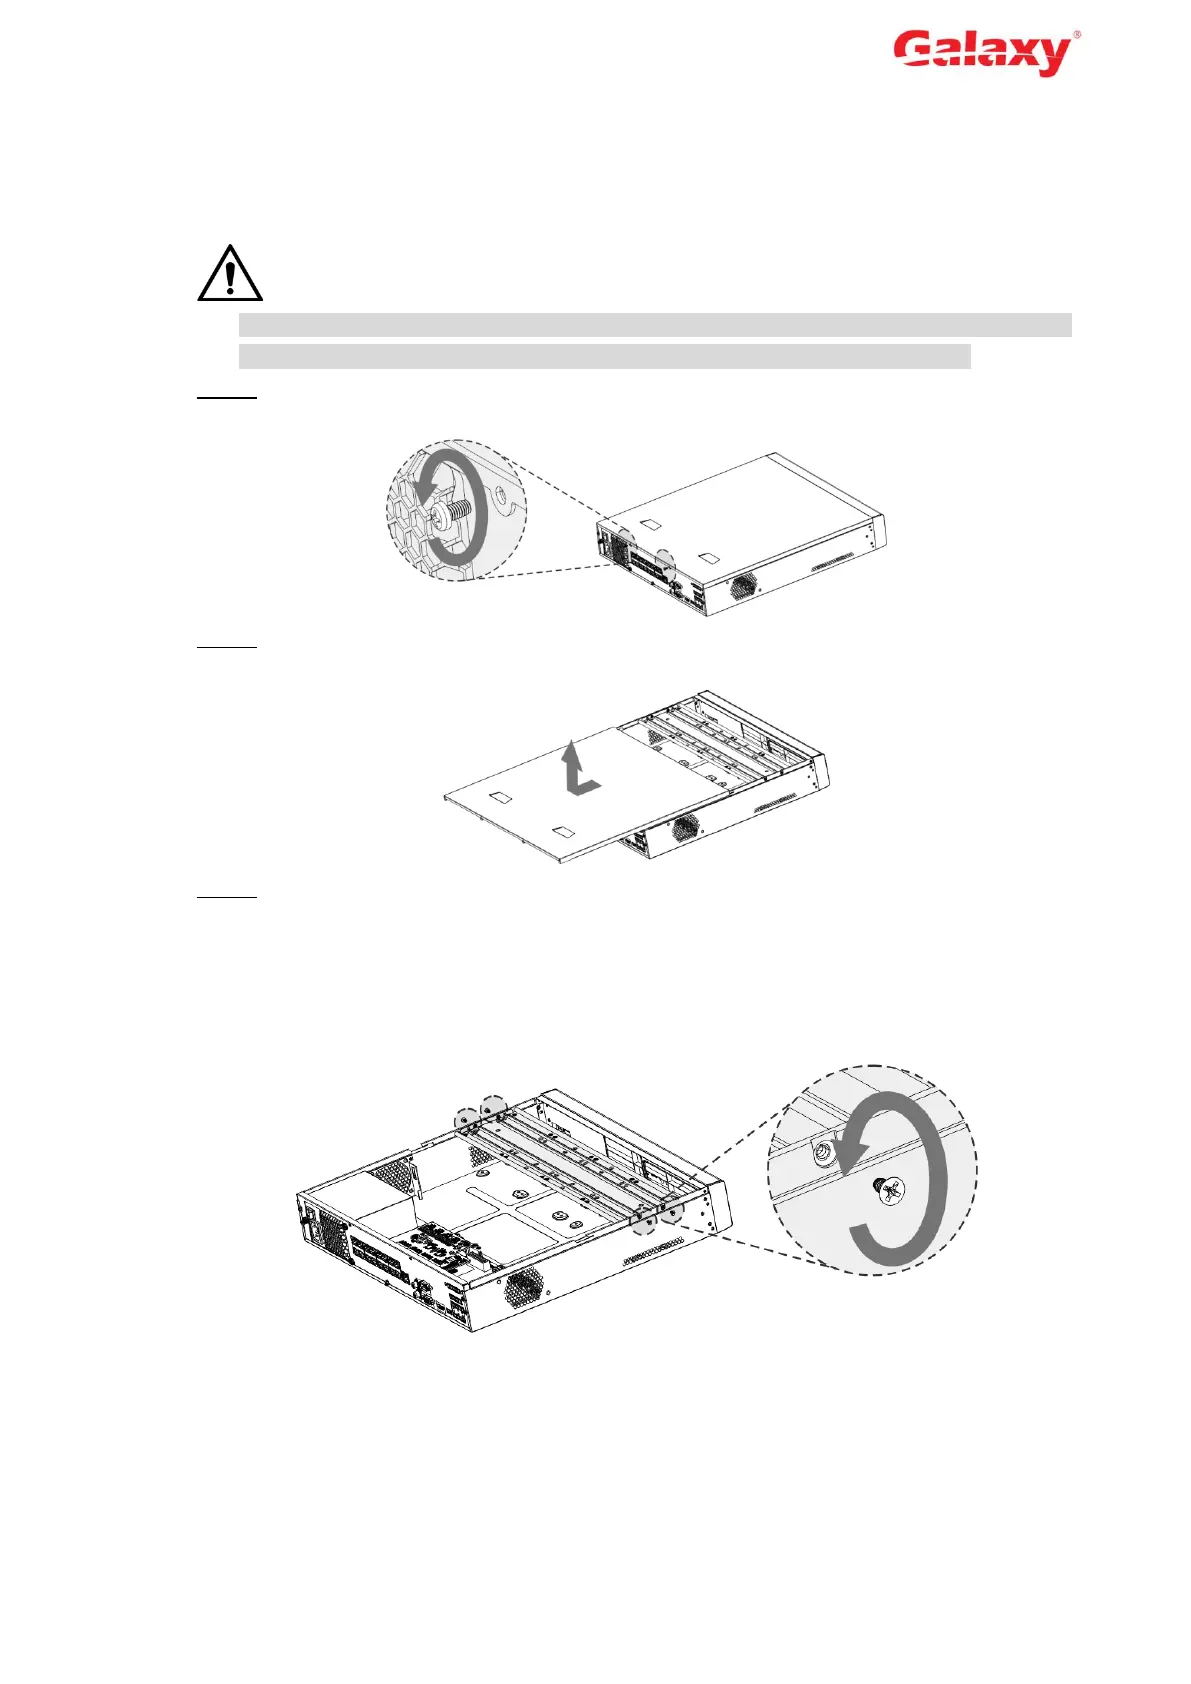
Step 1 Remove the fixing screws on the rear panel.
Figure 1-1 Remove the screws
Step 2 Remove the cover along the direction shown in the following arrow.
Figure 1-2 Remove case cover
Step 3 Remove the screws on the sides of HDD bracket to take out the bracket.
4-HDD NVR has one HDD bracket. For the way to remove the bracket, see Figure
1-3.
8-HDD NVR has two HDD brackets. For the way to remove the brackets, see
Figure 1-4.
Figure 1-3 Remove HDD bracket (4-HDD)
 Loading...