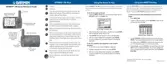
Quick Start
10
Allow the permanent type adhesive 24 hours to form an effective bond before using the
dash mount. Use of permanent adhesive may cause residual adhesive to remain on the
vehicle dash when the base is removed. To remove adhesive, use rubbing alcohol.
Repositionable adhesive performs best if the area of the dash where it is placed is fully cleaned of
dust and dash protectant prior to each placement. This adhesive also provides maximum support if
spread to conform to the footprint of the mounting base.
Replacement adhesive disks of both types are available from any Garmin dealer.
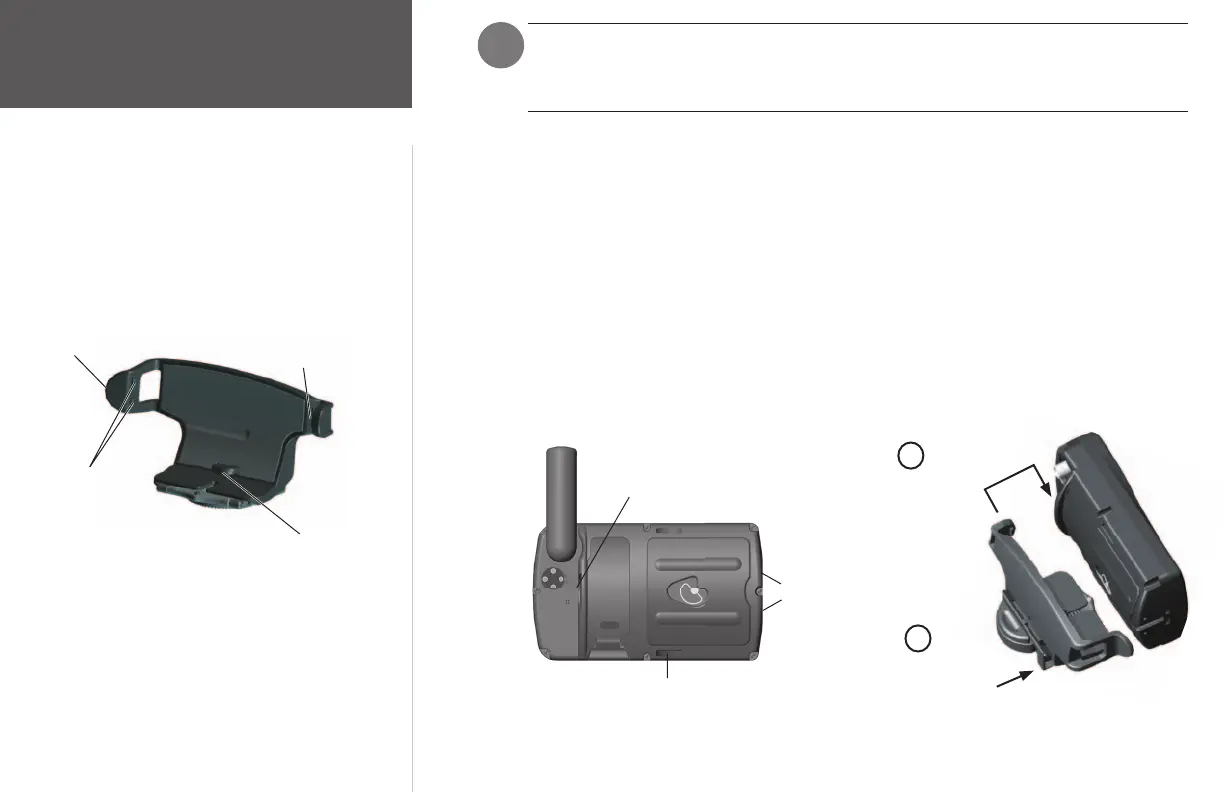
To install the mounting bracket on the GPSMAP 196:
1. Align the single long tab located on the right-hand side of the bracket (front view) with the matching
groove located on the right-hand side of the unit (i.e., front view, antenna side), at the back (see
illustrations below).
2. Push the bracket toward the unit so that both the large, curved tab at the bottom center of the
bracket and the two short tabs located on left-hand side of the bracket (front view) snap into the
grooves located at the back and bottom of the unit and on the left-hand side of the unit (front view),
respectively (see illustrations below).
Groove Locations on the GPSMAP 196
Installing the Mounting Bracket
Push bracket toward unit
and snap into place
Align long tab with
corresponding groove
on unit
1
2
Vehicle Dash Mount Instructions
Tab Locations on the Mounting Bracket
)
Long groove
Two short
grooves
Large, curved groove
The mounting bracket allows attachment of the GPSMAP 196
to the mounting base.
Protruding tab
Large, curved tab
Two short tabs
Single long tab
190-00283-01_0B.indd 10 2/6/2003, 11:12:32 AM