76
GENERAL ASSEMBLY
CONNECTING & DISCONNECTING TO THE
GAS SOURCE
Familiarise yourself with the general information and
safety guidelines located at the front of this manual.
DO NOT USE AN ADAPTOR AT THE CYLINDER
CONNECTION
Check
1. The cylinder is lled. A sloshing sound will be heard
when shaken.
2. The burner controls are in the ‘OFF’ position.
Connecting
1. Ensure cylinder valve is in its full off position.
2. Check for any damage to either the cylinder
connection or the hose. NEVER attempt to use
damaged equipment.
3. When connecting the hose to the cylinder tighten the
nut to a positive stop by hand or spanner.
4. Open cylinder valve fully. If a leak can be heard at
either end of the hose turn cylinder off and tighten
joint. Wait 5 minutes before re-testing and use a
soapy water solution to check the joint. If bubbles
appear, the connection will need to be re-tightened.
Disconnecting
1. Ensure the burner control is in the ‘OFF’ position.
2. Ensure cylinder valve is in the full off position.
For storage and cylinder exchange, disconnect hose
at the cylinder only, DO NOT disconnect hose from
appliance.
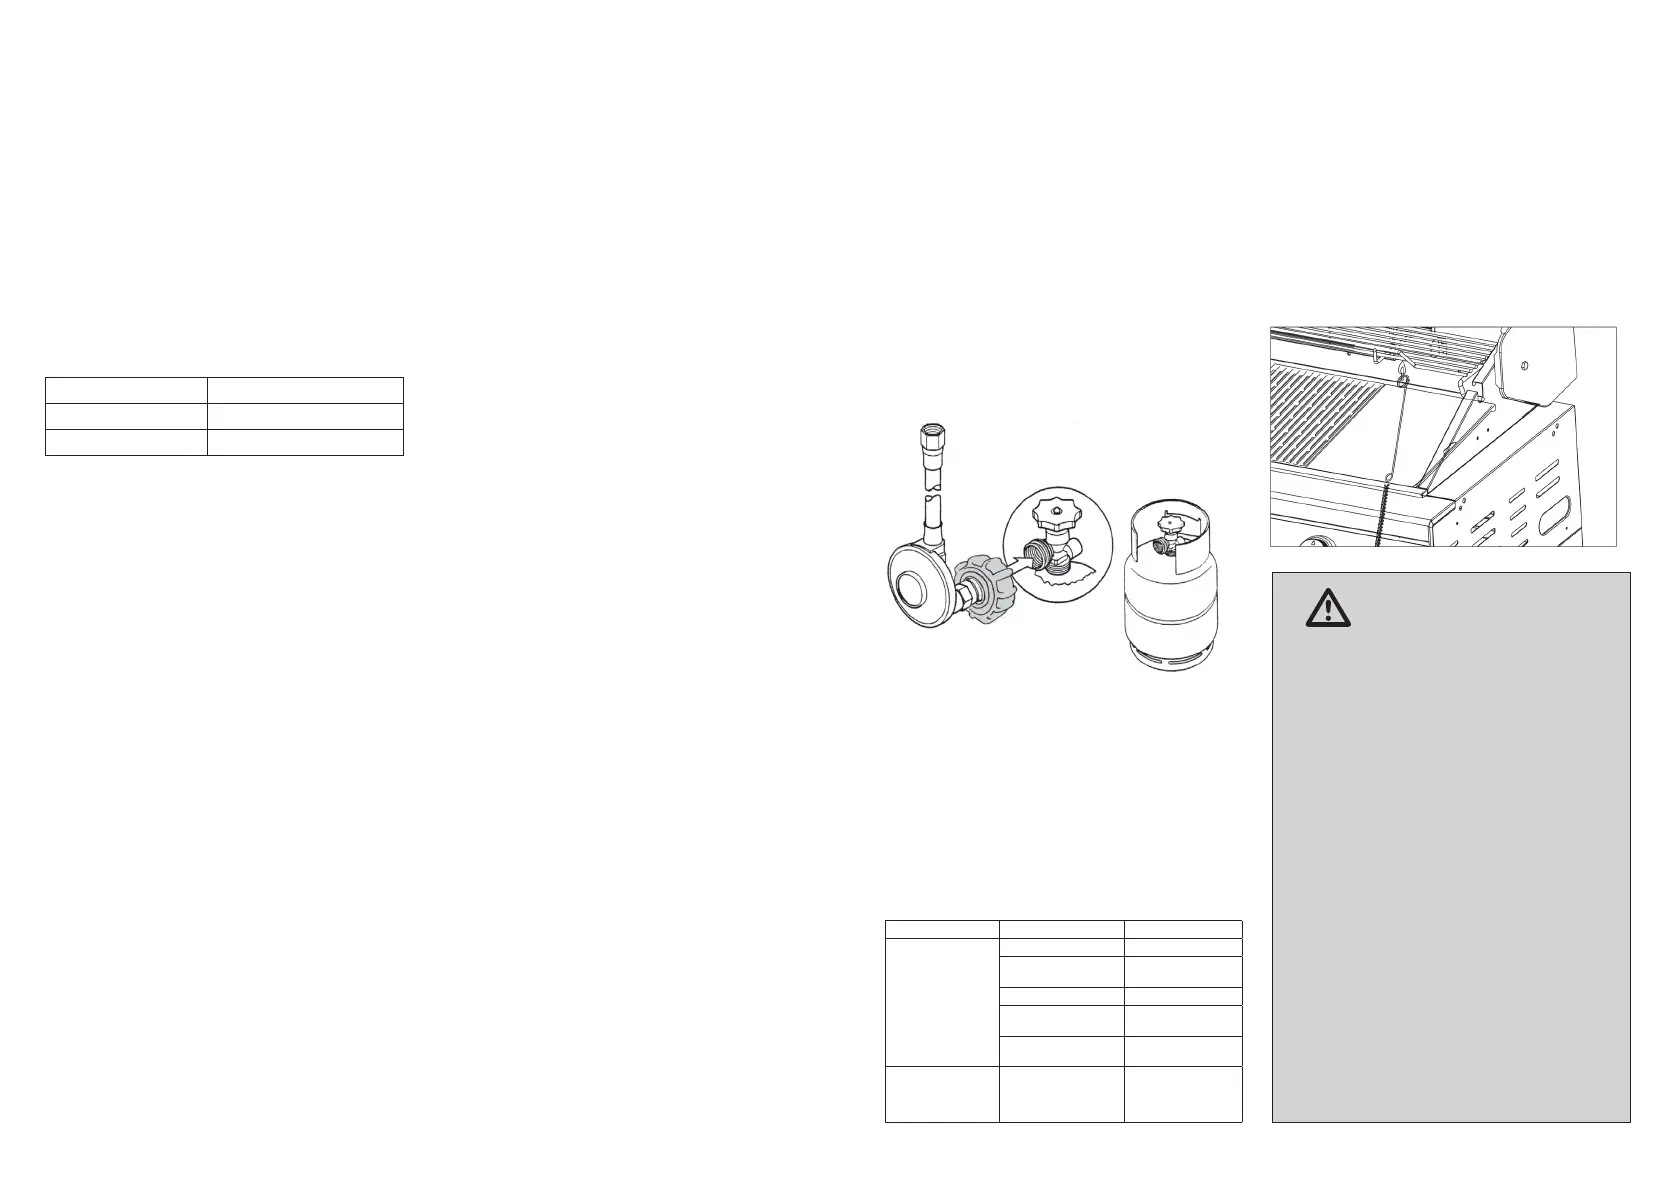
NEW LCC27 GAS CYLINDER AND
APPLIANCE CONNECTION
This appliance has been supplied with the new safer gas
cylinder connection Safe Lok LCC27 Type 27 regulator
and hose connection.
This connection will only connect to a 4kg or 9kg gas
cylinder with an LCC27 Type 27 cylinder valve. This
connection will NOT connect (screw) to the old type 21
POL gas cylinder valve.
ELECTRICAL DATA
IMPORTANT
This product is tted with a sealed electrical connection
plug that is compatible with the product, the mains
supply for Australia and meets the requirements of
international standards. This product must be connected
to a supply voltage that is equal to that stated on the
rating label. If the mains connection plug or power cord
becomes damaged it must be replaced with a complete
assembly that is identical to the original, and this must be
replaced by an authorised service centre. Always follow
the Australian requirements for connection to the mains
supply. If in doubt always consult a qualied electrician.
Technical Specication
Model No YOSAA12002000A
Voltage Input 220-240V AC 50Hz
Voltage Output 12V - 2000mA
LIGHT GLOBES
For replacement light globes please contact
Sitro Group Australia.
LIGHTING PROCEDURE
Burner Operation & Ignition System Check
1. Turn the control knobs clockwise to “OFF” position.
2. Connect the regulator to the gas bottle. Turn the gas
supply “ON” at the cylinder. Check with the use of
soapy water for any gas leakage between the bottle
and the regulator
3. Push down a control knob and keep pressing whilst
turning anti-clockwise to the “HIGH” position whilst
also pressing the ignition button (a clicking sound is
heard). Continue to press and hold the control knob
for 10 seconds (This is to ensure the Flame Failure
Device to be engaged). Release then check the ame
stays on.
4. If the burner still does not light, turn the control knob
to ‘OFF’ wait 5 minutes and repeat step 3.
5. Adjust the heat by turning the knob to the High/Low
position.
6. To turn the barbecue ‘OFF’, turn the cylinder valve to the
‘OFF’ position and then turn all of the control knobs on
the appliance clockwise to the ‘OFF’ position.
If the rotisserie back burner fails to remain alight or the
ame pattern is disturbed, ensure it is not facing into a
direct wind. Re-position the direction of the BBQ, wait 5
minutes, and try the lighting procedure again.
Before cooking for the rst time, operate the barbecue for
about 5 minutes with the lid closed and the gas turned on
HIGH. This will “heat clean” the internal parts.
Problem Possible Reason Solution
Burner will not ignite Valve on cylinder is closed Open valve on cylinder
Control knob is off Turn knob to high when
lighting
Ignition system not working Check the battery
Burner has gone out Check that the gas
bottle is not empty
Igniter is faulty Use a long barbecue
match
Flame not staying on
once control knob is
released
Control knob not held
down long enough for
Flame Failure Device to
engage
Repeat the lighting
procedure and hold
control knob down for
15 seconds
Ignition system check
IMPORTANT
• NOTE: If for some reason, ignitor fails to produce
a spark at the electrode, barbecue can be lit by
a long barbecue match. With hood open insert
lighted match into match lighting hole positioned
on the side of the BBQ body. Push and turn a
control knob to ‘HIGH’. Burner ignition can be
checked through this hole.
• Never use the side burner with the lid in the
closed position. Never attempt to the light the
side burner with a pot over the burner. Light
the burner rst ,and then place the pot over the
burner.
• DO NOT USE THE ROTISSERIE BURNER WHEN
MAIN BURNERS ARE IN OPERATION.
• THE WARMING RACK NEEDS TO BE REMOVED
BEFORE USING THE REAR BURNER
• The hood must be in the open position for
lighting.
• Do not leave the barbecue unattended when
alight.
• When the hood is in closed position, use only
the outside 2 burners or the rear burner. The
temperature should never exceed 250 degrees.
• DO NOT OPERATE MAIN & REAR BURNER
SIMULTANEOUSLY.
Lighting With Match
If needed you can light burners using a match and the
provided holder. The holder can be found chained to the
inside of the right hand door where your gas cylinder is
located.
To Use:
1. Locate the holder.
2. Place match into holder end.
3.
Light match and carefully position near selected burner.
4. Turn the selected gas valve and light burner.
LCC27 Regulator
& Hose
LCC27 Gas
Cylinder
(Cylinder
Not Included)
LCC27 Cylinder
Connection Device
 Loading...