figure 2
figure 3
figure 4
figure 5
figure 6
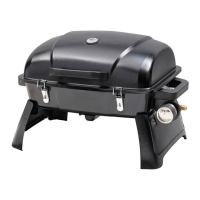
BARBECUE ASSEMBLY
1. Attachandtightenlowerfootcrosstoupper
footcrosswithwingscrewsprovided.Ensure
thefeetareorientedasshownduringuse.
(seeg.1)
2. Fittheslottedendofsupportpostintothe
footcrossopening,pressrmlyandsecure
withwingscrew.
3. Fithandleswithboltsandwingnutssupplied.
(seeg.2)
4. Fitbarbecuetotopofsupportpost,attach
barbecuewithlockingsafetycliponsupport
post.(seeg.3).Theintegratedsidehandles
andlegsallowuseonanoutdoortabletop.
Simplyliftthebarbecueoffthesupportstand.
5. Attachdriptraytorearcentreofbarbecue.
(seeg.4)
6. Fitthelefthand(ribbed)cookingplatetothe
leftsideofbarbecue,ensuringthatthegrease
outletopeningissituatedoverthedriptray.
(seeg.5)
7. Fittherighthand(smooth)platetotheright
sideofbarbecue,ensuringthattheedgeof
theplatetsoverthelefthandplate.
(seeg.6)
8. Connecttheregulatortothegascylinderand
leaktestwithasoapywatersolution.Attach
thecylinderretentioncordtothegascylinder
handleasshown.(seeg.5)
figure 1
FRONT