USE AND MAINTENANCE
ENGLISH
g
44
cod. G19503211
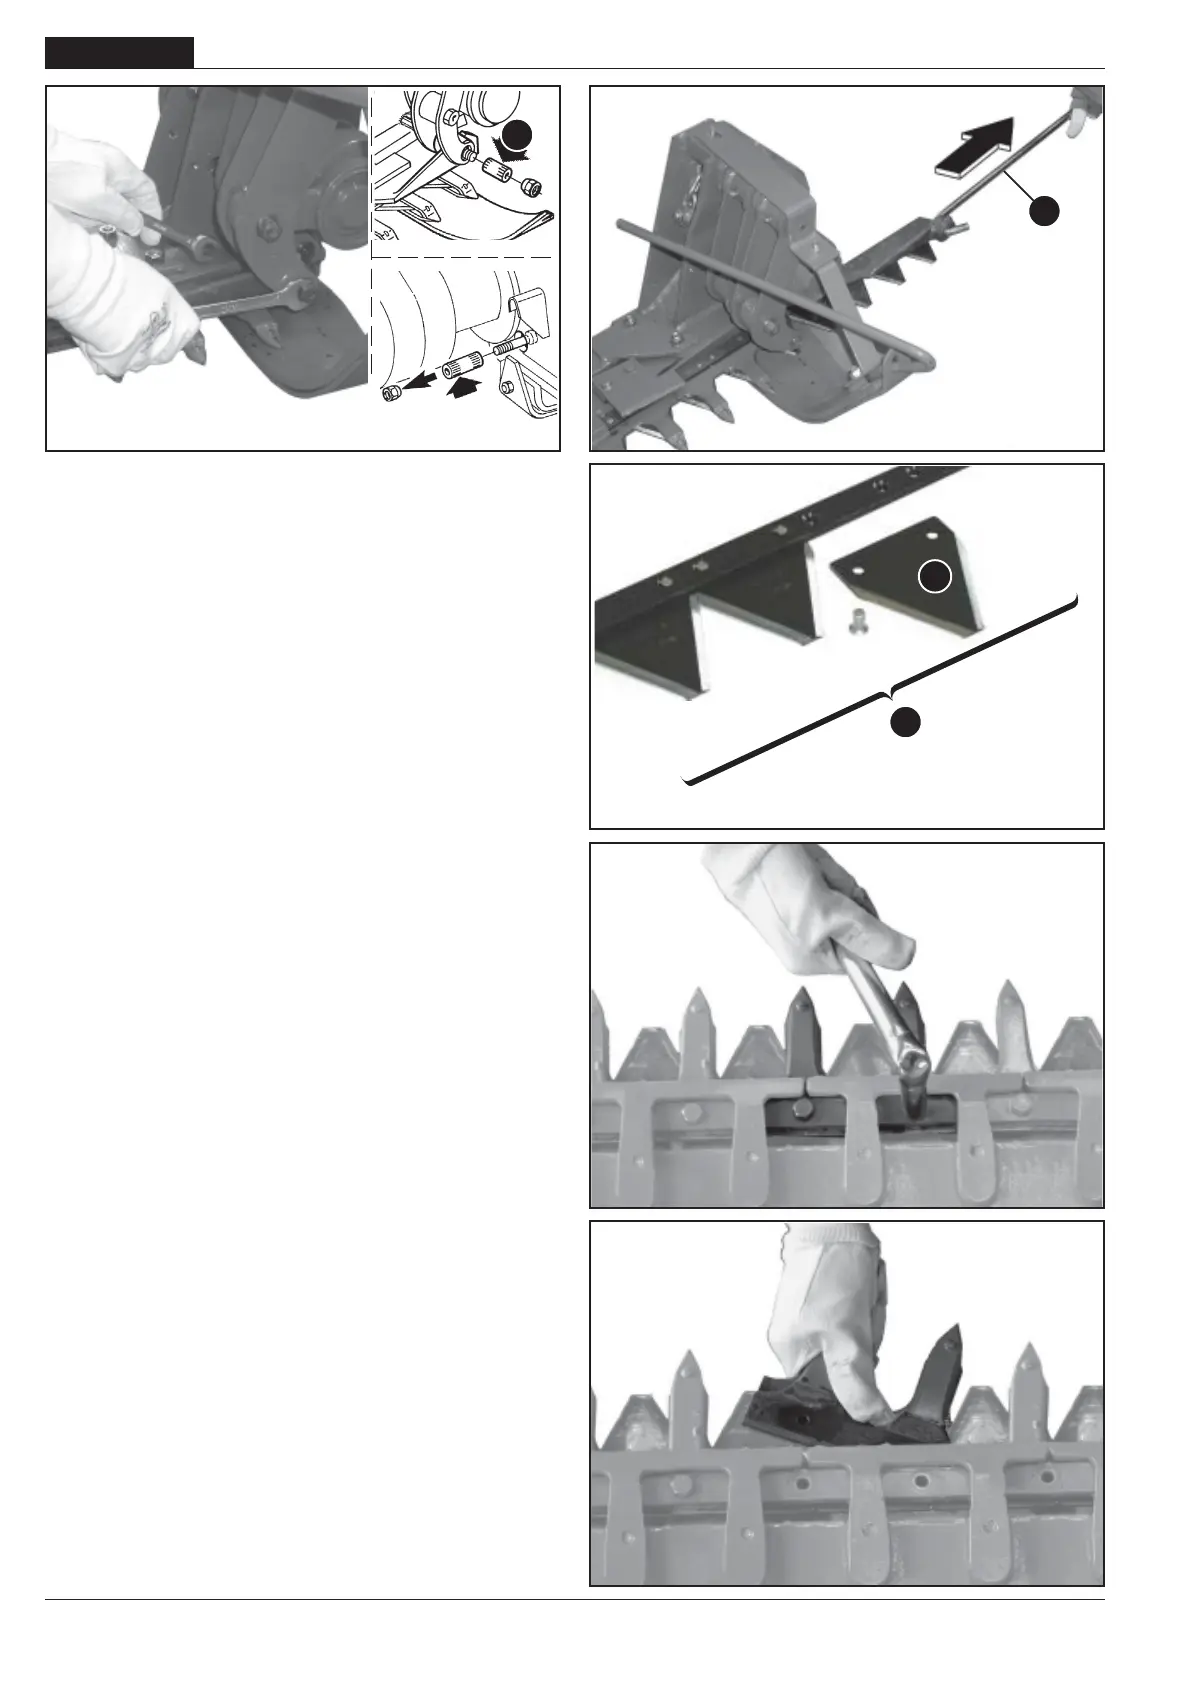
4.2 EXTRA MAINTENANCE
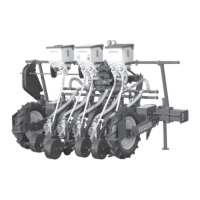
REPLACEMENT OF SECTION-HOLDING BAR (K, Fig. 44)
- With the implement resting on the ground, open the mowing
bar.
- Remove the expansion pin (H, Fig. 42) and pull out the section-
holding bar (Fig. 43) with the hooking tie rod (I, Fig. 43).
- Insert the new section-holding bar and lock it in place with the
expansion pin. Lubricate the cutters with very viscous oil during
the assembly phase. Grese.
REPLACEMENT OF SECTIONS (L, Fig. 44)
- With the implement resting on the ground, open the mowing
bar.
- Remove the expansion pin (H, Fig. 42) and slide out the section-
holding bar (Fig. 43).
- Remove the damaged section using a pin punch.
- Rivet a new section with the rivets provided (L, Fig. 44).
- Insert the section-holding bar and lock it in place with the
expansion pin.
REPLACEMENT OF BAR HOLDING REMOVABLE TOOTH
- With the implement resting on the ground, raise the mowing
bar and secure it with the hooking tie rod.
- Unscrew all the tooth fastening screws (Fig. 45).
- Remove all the teeth (Fig. 46).
- Remove the expansion pin and slide out the bar.
- Insert the new tooth-holding bar and lock it in place with the
expansion pin.
- Reposition the teeth and fasten them with the screws.
REPLACEMENT OF REMOVABLE TOOTH
- With the implement resting on the ground, raise the mowing
bar and secure it with the hooking tie rod.
- Unscrew the screws of the tooth to be replaced (Fig. 46).
- Slide out the tooth (Fig. 46), put in the new one and lock it in
place with the screws. For this it would be advisable to use a
torque wrench, respecting the values of 30 Nm.
Fig. 45
Fig. 46
Fig. 43Fig. 42
H
I
L
K
Fig. 44