08
WWW.GATEE.EU
USER GUIDE
02. Installation
To adapt the standard AEG installation to work with NanoHARD it is necessary to
get to the trigger contacts. In case of GB v2 contacts these are located inside a
gearbox. With a version 3 gearbox, the installation will be easier because the
contacts are on the outside of the gearbox. Please consult a local airsoft technician if
you have never disassembled a gearbox before or if you have any installation
concerns.
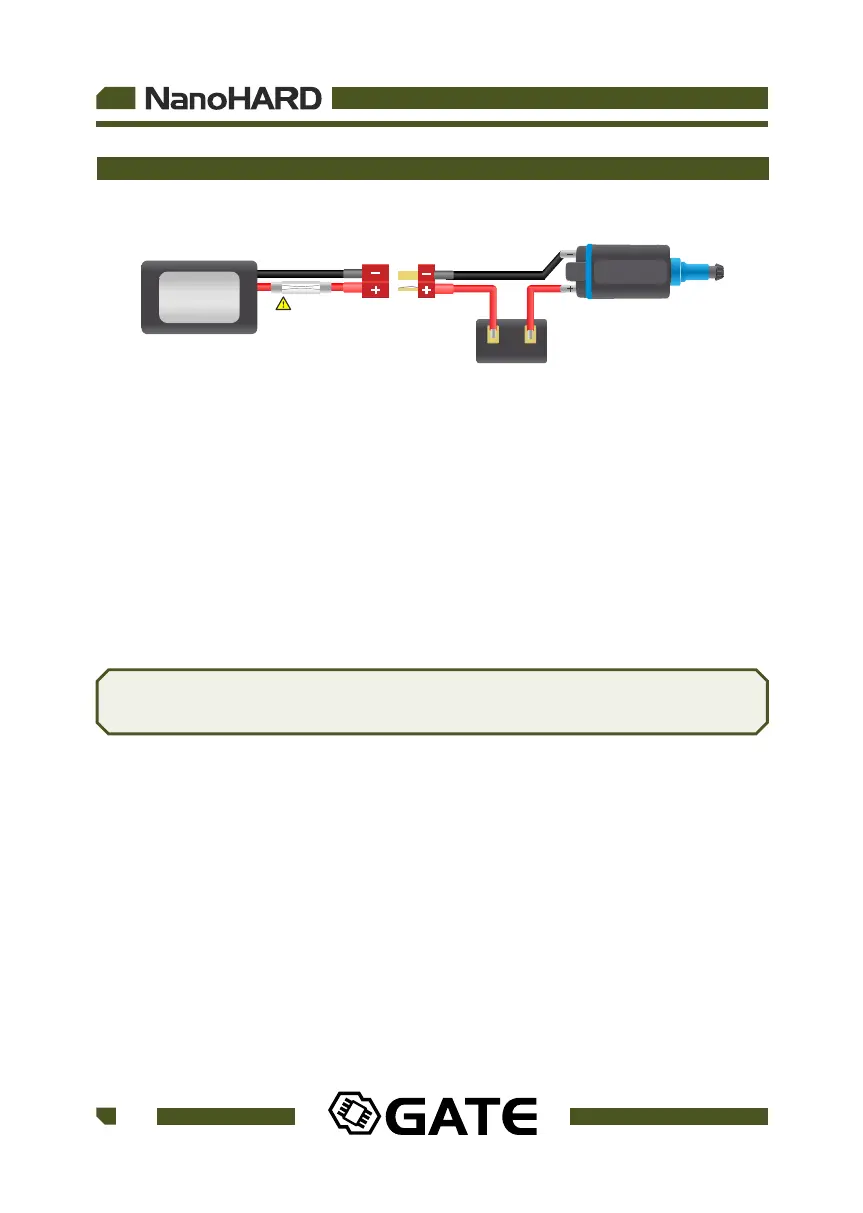
Fig 1. Standard AEG wiring scheme
BATTERY
UP TO 14.8V
AEG Motor
A B
CONTACTS
C
DANGER!
Incorrectly connecting positive and negative battery terminals
will cause immediate damage to the unit and it can lead to fire.
a) Installation of NanoHARD without replacement of wires. Using this method, the
original wiring is kept intact, and the connections are modified. Referencing Fig 1.,
de-solder A wire from the one of the trigger contacts and then solder it to the B wire.
It does not matter which wire you disconnect from the trigger switches, just join the
two wires together at one terminal. In the place of the A wire, solder the additional
single signal wire (No. 04 – provided in the kit). The GATE wire is very thin because it
handles very low current and it is only used for switch-detection. Now connect the
device between the battery and AEG. Do not forget about the signal wire. Connect it
to the top pin.
FUSE