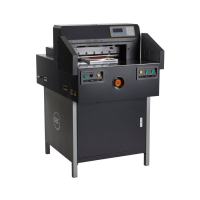
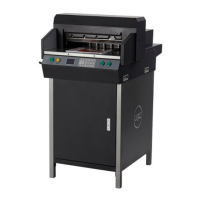
ProCut 20P – Installation and Operating Instructions
6. oPeratIon
The ProCut 20P Paper Cutter follows standard SGS
safety design specications. The infrared photoelectric
protection and two hand operation provides operators
with more safety.
WARNING: This machine is designed for one
person operation only. The operator must use both
hands to operate the cutter. Failure to observe this
warning could result in severe personal injury.
The ProCut 20P Paper Cutter is ideal for small to
medium sized operations, to cut stacks of photocopies,
printed materials, books, pictures, documents, and other
non-metal materials to specied sizes.
CAUTION: Do not cut staples, paper clips, or other metal
items with the cutter. Failure to observe this caution can
damage the Cutting Blade.
Note: Grease from the Cutting Blade may transfer to
the media when using the machine the rst time. It is
recommended to cut scrap media until the grease is no
longer being transferred.
When the machine is powered on, the LCD Display
illuminates. The Control Panel shows the machine’s
current condition.
1. Plug the power cord into an approved electrical
outlet.
2. Move the Circuit Breaker, on the machine, to the up
position.
3. Turn the switch to the ON position.
After powering on the machine the word RESET appears
on the LCD. Press the yellow Reset Button to set the
Cutting Blade to the HOME position and calibrate the
Back Gauge by returning to the home position and
returning to the last used numeric setting.
Place the media on the Working Table and use the
Jogging Aid to push the leading edge against the Back
Gauge and align the sheets.
Using both hands, simultaneously press and hold the
Clamp Cut and Cut buttons until it nishes cutting.
1. Using the Keypad, enter the length of the cut.
2. Press Enter.
The ProCut 20P can be programmed for in front and
behind the blade cutting. Up to 80 programs, containing
99 steps each, can be stored for reuse.
There are two modes:
• Front Blade
• Behind Blade
1. Power up the machine.
2. Press the yellow Reset Button.
• The Home screen is displayed on the LCD.
01 00.00
00.00 00.00 00.00
00.00
00.00
00.0000.00
05 06
02
07
03
08
04
x
10.00
5 inch 0716 00
Figure 14. Rendering of Home Screen
3. To select the menu mode, press SET on the Keypad.
4. Press the Up or Down arrow for your desired mode,
which is displayed on the LCD:
• Behind Blade
• Front Blade
5. Press ENTER on the Keypad.
• Double 00 flashes.
Figure 15.
01 00.00
00.00 00.00 00.00
00.00
00.00
00.0000.00
05 06
02
07
03
08
04
00
Behind blade program
Pressing Enter on the Keypad
6. Press the Up or Down arrow buttons to select a
program number 00 - 80.
7. Press ENTER to select the program.
• The LCD displays the program number and cut
values associated with the program. The first cut
is highlighted.