Do you have a question about the GE Built-In Wall Oven and is the answer not in the manual?
Crucial advice for installers and consumers regarding saving instructions, codes, and proper grounding.
Illustrates screws and optional trim assemblies provided with the oven.
Lists necessary items such as strain relief clamps, junction boxes, wire nuts, and string.
Specifies essential tools including drill bits, drills, and screwdrivers for installation.
Ensures proper installation, secure mounting, and cabinet material suitability for oven temperatures.
Critical warnings about shutting off power during connections and the risks of improper wiring.
Chart detailing recommended circuit sizes based on oven KW rating for 240V and 208V.
Guidance on using qualified electricians, local codes, NEC, and 4-conductor connections.
Covers removing packaging, checking components, and preparing the oven for removal or movement.
Detailed instructions on how to safely remove the heavy oven door and handle it carefully.
Guidance on placing the oven for installation and removing the bottom trim piece.
Provides detailed dimensions for cabinet width, depth, and height for 27" single ovens.
Advice on shimming cabinets, supporting oven weight, and covering visible marks or openings.
Specifies that these ovens are not approved for stackable installations.
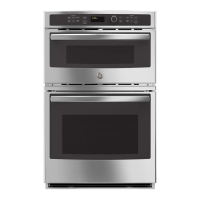
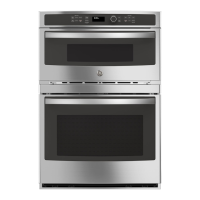
Provides detailed dimensions for cabinet width, depth, and height for 27" double ovens.
Guidance on shimming cabinets and ensuring adequate support for double oven weight.
Notes that these ovens are not approved for stackable installations.
Specifies cutout dimensions, platform support, and clearances for under-counter installations.
Covers cooktop compatibility, filler use, and restrictions on under-counter installations.
Details minimum spacing requirements when installing two ovens side-by-side.
Cutout requirements for installing a single 27" oven above a warming drawer.
Cutout requirements for installing a double 27" oven above a warming drawer.
Specifies the need for a separate 120V receptacle for the warming drawer.
Cutout requirements for installing a single 27" oven beneath an Advantium unit.
Cutout requirements for a single 27" oven placed between Advantium and warming drawer units.
Guidance on electrical connections and clearances for combined Advantium and oven installations.
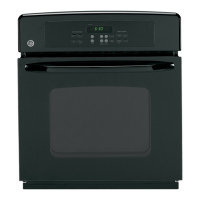
Provides detailed dimensions for cabinet width, depth, and height for 30" single ovens.
Advice on shimming cabinets, supporting oven weight, and covering visible marks or openings.
Notes on stackability, side-by-side spacing, and cutout requirements.
Provides detailed dimensions for cabinet width, depth, and height for 30" double ovens.
Guidance on shimming cabinets and ensuring adequate support for double oven weight.
Advises on shimming cabinets and covering visible marks or openings for proper installation.
Specifies cutout dimensions, platform support, and clearances for under-counter installations.
Covers cooktop compatibility, filler use, and restrictions on under-counter installations.
Details minimum spacing requirements when installing two ovens side-by-side.
Cutout requirements for installing a single 30" oven above a warming drawer.
Cutout requirements for installing a double 30" oven above a warming drawer.
Specifies the need for a separate 120V receptacle for the warming drawer.
Cutout requirements for installing a single 30" oven beneath an Advantium unit.
Cutout requirements for a single 30" oven placed between Advantium and warming drawer units.
Guidance on electrical connections and clearances for combined Advantium and oven installations.
Important guidance on direct wiring, conduit, strain relief, and handling aluminum wiring.
Steps for connecting the flexible conduit to the junction box, including positioning and securing.
Instructions for new construction or specific codes requiring a four-conductor branch circuit.
Instructions for connecting to a three-conductor branch circuit, following local code permissions.
Procedure for sliding the oven into the cutout, using a string to manage the conduit.
Instructions for drilling pilot holes and securing the oven with screws, including warnings.
Steps for centering the bottom trim, marking holes, and drilling pilot holes.
Procedure for attaching the metal bottom trim using screws, with a note on future removal.
Detailed instructions on lifting and removing the heavy oven door safely.
Procedure for re-attaching the oven door by seating hinge arms into slots and locking hinges.
Final checks before operation: protective film, wiring security, trim, and mounting screws.
Steps to verify proper operation: internal items, conduit connection, power, and circuit breaker.
Important notes for electricians regarding wire ratings, aluminum wiring, and splices.