EasyManua.ls Logo

GE GTD72EBSN0WS - User Manual

GE GTD72EBSN0WS
16 pages
Print Icon
To Next Page IconTo Next Page
Loading...
49-3000198-1
SAFETY INFORMATION .........3
USING THE DRYER ................4
Appliance Communication ............ 5
Controls ............................ 6
Settings ..............................8
LOADING ..........................9
VENTING .........................10
CARE AND CLEANING .......... 11
TROUBLESHOOTING TIPS ......12
LIMITED WARRANTY ...........15
CONSUMER SUPPORT ..........16
OWNER’S MANUAL
Write the model and serial
numbers here:
Model # _________________
Serial # _________________
They are on the label on
the front of the dryer
behind the door.
06-19 GEA
DRYERS
GE is a trademark of the General Electric Company. Manufactured under trademark license.
ENGLISH/ESPAÑOL

Other manuals for GE GTD72EBSN0WS

Questions and Answers

  • C
    Christopher PayneAug 15, 2025
    Why do my clothes take so long to dry in my GE GTD72EBSN0WS Dryer?
    • A
      Ashley BrownAug 15, 2025
      Several factors can cause your GE Dryer to take too long to dry clothes. First, ensure the dryer venting is correct according to the Installation Instructions, and that ducting is clean, free of kinks, and unobstructed. Also, check if the outside wall damper operates easily. Other causes may include improper sorting, large loads of heavy fabrics, incorrect control settings, a full lint filter (clean it before every load), blown fuses or tripped circuit breakers (some electric dryers use 2 fuses/breakers, so check both), overloading, underloading (add a few items if drying only one or two), or the ecoDry setting being enabled (which extends dry times to reduce energy usage).
  • M
    Mary AllenAug 18, 2025
    What to do if my GE GTD72EBSN0WS doesn’t start?
    • M
      Michelle DunnAug 18, 2025
      If your GE Dryer isn't starting, first, ensure the control panel isn't "asleep" by pressing the Power button to activate it. Next, check that the dryer is properly plugged into the outlet. Also, inspect the building’s fuse/circuit breaker box and replace the fuse or reset the breaker if necessary. Finally, if you were starting a Delay Dry cycle, make sure the dryer wasn't accidentally paused; press Start/Pause to restart the countdown.
  • A
    andrewsamandaAug 21, 2025
    What to do if GE GTD72EBSN0WS Dryer load is still damp after drying?
    • B
      Brandi PenaAug 21, 2025
      If your GE Dryer load is still damp after selecting the Dry dryness level, it could be due to a mixture of heavy and light fabrics. When combining these, choose More Dry. Another possible cause is a blocked exhaust system, so inspect and clean it.
  • R
    Robert WilsonAug 25, 2025
    What to do if collars are still wet after GE Dryer cycle?
    • L
      Lisa DiazAug 25, 2025
      If collars and waistbands are still wet at the end of a cycle in your GE Dryer, it’s because the dryness monitor senses that the body of the clothes is dry. Choose QUICK DRY or TIMED DRY to dry damp collars and waistbands.
  • N
    nsmithAug 27, 2025
    How to stop my GE GTD72EBSN0WS Dryer from shaking and making noise?
    • S
      Steven HawkinsAug 27, 2025
      If your GE Dryer is shaking or making noise, it might be sitting unevenly. Move the dryer to an even floor space, or adjust the leveling legs as necessary until it is.
  • T
    Travis MitchellAug 30, 2025
    Why is there so much static in my GE GTD72EBSN0WS Dryer?
    • C
      Christopher JenkinsAug 30, 2025
      Static in your GE Dryer can be caused by several factors. Try using a fabric softener. Overdrying can also cause static, so adjust the setting to Less Dry or Damp. Additionally, synthetics, permanent press, and blends are prone to causing static.
  • P
    Paul CooperSep 2, 2025
    Why are my garments still wrinkled after GE GTD72EBSN0WS Dryer steam cycle?
    • D
      Dawn SellersSep 2, 2025
      If garments are still wrinkled after a steam cycle in your GE Dryer, it may be due to overloading. Try loading fewer garments and manually increasing the drying time. Also, ensure the lint filter is clean.
  • K
    Kevin SmithSep 5, 2025
    Why does my GE GTD72EBSN0WS Dryer keep tumbling after it's done?
    • C
      Christopher WilliamsSep 5, 2025
      If your GE Dryer continues to tumble after the display says Complete, check if the Wrinkle Care option is selected and ensure it is not.
  • M
    Mrs. Jaclyn BradleySep 8, 2025
    Why is there water on the floor behind my GE Dryer?
    • J
      James MartinezSep 8, 2025
      If you find water on the floor behind your GE Dryer, check for a loose water hose connection and tighten it. Also, ensure the hose has a rubber washer at the connection with the valve; install the rubber washer provided with the hose if it's missing.
  • H
    Hailey StewartSep 12, 2025
    What to do if baby clothes are wrinkled after GE GTD72EBSN0WS Dryer steam cycle?
    • C
      Charles HernandezSep 12, 2025
      If garments are still wrinkled after the steam cycle on your GE Dryer, and the load consists of children's or infant garments, use the Steam Refresh cycle.

Summary

Safety Information

Additional Gas Dryer Warnings

Specific warnings for gas dryers, including fire and explosion hazards.

Using the Dryer

Getting Started Steps

Step-by-step guide to initial setup and first use of the dryer.

Appliance Communication

Information on connecting the dryer to WiFi and using smart features.

Controls and Display

Explanation of the control panel, buttons, and status indicators.

Drying Cycles

Overview of available sensor and timed drying cycles for various fabric types.

Settings and Options

Detailed explanation of all adjustable settings and special cycle options.

Loading

Sorting and Loading Hints

Guidance on sorting clothes and loading the dryer to ensure optimal performance.

Drying Rack

Instructions for using the optional drying rack for delicate items.

Venting

Venting the Dryer

Essential guidelines for properly venting the dryer for optimal performance and safety.

Care and Cleaning

Interior and Duct Cleaning

Procedures for cleaning the dryer's interior and exhaust duct annually.

Exterior Care

How to clean the dryer's exterior surfaces and control panel.

Lint Filter Maintenance

Instructions on cleaning the lint filter before every use for safety and efficiency.

Stainless Steel Drum Care

Guidance on cleaning the stainless steel dryer drum without causing damage.

Drum Light

Information about the drum light and its replacement by a qualified technician.

Troubleshooting Tips

Common Operational Issues

Diagnosing and resolving common dryer problems like noise, starting, and display errors.

Drying Performance Problems

Addressing issues related to heat, drying times, and fabric condition.

Fabric and Load Specific Issues

Resolving problems related to fabric care, load composition, and material interactions.

Steam Cycle Specific Issues

Troubleshooting common problems encountered with steam drying cycles.

Limited Warranty

Exclusion of Implied Warranties

Details on limitations and exclusions for implied warranties like merchantability.

Extended Warranties

Information on purchasing extended warranties for additional coverage.

Consumer Support

GE Appliances Website

Accessing the GE Appliances website for product information and support.

Register Your Appliance

Online process for registering your new appliance for enhanced communication.

Schedule Service

How to schedule professional repair service online or by phone.

Remote Connectivity

Information on connecting and managing appliances remotely via smart features.

Parts and Accessories

How to order replacement parts and accessories for your appliance.

Contact Us

Methods for contacting GE Appliances customer relations for feedback or issues.

Overview

This document is an owner's manual for a GE Appliances dryer, providing comprehensive information on its operation, features, maintenance, and troubleshooting. It is designed to guide users through safe and efficient use of the appliance.

Function Description

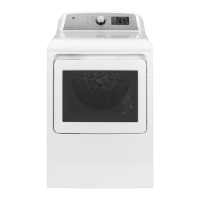
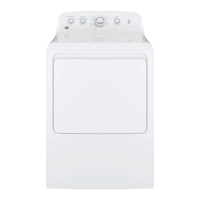
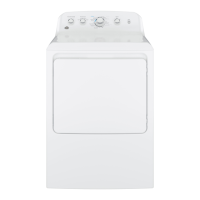
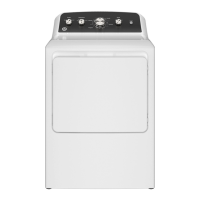
The GE Appliances dryer is designed to efficiently dry clothes and other fabric items. It offers a variety of drying cycles and settings to accommodate different fabric types and load sizes, ensuring optimal care for garments while minimizing energy consumption. The dryer utilizes both sensor-based and timed drying methods to achieve desired dryness levels. Some models are equipped with steam cycles, such as STEAM Dewrinkle and STEAM Refresh, to reduce wrinkles and refresh garments. The SANITIZE cycle provides an anti-bacterial process using high heat. The appliance also includes features to minimize wrinkles, such as the Wrinkle Care option, which tumbles clothes without heat after a cycle.

Usage Features

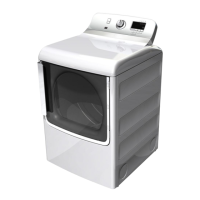
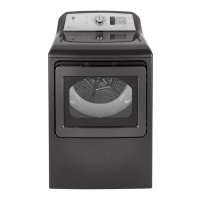
The dryer features an intuitive control panel with a cycle selector knob and various buttons for customizing settings. To begin, users clean the lint filter, loosely add items, and close the door. The display is activated by pressing the Power button. Users then select a dry cycle, which comes with default settings that can be adjusted. The Start/Pause button initiates or pauses the drying cycle.

The control panel includes several indicators and controls:

  • Power: Activates the display or puts the dryer into idle mode.
  • Start/Pause: Starts or pauses the selected cycle.
  • Display and Status Lights: Shows approximate time remaining and dryer status messages like "Pause," "Sensing," and "Check Vent."
  • Control Lock: Prevents accidental changes to settings by locking the controls. This feature can be activated by pressing and holding specific buttons for 3 seconds.
  • Dryness Level (Level): Available for sensor cycles, allowing users to select from More Dry, Dry, Less Dry, or Damp settings. "Dry" is recommended for energy savings.
  • Temperature (Temp): Allows selection of High, Medium, Low, or No Heat settings. Steam cycles require the High temperature setting.
  • Time (Timed Dry): For timed cycles, users can adjust the drying duration in one-minute increments using More Time and Less Time buttons.
  • Wrinkle Care: Adds an hour of no-heat tumbling after the cycle to minimize wrinkles.
  • Damp Alert: (On some models) Beeps when clothes reach a damp level, useful for items to be hung dry.
  • Drum Light: Illuminates the dryer drum for better visibility when loading or unloading.
  • Delay Dry: Allows users to set a delayed start time for the cycle, in one-hour increments up to 24 hours.
  • Sound: Adjusts the volume of button presses and the end-of-cycle signal.
  • My Cycle: Allows users to save customized settings for a specific cycle knob selection.

The dryer offers a range of specific drying cycles:

  • MIXED LOAD: For loads consisting of cottons and poly-blends.
  • DELICATES: For delicate items, special-care fabrics, and knits.
  • COTTONS/Normal: For cottons and most linens. ENERGY STAR® models are tested on this cycle with default settings (Dry level, Low temperature, and ecoDry).
  • TOWELS/Sheets: For most towels and linens.
  • BULKY/Comforter: For large items like bedspreads, blankets, and sleeping bags.
  • JEANS: Specifically for jeans.
  • CASUALS/ACTIVE WEAR: For wrinkle-free, permanent press, and sports items.
  • QUICK DRY: For small loads that need to dry quickly.
  • TIMED DRY: Runs for a user-selected duration.
  • WARM UP: Provides 10 minutes of warming time.
  • AIR FLUFF: Provides 10 minutes of tumbling with no heat.
  • STEAM Dewrinkle: (On some models) For larger loads of dry garments with wrinkles. Requires High temperature and water connection.
  • STEAM Refresh: (On some models) For small loads of dry garments with wrinkles. Requires High temperature and water connection.
  • SANITIZE: Reduces certain types of bacteria using high heat. Not for delicate fabrics.

The ecoDry option, available for several sensor cycles, reduces total energy consumption by adjusting cycle settings, though it may extend drying times.

For models with WiFi Connect capability, users can monitor and control the dryer remotely via a smartphone app. This includes adjusting Delay Dry settings or starting the dryer remotely.

The dryer also supports a Drying Rack (on some models) for delicate items, which should be used with the TIMED DRY cycle.

Maintenance Features

Regular maintenance is crucial for the dryer's performance and longevity.

  • Lint Filter: Must be cleaned before or after each load. A waxy buildup can be removed by washing the filter in warm, soapy water.
  • Interior and Duct: The interior and exhaust duct should be cleaned annually by qualified service personnel.
  • Exhaust Duct: Should be inspected and cleaned at least once a year to prevent clogging, which can lengthen drying time. The manual provides steps for vacuuming the duct.
  • Exhaust Hood: Should be checked to ensure the flaps move freely and are free of obstructions like wildlife.
  • Exterior: Spills and washing compounds should be wiped with a damp cloth.
  • Stainless Steel Drum: Can be cleaned with a damp cloth and a mild, non-abrasive cleaner. Scratches or dents during normal use will not affect its function or durability.
  • Drum Light: The LED drum light requires replacement by a qualified technician.

The manual also emphasizes proper Venting for optimal performance and safety, detailing the use of rigid metal ductwork and avoiding plastic or combustible materials. It provides warnings against improper venting practices.

Troubleshooting tips are included to help users diagnose and resolve common issues such such as clothes taking too long to dry, the dryer not heating, clothes being wrinkled, or the "Check Vent" light illuminating.

GE GTD72EBSN0WS Specifications

General IconGeneral
BrandGE
ModelGTD72EBSN0WS
Appliance CategoryDryer
Capacity7.4 cu. ft.
ColorWhite
Control TypeElectronic
VentlessNo
Dryer VentingVented
Number of Cycles12
Wrinkle Care OptionYes
Moisture SensorYes
Energy Star CertifiedNo
Width27 in
Weight125 lb

Related product manuals