– 50 –
(Continued next page)
Sealed System - Evaporator
Evaporator Removal
1. Disconnect power to the refrigerator.
2. Recover refrigerant.
3. Remove freezer shelving (if applicable).
4. Remove ice maker if installed (see Ice Maker
Removal section in this Guide).
5. Remove the air tower (see Air Tower Removal
section in this Guide).
6. Remove evaporator cover (see Evaporator
Cover Removal section in this Guide).
7. Remove evaporator fan (see Evaporator Fan
Removal section in this Guide).
8. Remove defrost thermostat from the evaporator
(see Defrost Thermostat section in this Guide).
9. Remove the defrost heater (see Defrost Heater
section in this Guide).
10. Disconnect the ground wire from evaporator
and position all wiring to allow for evaporator
removal.
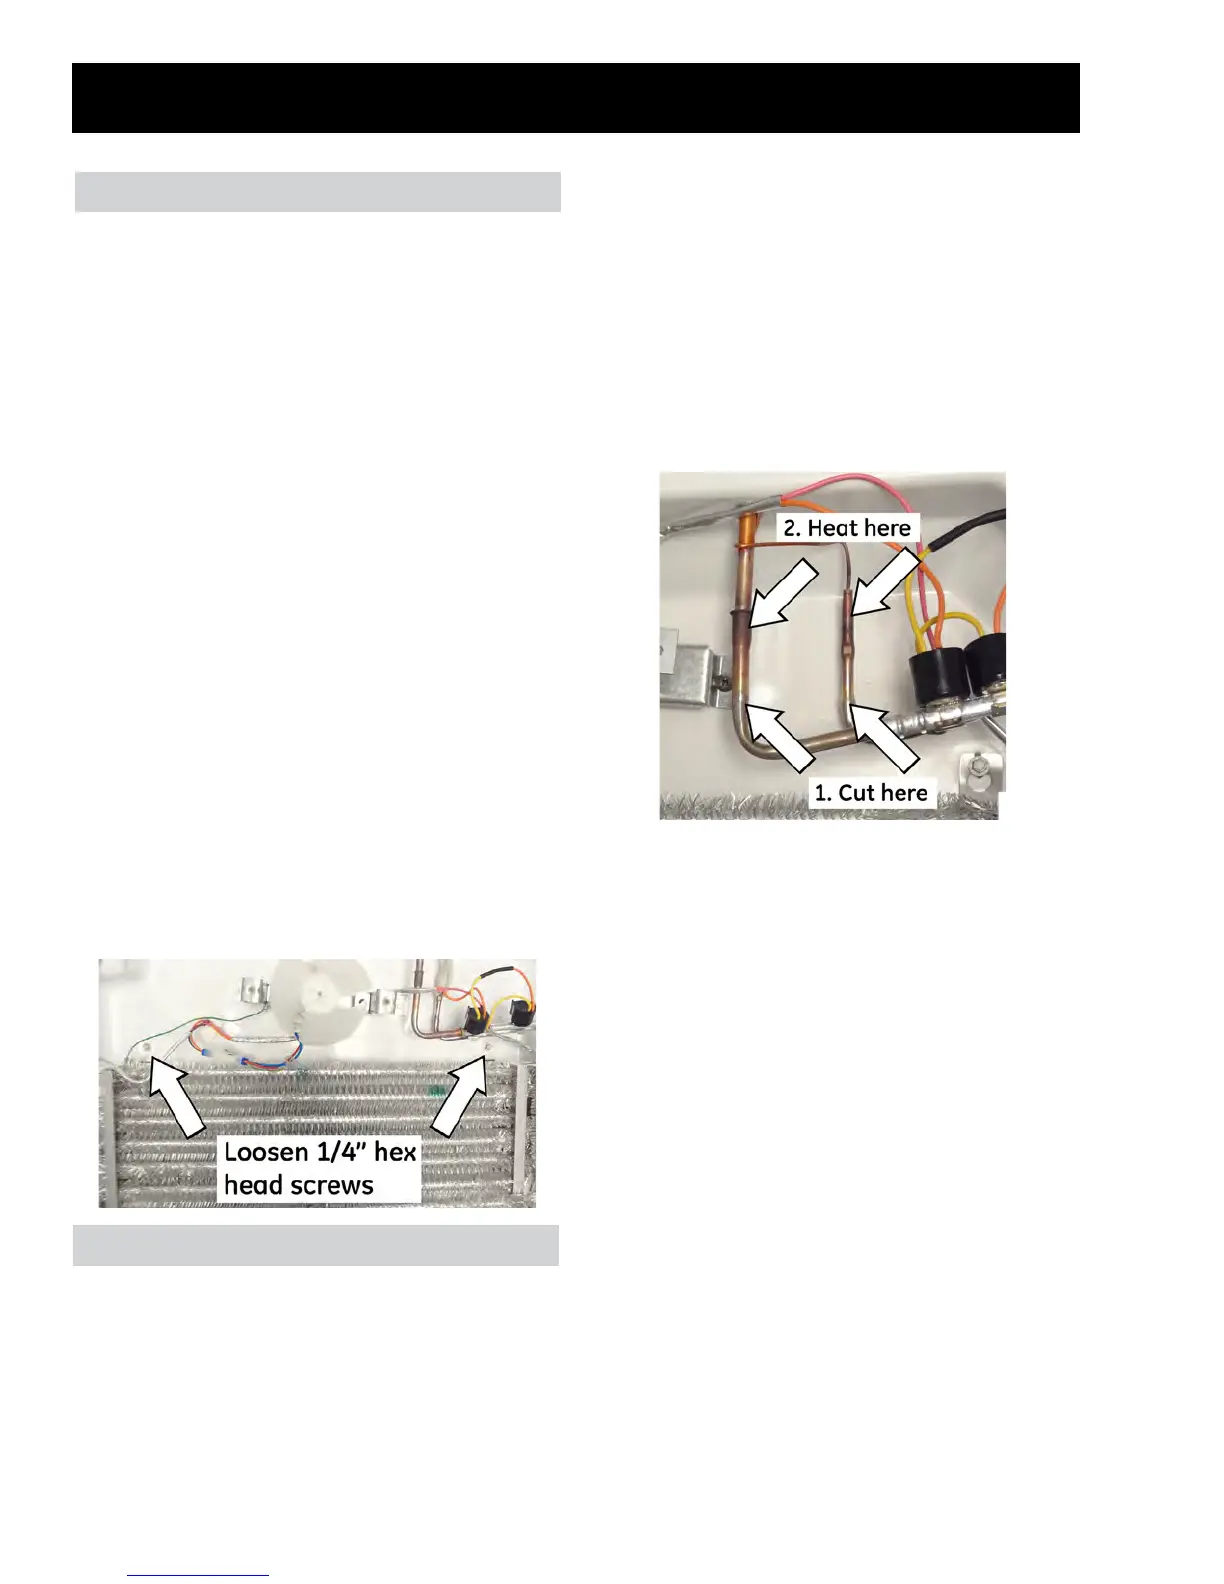
11. Loosen the two 1/4 in. hex head screws from the
evaporator support.
Evaporator (Brazing Method)
Caution:
• If unbrazing the evaporator, HEAT SHIELD P/N
WR49X10025 must be used to prevent damage
to freezer liner.
• Add thermal paste (WX5X8927) to the exposed
Liner or any item that heat from a torch may
come in contact with.
• Protect wiring from heat during unbrazing
and re-brazing.
12. Cut the suction line o of the evaporator (see
image below).
13. Cut the capillary tube section o (see image
below).
14. Unbraze the capillary tube.
15. Unbraze the suction line.
16. Remove the evaporator.
17. Using a le, or cap tube cutter (WX05X10050)
score the capillary tube just above the old
braze and break the braze-covered section
o. This will help prevent the capillary tube
from becoming plugged when re-brazing.
18. Position the new evaporator in the cabinet.
Insert the suction line and the capillary tube
into the evaporator.
19. Braze the suction line to the evaporator.
20. Braze the capillary tube to the evaporator.
21. Install a replacement drier.
22. Evacuate and recharge the system using
currently accepted procedures.