– 57 –
Sealed System - Condenser
Condenser Removal
1. Disconnect power to the refrigerator.
2. Remove the ve 1/4 in. hex head screws from
the rear access cover.
3. Recover the refrigerant.
4. Move the water valve out of the way (if
applicable).
5. Remove the condenser fan assembly (see
Condenser Fan Assembly Removal section in
this Guide).
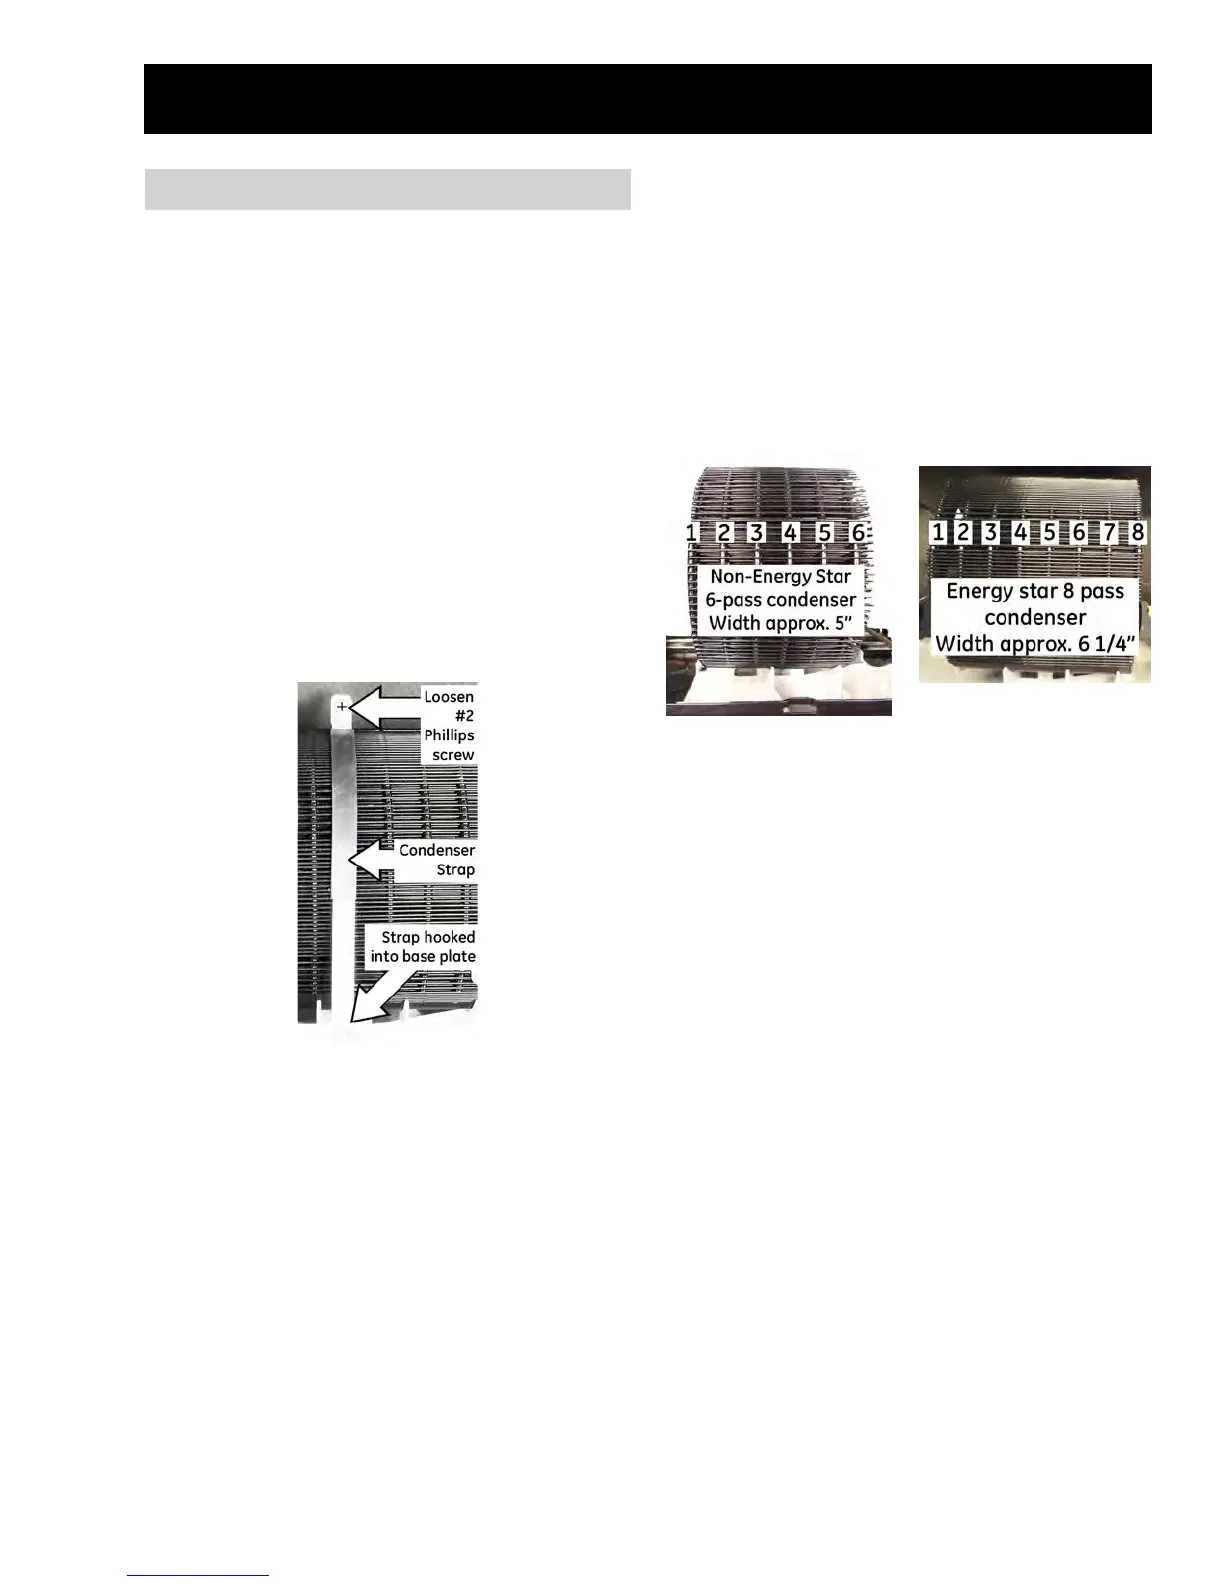
6. Loosen the condenser fastening strap, using a
#2 Phillips screw driver.
7. Disengage the condenser strap from the base
plate.
8. Unbraze the discharge line from the compressor.
9. Cut the hot gas line, leaving enough room
to braze the tubing or connect lokring (Cut
as close to the braze joint as possible). (See
Service Guide 31-9067 for additional Lokring
information).
10. Remove the condenser.
The condenser support is the platform that the
condenser sits on and is secured to the base plate
by the condenser fastening strap.
There are two types of condensers, one for Estar,
and one for Non-Estar.
• Energy star has 8 condenser tubing passes
• Non-Energy star has 6 condenser tubing passes
**When replacing the condenser, an Energy star
condenser (8 pass condenser) will be sent for Energy
star models and Non-Energy star models, unit
charge will not change.
11. Position the new condenser to the condenser
support.
12. Tighten the condenser strap using a #2 screw
driver.
13. Braze or Lokring the hot gas line to condenser.
14. Braze or Lokring the discharge tube to the
compressor.
15. Install a replacement drier.
16. Evacuate and recharge the system.
 Loading...