Page 35
17996 Rev5, August 2013
3. Wait a few minutes and touch the back of the heating plate. It should be
warm if the LED C is blinking. This indicates that the sensor is being
heated.
4. After the H201Ti has performed the first-time power-up sequence and then
the self-test sequence, verify it displays the following messages at the rate of
one every five seconds:
• Alarm messages (if any)
• Gas level
• Gas hourly trend
• Gas daily trend
• Date and time
5. If the H201Ti is linked to a Hydran 201Ci- C Controller, power them up and
verify the H201Ci-C’s operation by observing the following LEDs:
• The Supervisory Link Supply indicator (green, DS12) is lit.
• The Heater indicator (yellow, DS8):
o It must initially be lit if the ambient temperature is below
approximately 25 °C (77 °F).
o After a while, it must flash as the enclosure temperature reaches the
above set point.
o It must remain off if the ambient temperature exceeds the set point.
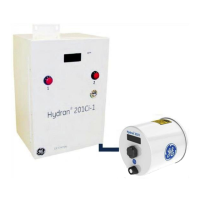
6. If the H201Ti is linked to a Hydran 201Ci-1 Controller, power them up and
verify the H201Ci-1’s operation by observing the following LED’s and
indicators:
• The Supervisory Link Supply indicator (green, DS12) is lit.
• The Heater indicator (yellow, DS8):
o It must initially be lit if the ambient temperature is below
approximately 25 °C (77 °F).
o After a while, it must flash as the enclosure temperature reaches the
above set point.
o It must remain off if the ambient temperature exceeds the set point.
• The two alarm indicators of the door-mounted push-buttons are off.
• The Alarm 1 (Gas High) indicator (yellow, DS10) is off.
• The Alarm 2 (Gas High-High) indicator (yellow, DS9) is off.
• The System OK indicator (yellow, DS11) is lit.
Note: The H201Ci-1’s display must also be functional.
7. The H201Ti requires set-up (alarms, temperature, data logging) and
commissioning for normal use. Please refer to the Hydran 201i System
Instruction Manual.
 Loading...


