EasyManua.ls Logo

GE PDT760SSFSS User Manual

GE PDT760SSFSS
48 pages
To Next Page IconTo Next Page
Page #1 background imageLoading...
Page #1 background image
GE Appliances
Installation Instructions
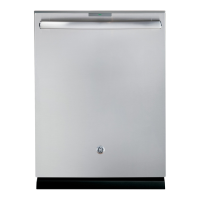
Built-In Dishwasher
If you have questions, call 800.GE.CARES (800.432.2737) or visit our Website at: GEAppliances.com.
In Canada, please call 1.800.561.3344 or visit www.geappliances.ca
IMPORTANT – The dishwasher MUST be installed
to allow for future removal from the enclosure if service is
required.
Care should be exercised when the appliance is installed or
removed, to reduce the likelihood of damage to the power
supply cord.
If you received a damaged dishwasher, you should immediately
contact your dealer or builder.
Optional Accessories – See the Owner’s Manual for available
custom panel kits.
FOR YOUR SAFETY
Read and observe all CAUTIONS and WARNINGS shown
throughout these instructions. While performing
installations described in this booklet, gloves, safety glasses
or goggles should be worn.
READ CAREFULLY.
KEEP THESE INSTRUCTIONS.
IMPORTANT – Observe all governing codes and
ordinances.
Note to Installer – Be sure to leave these instructions for the
consumer’s and local inspector’s use.
Note to Consumer – Keep these instructions with your
Owner’s Manual for future reference.
Skill Level – Installation of this dishwasher requires
basic mechanical, electrical and plumbing skills. Proper
installation is the responsibility of the installer. Product
failure due to improper installation is not covered under
the GE Appliance Warranty. See warranty information.
Completion Time – 1 to 3 Hours. New installations require
more time than replacement installations.
BEFORE YOU BEGIN
Read these instructions completely and
carefully.
31-31524-1 09-13 GE
Question and Answer IconNeed help?

Do you have a question about the GE PDT760SSFSS and is the answer not in the manual?

GE PDT760SSFSS Specifications

General IconGeneral
Stylebuilt-in dishwashers
Colorstainless-steel
Noise level40 decibels
Control Typeelectromechanical
Delay Startyes
Child Lockno
Load Sensoryes
Number of Racks3
Cycle Signalno
Food Disposeryes
Sanitize Settingsyes
Annual Energy Consumption275 kilowatt hours
Voltage120 volts
Current9 amperes
Weight and Dimensions IconWeight and Dimensions
Depth24 inches

Summary

Before You Begin

For Your Safety

Installation Preparation

Parts Supplied in Installation Package

Lists all components included in the dishwasher's installation package.

Materials You Will Need

Details necessary materials for installation, distinguishing between general and new installations.

Tools You Will Need

Enumerate required tools for performing the dishwasher installation process.

Prepare Dishwasher Enclosure

Instructions for preparing the cabinet opening, including dimensions and requirements.

Drain Requirements

Outlines local code compliance and distance limitations for the drain hose.

Determine Drain Method

Guides the user to select the appropriate drain installation method based on specific conditions.

Cabinet Preparation

Details on drilling holes in the cabinet wall for drain hose and other connections.

Prepare Electrical Wiring

Covers electrical requirements, grounding, and wiring methods for permanent or corded models.

Prepare Hot Water Line

Instructions for connecting the hot water supply line, including tubing type and pressure.

Dishwasher Installation Steps

Step 1: Preparation

Locating and gathering all items from the installation package.

Step 2: Check Door Balance

Verifying and adjusting the dishwasher door balance for smooth operation.

Step 3: Remove Wood Base, Install Leveling Legs

Removing the shipping base and installing the adjustable leveling legs.

Step 4: Remove Toekick

Detaching the toekick panel as part of the installation process.

Step 5: Position Sound Barrier

Instructions for positioning the sound barrier on models so equipped.

Step 6: Remove Floor Protect

Removing the protective cover from the bottom of the dishwasher.

Step 7: Install 90° Elbow

Attaching the 90° elbow to the water inlet valve.

Step 8: Install Drain Hose to Drain Loop

Connecting the drain hose to create a drain loop for proper function.

Step 9: Position Water Line and House Wiring

Routing water supply and electrical wiring to avoid interference.

Step 10: Install Drain Hose, Through Cabinet

Guiding the drain hose through the cabinet opening.

Step 11: Slide Dishwasher Three-Fourths of the Way into Cabinet

Partially inserting the dishwasher into its final position.

Step 12: Install Trim Pieces

Attaching side and top trim pieces to the dishwasher.

Step 13: Install Mounting Brackets

Securing the dishwasher to the countertop or cabinets using mounting brackets.

Step 14: Push Dishwasher into Final Position

Completing the insertion of the dishwasher into the cabinet and checking alignment.

Step 15: Level Dishwasher

Ensuring the dishwasher is level for optimal performance and door operation.

Step 16: Position Dishwasher, Secure to Countertop or Cabinet

Final positioning and securing of the dishwasher using screws.

Step 17: Connect Water Supply

Connecting the hot water supply line to the dishwasher's inlet valve.

Step 18: Connect Drain Line

Connecting the drain hose to the house plumbing or disposer.

Step 19: Connect Power Supply

Connecting the dishwasher to the electrical power source.

Step 20: Pretest Checklist

A final review of installation points to prevent service charges.

Step 21: Dishwasher Wet Test

Running the dishwasher to check for leaks and proper operation.

Step 22: Replace Floor Protect

Reinstalling the floor protect pan and connecting the leak sensor.

Step 23: Position Insulation, Pre-Toekick, and Sound Barrier

Installing insulation, pre-toekick, and sound barrier components.

Step 24: Replace Toekick

Reattaching the toekick panel after installation.

Step 25: Literature

Ensuring the complete literature package is left with the consumer.

Related product manuals