Chapter 4. Installation
GFK-2847 QuickPanel+ User’s Manual–November 2013 19
Chapter 4. Installation
This chapter provides the following procedures for installing the QuickPanel+ unit:
Installing the Protective Sheet
Choosing a Mounting Location
Installing/Replacing the Battery
4.1 Installing the Protective Sheet
1. Wipe the display of any dust or fingerprints.
2. Peel a corner of the clear side of the protective sheet.
3. Begin applying the corner to the display.
4. Slowly apply the rest of the protective sheet, smoothing out as you go.
5. Peel the green curing film off the protective sheet.
4.2 Choosing a Mounting Location
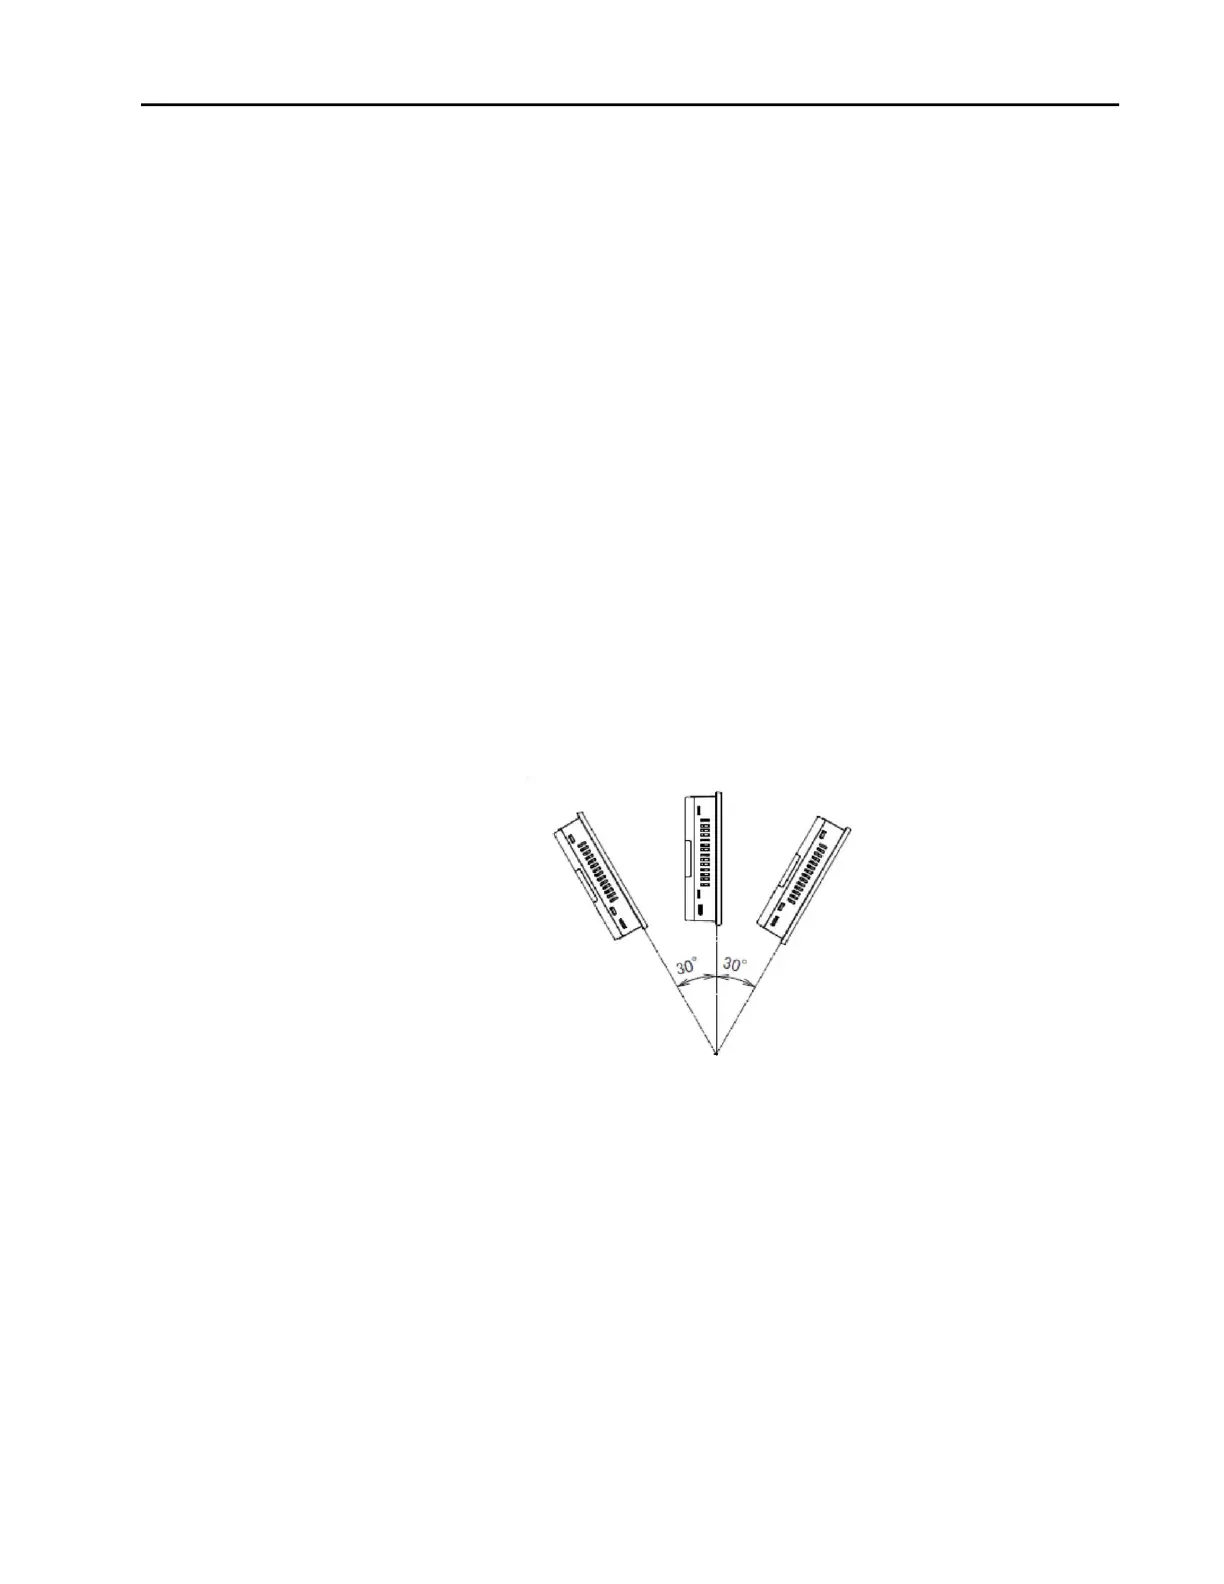
When mounting the QuickPanel+ make sure that the mounting area allows room to insert and
remove the SD card, cables, and mounting brackets. The QuickPanel+ should not be
mounted at an angle more than 30° from the vertical as illustrated below.
Figure 4. Mounting Angle
Choose a location that will allow natural convection air flow from bottom to top of the
QuickPanel+ unit.
For environmental requirements, see 1.1.3, “Environmental Specifications.”
4.3 Panel Mounting
To mount the QuickPanel+ in an enclosure, you will need:
■ a Phillips head screwdriver
■ four mounting brackets (supplied)
The QuickPanel+
has four mounting holes located on the top and bottom of the unit. The
mounting holes are indicated in the drawing below.