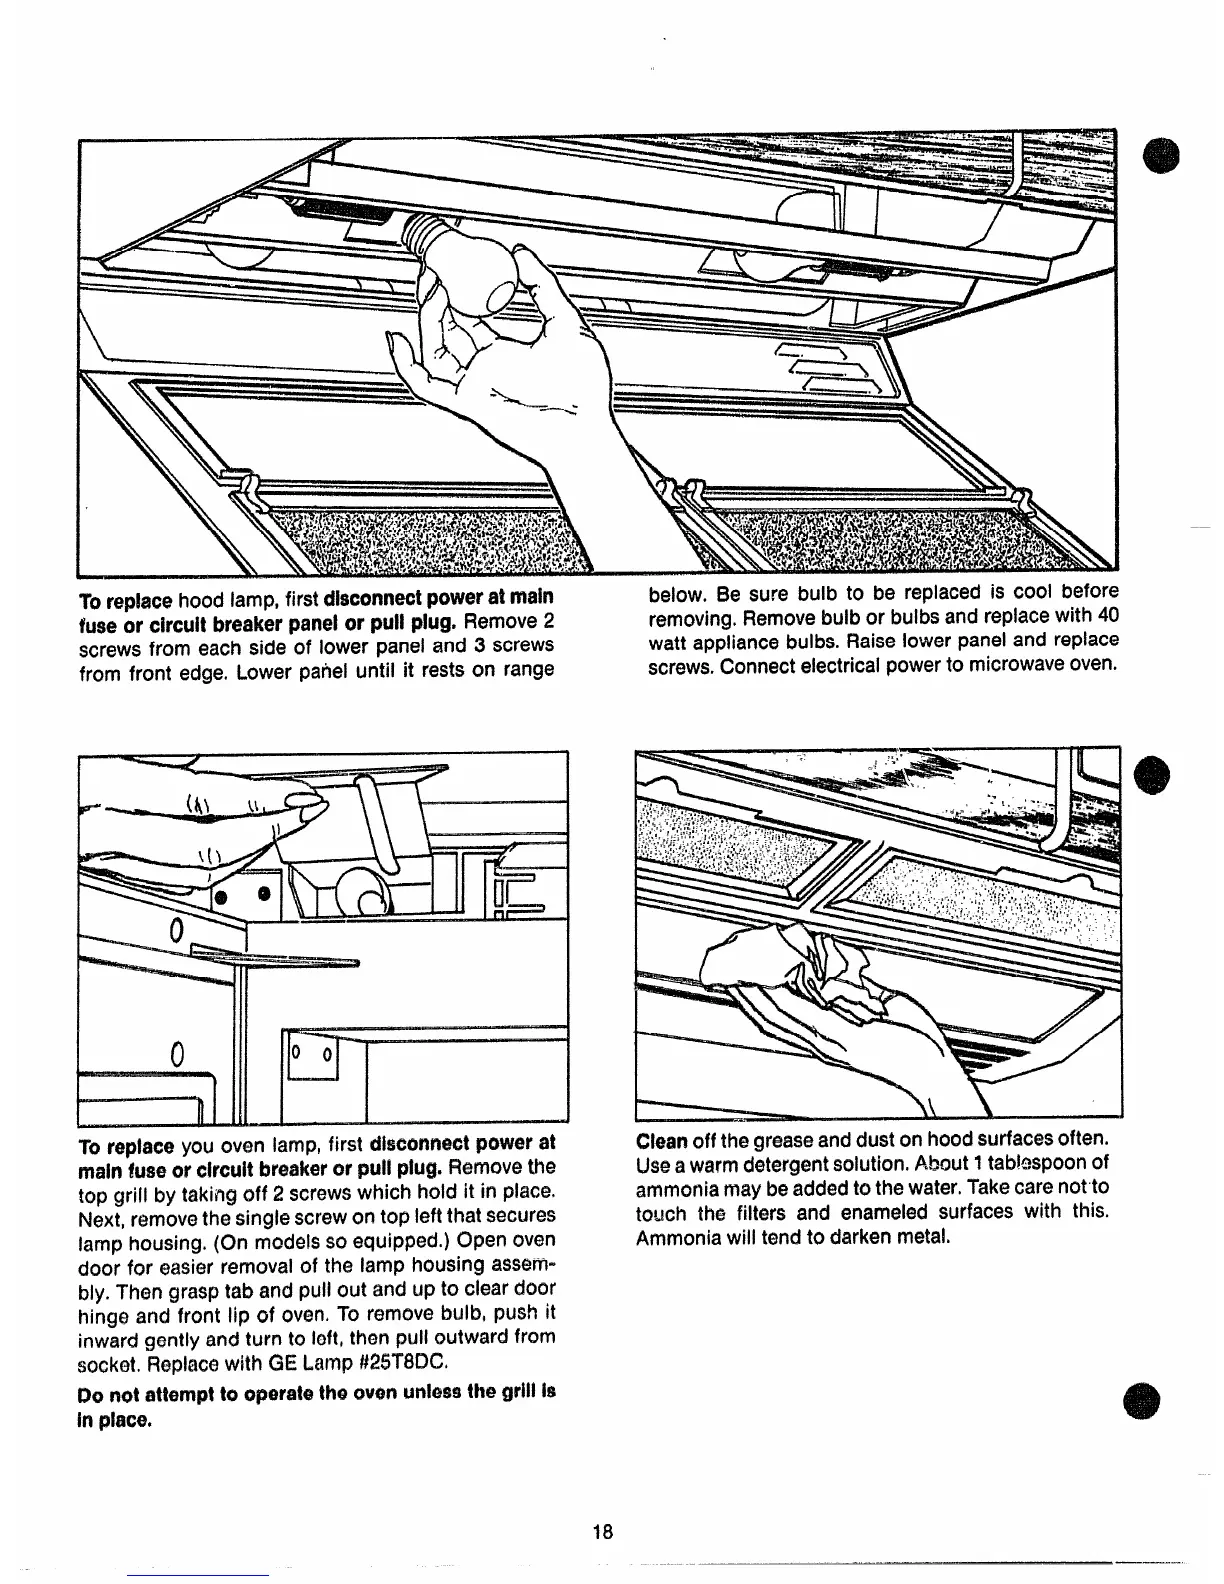
TOrep!acehoodlamp,firstdisconnectpoweratmain
below. Be sure bulb to be replaced is cool before
fuse or circuitbreakerpanelorpullplug,Remove2
removing.Removebulb or bulbsand replacewith
40
-—-—— -
screwsfrom each side-of lower-paneland 3 screws
watt appliancebulbs.Raiselower paneland replace
from front edge.Lower patiel until it restson range
screws.Connectelectricalpowerto microwaveoven.
—, ,0
“&orepimeyouoven lamp,first disconnef$tpowerat
ndn km orckcultbreakeror pullplug,Removethe
topgrill by taking off 2 screwswhich hold it in place.
Next,removethesinglescrewon top leftthatsecures
lamp housing.(On modeissoequipped.)Openoven
door for easierremovalof the lamp housing assern-
My.Then gra$ptab and pull out and up to clear door
hinge and front lip of ovumTo removebulb, push it
inwardgently andturn to loft,then pull outward from
sockot.Ftoplacewith GE Lamp#25TfHXl
Do
notattempttooperatetheovonunhx$ethegrWk
inpUMx3*
\
J
[
.
Cleanoff thegreaseandduston hoodsurfacesoften.
Useawarmdetergentsolution.About1tabl~spoonof
ammoniamaybeaddedto thewater.Takecarermtto
touch the filters and enameledsurfaces with this.
Ammoniawill tend to darkenmetal.
18
.-——.— —--—-——